


Chapter 5. Installing options
81
Notes:
a.
The new microprocessor comes in a kit with a VRM and a heat sink.
b.
If you are replacing a failed microprocessor, verify that you have selected the
correct microprocessor to be replaced. The LED next to the failing
microprocessor will be on.
Attention:
Before attempting to remove the heat sink, note that the heat-
conducting grease between the heat sink and the microprocessor might have
formed a strong bond. Do not force the components apart; doing so can
damage the microprocessor pins. If the heat sink does not separate from the
microprocessor easily, loosen one heat sink thumbscrew first. This allows
one corner of the heat sink to lift off of the microprocessor; then, you can
loosen the other thumbscrew and remove the heat sink.
After removing the heat sink, lift the microprocessor locking lever to the open
position and remove the microprocessor.
c.
If you are installing an additional microprocessor,
first
install a VRM in the slot
adjacent to the microprocessor socket you have selected and remove the
protective tape from the microprocessor socket.
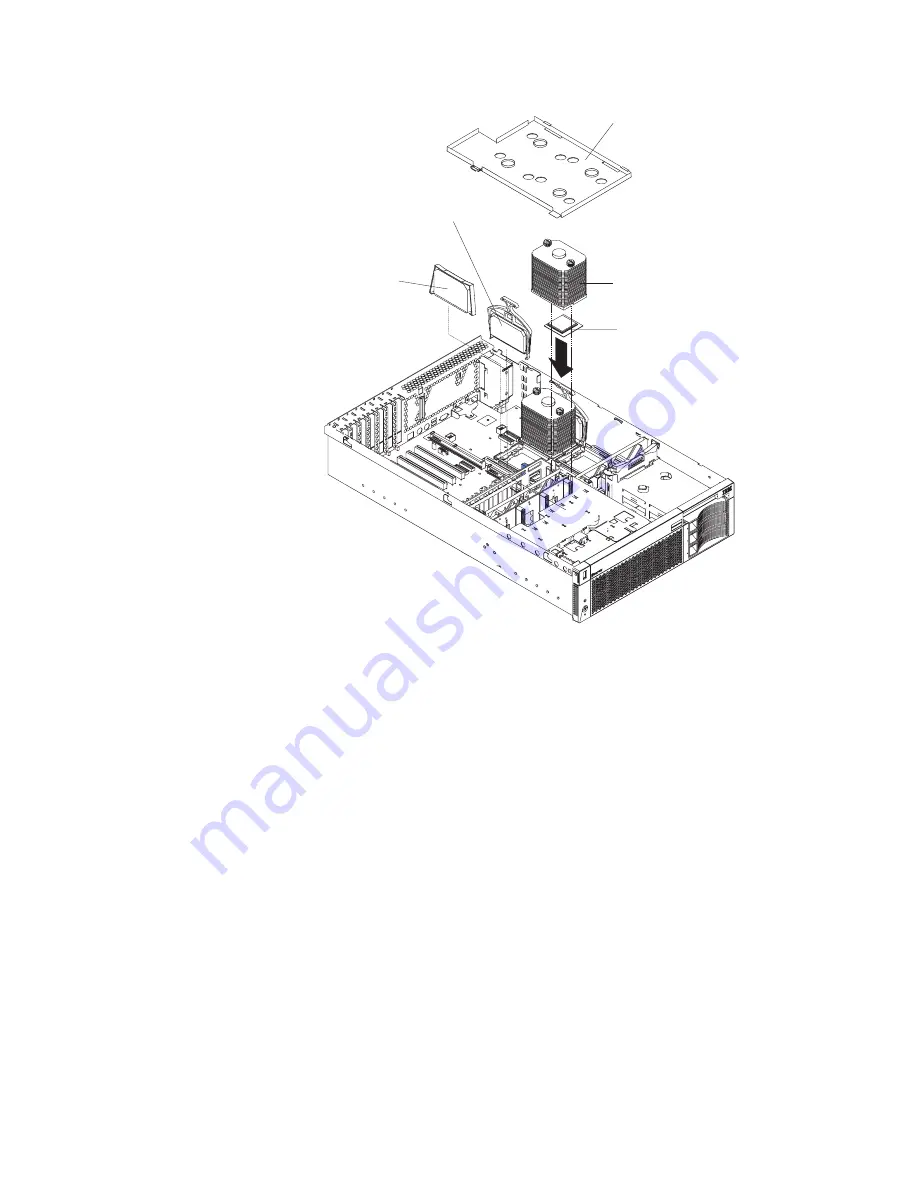
4.
Install the microprocessor:
a.
Touch the static-protective package containing the new microprocessor to any
unpainted
metal surface on the server; then, remove the microprocessor from
the package.
b.
Ensure that the microprocessor locking lever is in the open position to permit
plugging in the microprocessor.
Microprocessor
Microprocessor
VRM
XA-32
chipset VRM
Heat sink
Heat sink stabilizer
Summary of Contents for Eserver xSeries 360 Type 8686
Page 1: ...User s Reference xSeries 360 Type 8686...
Page 2: ......
Page 3: ...IBM IBM xSeries 360 User s Reference...
Page 8: ...vi IBM xSeries 360 User s Reference...
Page 14: ...xii IBM xSeries 360 User s Reference...
Page 64: ...50 IBM xSeries 360 User s Reference...
Page 108: ...94 IBM xSeries 360 User s Reference...
Page 162: ...148 IBM xSeries 360 User s Reference...
Page 183: ......
Page 184: ...IBM Part Number 24P2866 Printed in the United States of America 24P2866...


