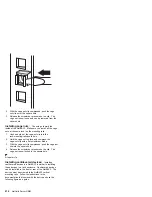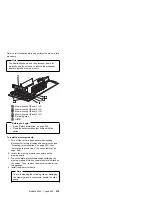
b. Center the microprocessor
.6/
over the
secondary connector
.4/
.
Attention
Make sure the microprocessor is oriented
and aligned correctly before you try to press
it into the connector.
c. Press in on the latches
.7/
and carefully insert
the microprocessor into the connector.
d. Press outward on the latches
.7/
to lock the
microprocessor in place.
Note
To remove the microprocessor, press in on
the latches
.7/
and lift the microprocessor
out of the connector.
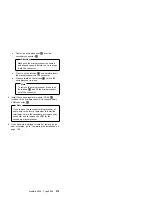
4. Install the voltage regulator module (VRM)
.1/
included in the microprocessor kit in the secondary
VRM connector
.8/
.
Note
If you remove the secondary microprocessor at
some time in the future, remember to install the
terminator card in the secondary microprocessor
connector and to remove the VRM for the
secondary microprocessor.
5. If you have other options to install or remove, do so
now; otherwise, go to “Completing the installation” on
page 154.
Netfinity 5500 - Type 8660
219
Summary of Contents for 86604RU - Netfinity 5500 - 4RU
Page 2: ......
Page 8: ...vi Netfinity Server HMM...
Page 214: ...1 Hard disk drive 2 Drive tray handle open position 206 Netfinity Server HMM...
Page 244: ...Screws 236 Netfinity Server HMM...
Page 247: ...Netfinity 5500 Type 8660 239...
Page 314: ...306 Netfinity Server HMM...
Page 324: ...316 Netfinity Server HMM...
Page 325: ...Related service information 317...
Page 326: ...318 Netfinity Server HMM...
Page 327: ...Related service information 319...
Page 340: ...332 Netfinity Server HMM...
Page 341: ...Related service information 333...
Page 346: ...338 Netfinity Server HMM...
Page 402: ...IBM Part Number 00N5902 Printed in U S A S1 L 98 3...


