9
English
STANDARD ACCESSORIES
○
Chain case .................................................................. 1
○
Guide bar ..................................................................... 1
○
Chain ........................................................................... 1
○
Plug clip*...................................................................... 1
○
Chain Saw Oil (100 ml) .................................................1
* Not supplied in certain sales areas.
Standard accessories are subject to change without
notice.
OPTIONAL ACCESSORIES
(SOLD SEPARATELY)
○
Chain Saw Oil
○
Round File
○
Depth Gauge Jointer
Round File and Depth Gauge Jointer are to be used
for sharpening of chain blades. As to its application,
please refer to the item titled “Sharpening of the Chain
Blade”.
○
Chain Case
Always keep the chain cover on the chain while
carrying the chain saw or while storing it.
Optional accessories are subject to change without notice.
APPLICATIONS
General wood cutting.
INSTALLING (REPLACING) SAW
CHAIN
WARNING
○
To prevent accidents, always switch the unit o
ff
, and
disconnect the plug from the receptacle.
○
Don’t use the saw chain or the guide bar other than
those speci
fi
ed in “SPECIFICATIONS”.
CAUTION
Wear gloves and be careful to avoid injury with the saw
chain.
NOTE
○
When removing the saw chain, remove sawdust from
the oil spout, oil hole, and guide bar groove.
If sawdust accumulates, this may cause the unit to fail.
○
Use the correct type of saw chain in accordance with
the speci
fi
cations.
If you install the wrong type of guide bar, the saw chain
may come o
ff
and injury may occur.
1. Removing the side cover (Fig. 4)
1
Rotate the knob once to loosen it.
2
Rotate the tension dial half a turn to loosen it.
3
Turn the knob and remove the side cover.
2. Removing the saw chain and guide bar (Fig. 5)
Remove the saw chain and guide bar in the direction
indicated by the arrow.
3. Engaging the new saw chain in the sprocket
(Figs. 6, 7)
Engage the saw chain at the guide bar tip with attention
to the direction of the saw chain, and then properly
engage the saw chain with the sprocket.
4. Installing the side cover
1
Adjust the tension dial of the side cover so that the
chain tensioner boss is inserted into the guide bar
chain tensioner hole, and attach the side cover. (
Fig. 8
)
2
Rotate the knob once to temporarily
fi
x it. (
Fig. 9
)
5. Adjusting the saw chain tension (Fig. 10)
○
While lifting the guide bar tip, turn the tension dial to
adjust the saw chain tension.
○
Turn the tension dial to the right to increase the saw
chain tension, and to the left to decrease it.
6. Checking the saw chain tension (Fig. 11)
Adjust the saw chain tension so that the gap between
the saw chain drive link and the guide bar is 0.5 to 1 mm
when you lift the saw chain slightly near the center of
the guide bar.
7. Securing the knob (Fig. 12)
1
When adjustment is complete, lift up the guide bar, and
fully tighten the knob.
2
Make sure the bolt is
fi
rmly tightened.
WARNING
After adjusting the saw chain tension, ensure the knob
is fully tightened.
If it is loose, injury may occur.
INSPECTION AND PREPARATION
PRIOR TO USE
Prior to use, make the following inspection and preparation.
WARNING
○
Ensure that the power source to be utilized conforms
to the power requirements speci
fi
ed on the product
nameplate.
○
To prevent accidents, always perform steps 1 to 5
ensuring the plug is disconnected from the receptacle.
○
Do not secure the lock-o
ff
button while it is pressed.
If the switch is accidentally engaged, the unit may
unexpectedly start and injury may occur.
1. Ensuring the switch is o
ff
○
Ensure that the power switch is in the OFF position. If
the plug is connected to a receptacle while the power
switch is in the ON position, the power tool will start
operating immediately, which could cause a serious
accident.
○
When the switch is engaged while pressing the lock-
o
ff
button, the unit switches on, and when the switch is
released, the unit switches o
ff
.
2. Checking the extension cord
When the work area is remote from the power source,
use an extension cord of su
ffi
cient thickness and rated
capacity. The extension cord should be kept as short
as practicable.
3. Checking the saw chain tension
○
If the saw chain tension is incorrect, there is a risk of
damage to the saw chain or guide bar and malfunction.
Referring to steps 5 to 7 “Installing (replacing) saw
chain,” ensure an appropriate tension is set.
○
While the saw chain is still new, it is particularly
stretchy, so periodically check the tension and adjust
as required.
○
Also check the knob is securely tightened.
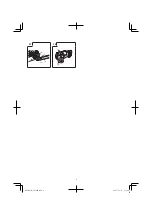
4. Checking operation of chain brake (Fig. 13)
WARNING
○
Although the chain brake is an emergency stop device,
this is not completely reliable. Operate carefully to
avoid the risk of kickback.
○
The chain brake is intended for use in emergencies and
when starting up. Do not use it indiscriminately.
○
To avoid impaired movement of the chain brake due to
buildup of sawdust etc., clean regularly.
○
The chain brake is an important component to ensure
safe use.
If you have any concern regarding the brake operation,
request repair from your Hitachi Authorized Service
Center.
0000Book̲CS30SB.indb 9
0000Book̲CS30SB.indb 9
2015/03/13 17:18:44
2015/03/13 17:18:44
Summary of Contents for CS 30 SB
Page 236: ...236 0000Book CS30SB indb 236 0000Book CS30SB indb 236 2015 03 13 17 18 58 2015 03 13 17 18 58 ...
Page 240: ...240 0000Book CS30SB indb 240 0000Book CS30SB indb 240 2015 03 13 17 18 59 2015 03 13 17 18 59 ...
Page 241: ...241 0000Book CS30SB indb 241 0000Book CS30SB indb 241 2015 03 13 17 18 59 2015 03 13 17 18 59 ...

