


43
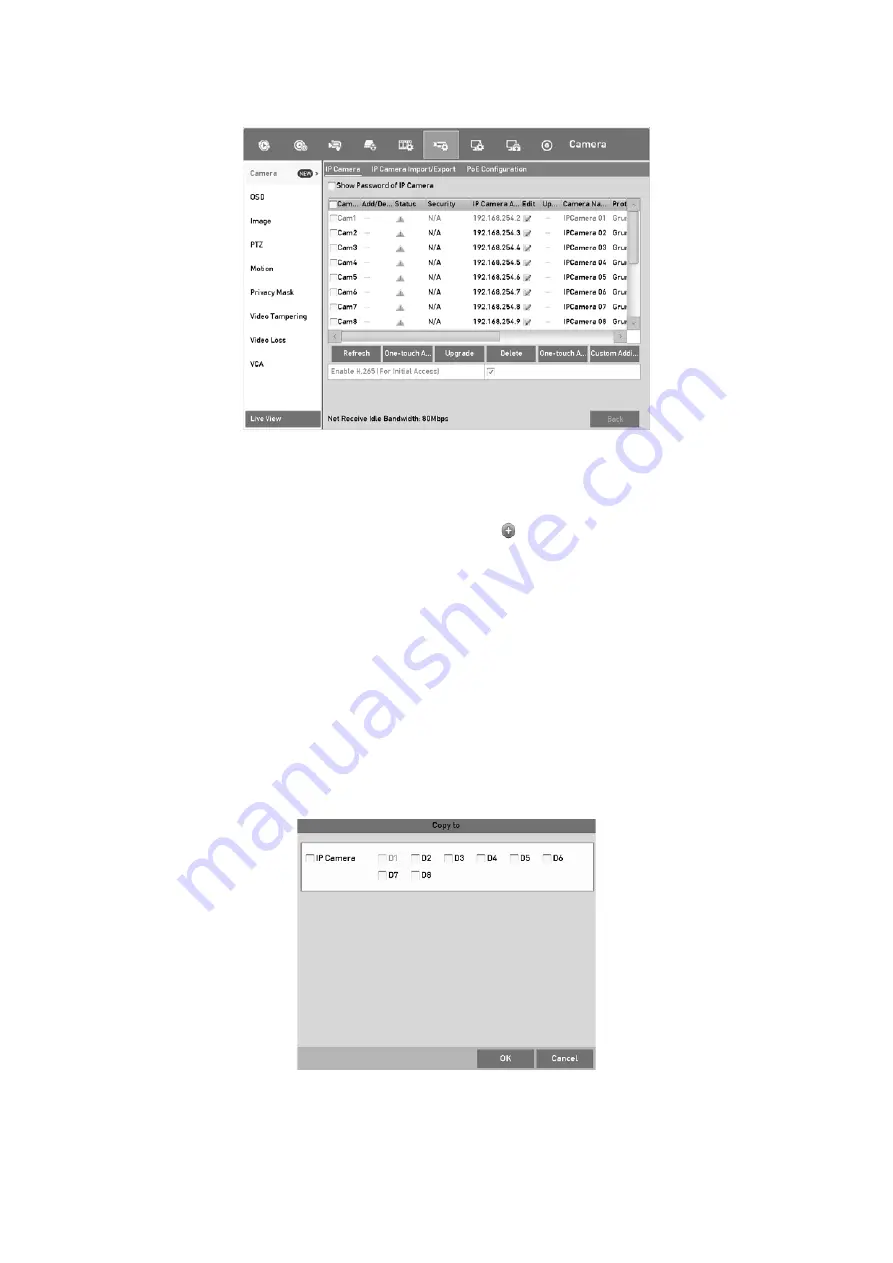
IP Camera Management Interface
Step
2
The online cameras with same network segment will be detected and displayed in
the camera list.
Step
3
Select the IP camera from the list and click
to add the camera (with the same
admin password of the DVR’s). Or you can click the
One-touch Adding
button to add
all cameras (with the same admin password) from the list.
Note:
Make sure the camera to add has already been actiavted by setting the admin password,
and the admin password of the camera is the same with the DVR’s.
Step
4
(Optional) Check the checkbox of
Enable H.265
(For Initial Access) for the
connected IP camera supporting H.265. Then the IP camera will be encoded with
H.265.
Step
5
(For the encoders with multiple channels only) check the checkbox of Channel Port
in the pop-up window, as shown in the following figure, and click
OK
to add multiple
channels.
Select Multiple Channels
Summary of Contents for GD-RT-5008P
Page 2: ......
Page 134: ...134 Set PTZ Linking Step 8 Click OK to save the settings...


