


128
2)
Edit the
Privacy Information
in the text filed to hide the input information overlay.
Up to 3 pieces of privacy information can be edited and no more than 32 characters
can be input for each piece of information.
3)
Click
OK
to save the settings.
Step
5
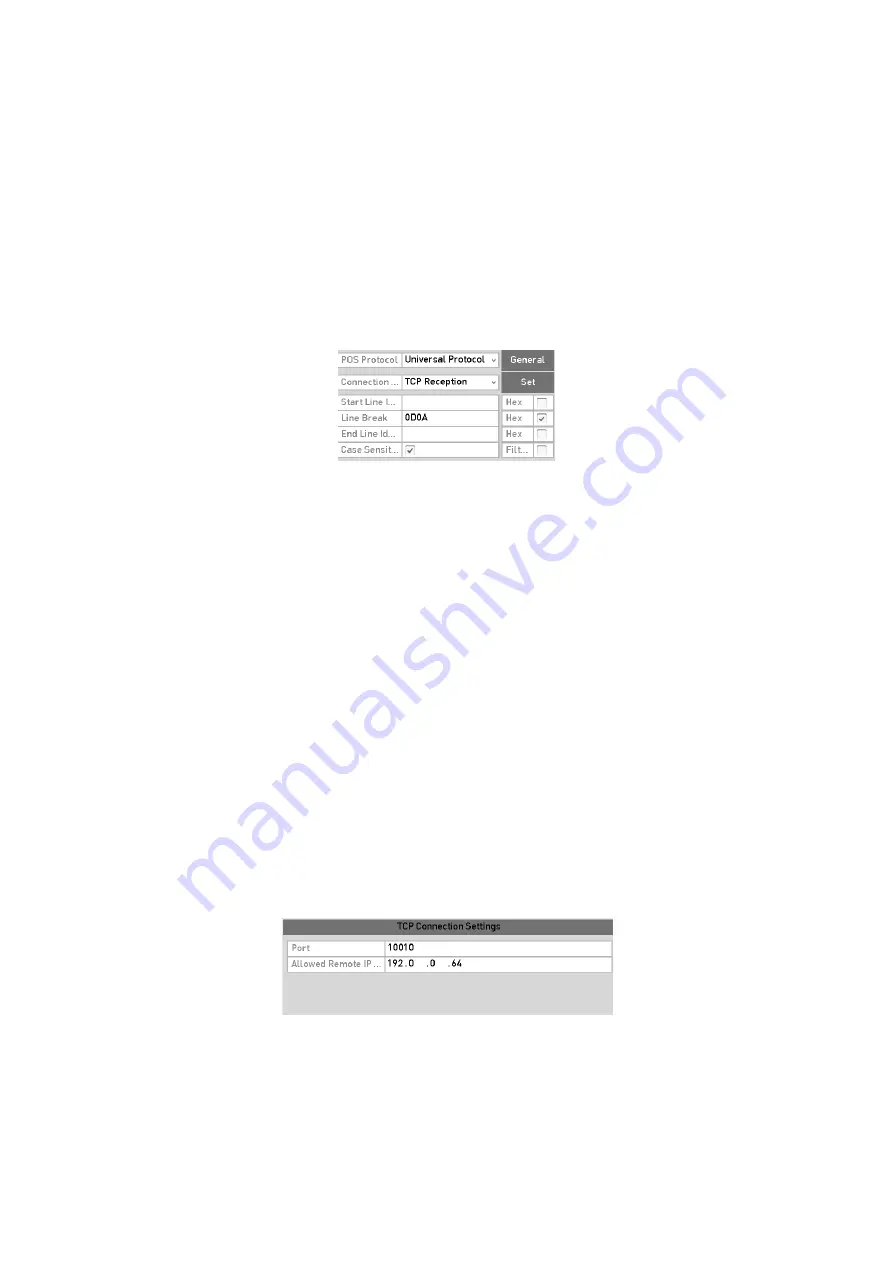
Select the POS protocol to Universal Protocol, EPSON, AVE or NUCLEUS.
Universal Protocol
Click the
Advanced
button to expand more settings when selecting the universal
protocol. You can set the start line tag, line break tag and end line tag for the POS
overlay characters, and the case-sensitive property of the characters.
Universal Protocol Settings
NUCLEUS
If you select NUCLEUS protocol, reboot the device to take the new settings into effect.
1)
Click
Set
button to enter the NUCLEUS Settings interface.
2)
Edit the Employee, Shift and Terminal information. No more than 32 characters can
be input.
3)
Click
OK
to save the settings.
Note:
If you select NUCLEUS protocol, the connection type defaults to be RS-232, and all
the other POS protocol will change to be NUCLEUS.
You should set
Usage
to be Transparent Channel for RS-232 settings in
Menu >
Configuration > RS-232
first.
Step
6
Select the Connection Type to TCP, UDP, Multicast, RS-232, USB->RS-232 or Sniff,
and click
Set
to configure the parameters for each connection type.
TCP Connection
When using TCP connection, the port must be set from 0 to 65535, and the port for
each POS machine must be unique. Input the Allowed Remote IP Address for
connecting the DVR and the POS machine via TCP.
TCP Connection Settings
UDP Connection
Summary of Contents for GD-RT-5008P
Page 2: ......
Page 134: ...134 Set PTZ Linking Step 8 Click OK to save the settings...


