


183
An eSATA disk should be connected to the device.
Step
1
Enter the HDD Advanced Setting interface:
Menu > HDD > Advanced
Step
2
Click the
Disk Clone
tab to enter the disk clone configuring interface.
Step
3
Make sure the usage of the eSATA disk is set as Export.
If not, click the
Set
button to set it. Choose Export and click the
OK
button.
Note:
The capacity of destination disk must be the same as that of the clone source disk.
Step
4
Check the checkbox of the HDD to be cloned in the Clone Source list.
Step
5
Click the
Clone
button and a message box pops up.
Step
6
Click the
Yes
button to continue.
You can check the clone progress in the HDD status.
14.7 Checking the HDD Status
You may check the status of the installed HDDs on DVR so as to take immediate check and
maintenance in case of HDD failure.
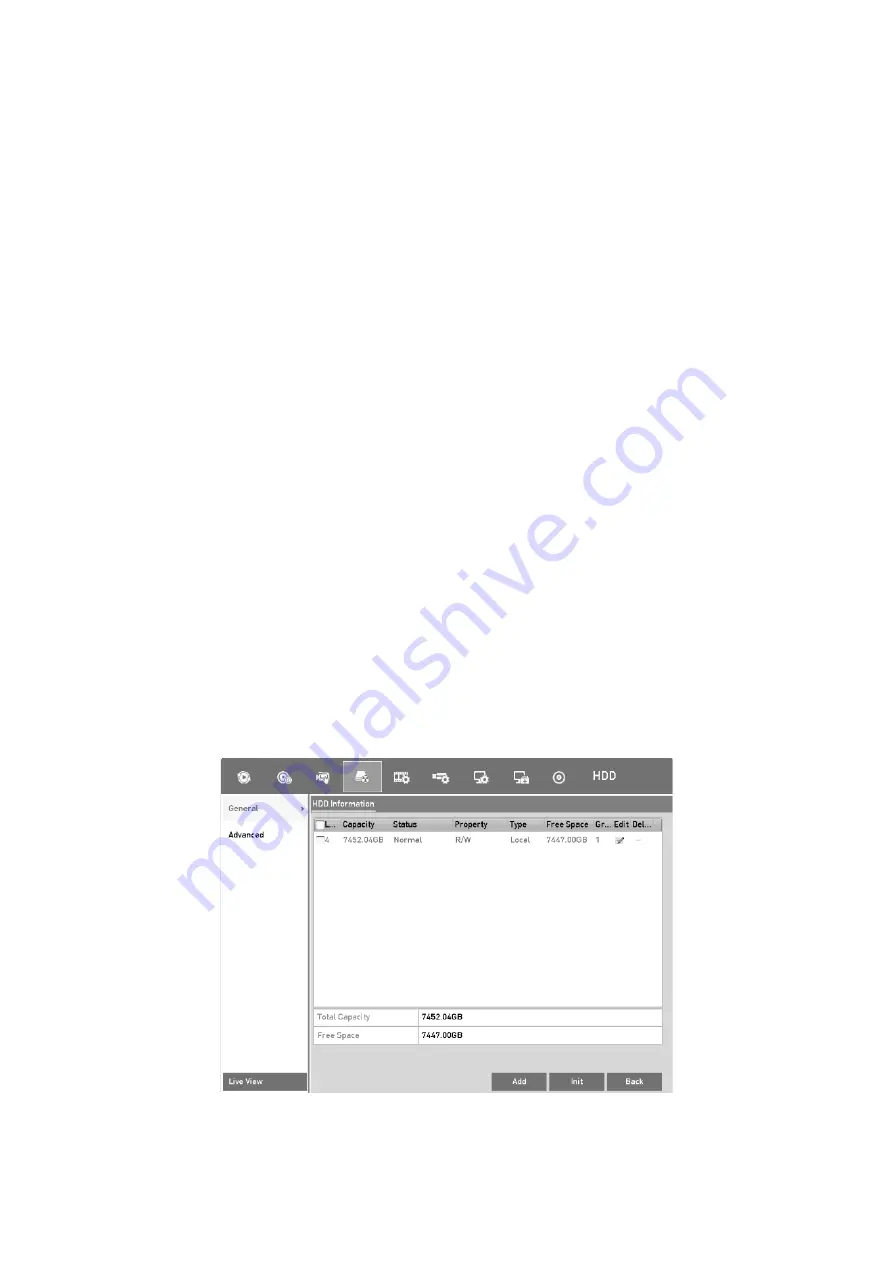
Checking HDD Status in HDD Information Interface
Step
1
Go to
Menu > HDD > General
.
Step
2
Check the status of each HDD which is displayed on the list, as shown below.
View HDD Status (1)
Summary of Contents for GD-RT-5008P
Page 2: ......
Page 134: ...134 Set PTZ Linking Step 8 Click OK to save the settings...


