


Kayenne/Karrera/GV Korona
User Manual
251
•
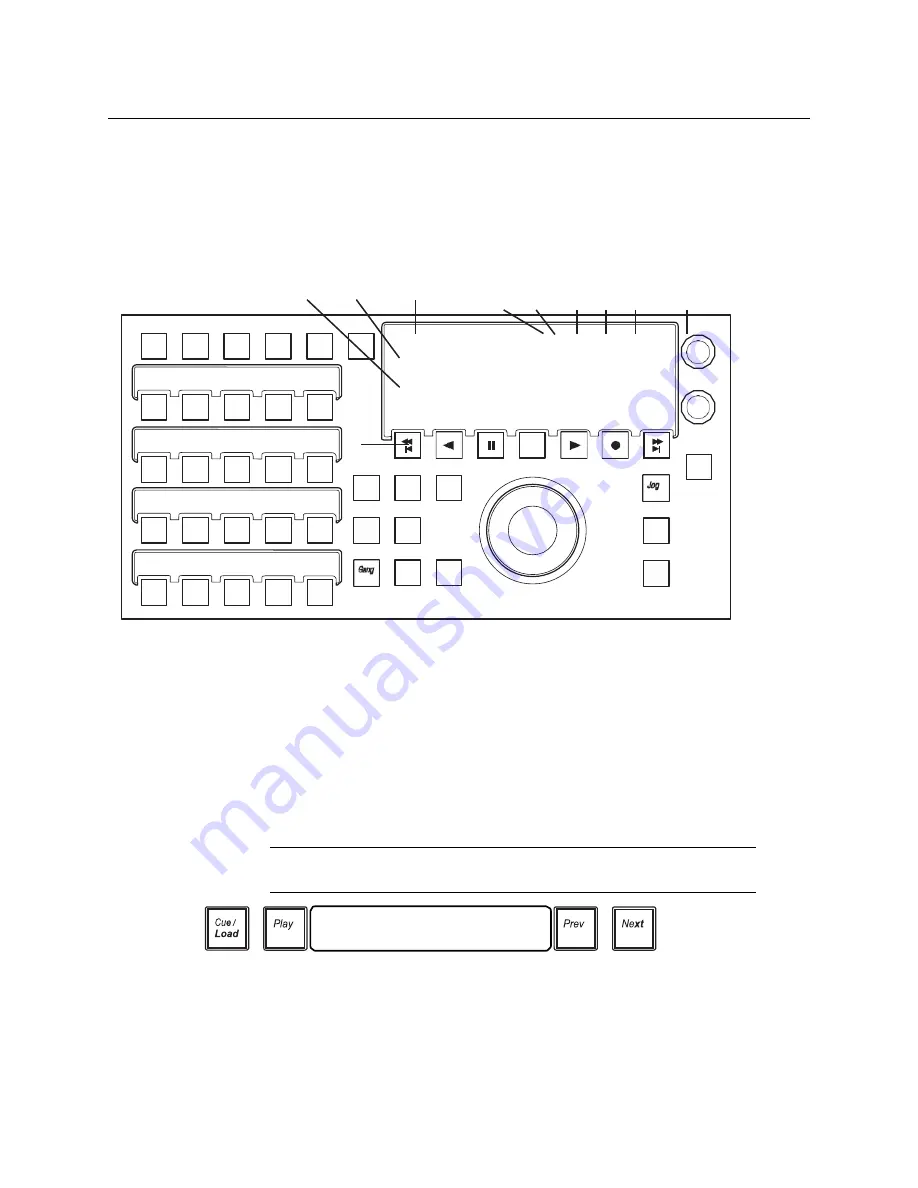
Clip folder and clip name (folder only displayed if supported by the device, e.g.
ClipStore supports folder display but K2 does not).
Duration Mark In
Device
(Preset)
Page/Bank
(Last Recalled
Register)
Page/Bank/Reg
E-MEM
Level
A
K2-1
CS-1
B
K2-2
CS-2
C
K2-3
CS-3
D
K2-4
CS-4
E
CLR
F
Folder
CS-1
12 345 MISC4
I ØØ:ØØ:ØØ:22 OU ØØ:ØØ:Ø7:24
D ØØ:ØØ:Ø7:Ø2 TC ØØ:ØØ:ØØ:ØØ
GV/BrightStar
Cue
Clip
Load
Mark Out
Time Code
IS 1
IS 2
IS-3
IS 4
Go To
TC
Mark
In
Mark
Out
IS 5 IS 6
ENT
Loop
Link
Cue
Set
In
Set
Out
Var
Sh
utl
Device Control Module, Status Display
Karrera Device Control
With Karrera, external devices can be controlled from Device Control Groups (one for a 2-
M/E Karrera system and two for a 3-M/E). The Device Control Group consists of a 16
character Status Display (displays the current clip) and Play, Cue/Load, Next Clip, and
Previous Clip buttons.
For the one group on the 2-M/E Karrera, the Device Control Group can be assigned to a
button row, on a 3-M/E the right-most group can be assigned to a device associated with a
source select button.
Note:
Off Air Advance and Auto Start buttons are accessed from the GV
Switcher menu.
System Bar, Device Control Group
For the left-most Device Control Group (on a 3-M/E system), you can associate (or marry) a
source button row to the group by holding down the PREV and NEXT buttons together and
then select any button in the row.
For the other Device Control Group on a 3-M/E, you can associate a device to the group by
holding down a source select button that has a device attached, then press the PREV and
NEXT buttons together (or you can press and hold down the PREV and NEXT buttons and
8805_02
8623267_35
Summary of Contents for GV KORONA
Page 16: ...Table of Contents xvi ...
Page 38: ...40 ...
Page 122: ......
Page 406: ...Kayenne Karrera GV Korona User Manual 409 ...