GE
V
OLUSON
i / V
OLUSON
e
D
IRECTION
KTI106052, R
EVISION
10
S
ERVICE
M
ANUAL
4-22
Section 4-4 - Functional Checks
4-4-7
Generic Measurements
(cont’d)
4-4-7-2
Circumference/Area Measurements
1.) Press the
CALIPER
key and then select the GENERIC AREA in the menu area.
2.) Select the corresponding item from the menu area. An active cursor displays.
3.) To position the active cursor, move the
TRACKBALL
.
4.) To fix the start point, press
SET
(the right or left trackball key). The system fixes the first cursor
and displays a second active caliper.
5.) To position the second caliper, move the
TRACKBALL
and press
SET
(Rt. / Lt. trackball key).
NOTE:
If you have selected a “trace” item, the measurement is finished and the area and circumference results
appear on the screen.
6.) An ellipse appears the axis of which is defined by these two points.
To adjust the width of the ellipse, move the
TRACKBALL
.
7.) To toggle between calipers, or to readjust a traced line, press the upper trackball key.
8.) To complete the measurement, press
SET
(right or left trackball key). The system displays the
circumference and area in the measurement results area.
Before you complete a measurement:
-
To erase the ellipse resp. trace and the current data measured, press the
BACKSPACE
key
on the keyboard.
The original caliper is displayed to restart the measurement.
-
To exit the measurement function, press the
CALIPER
key or
EXIT
key on the control panel.
4-4-7-3
Volume Measurements
1.) Press the
CALIPER
key and then select the GENERIC VOLUME in the menu area.
2.) Select the appropriate item.
3.) Perform the measurement(s) using the
TRACKBALL
and
SET
(right or left trackball key).
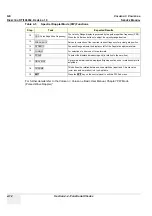
For further details:
see 4-4-7-1
and
4-4-7-2
.
4-4-7-3-1
Multiplane Measurements
NOTE:
This volume measurement is only possible in 3D Mode.
1.) Select the reference image in which the measurement is to be performed (A, B or C).
2.) Press the
CALIPER
key once and select the MULTIPLANE item.
3.) Select the first section through the body by pressing the REF.SLICE Soft-menu button (first
section should be set at the edge of the object).
4.) Position the start dot of the area which should be surrounded and store it with
SET
.
5.) Surround the area with the trackball, then press
SET
(right or left trackball key). The area is
calculated and displayed. It may even be “zero”. Press the
SET
key twice.
6.) Select the next parallel section with the REF. SLICE buttons and measure the area.
7.) Repeat 5. and 6. until the edge of the measured object is reached.
NOTE:
The contour of the measured area is not erased if a new section is adjusted.
To call back the measured areas press the
PREV / NEXT
Soft-menu buttons.
NOTE:
To erase the results, select the
INIT
item shown in the menu area.
Summary of Contents for Voluson i BT06
Page 2: ......
Page 11: ...GE VOLUSON i VOLUSON e DIRECTION KTI106052 REVISION 10 SERVICE MANUAL ix ZH CN KO...
Page 44: ...GE VOLUSON i VOLUSON e DIRECTION KTI106052 REVISION 10 SERVICE MANUAL xlii Table of Contents...
Page 514: ...GE VOLUSON i VOLUSON e DIRECTION KTI106052 REVISION 10 SERVICE MANUAL IV Index...
Page 515: ......

