Printer Connection and Software Installation
107
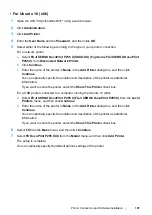
• For Ubuntu 10 (x86)
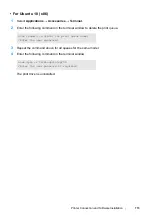
1
Open the URL "http://localhost:631" using a web browser.
2
Click
Administration
.
3
Click
Add Printer
.
4
Enter the
User Name
and the
Password
, and then click
OK
.
5
Select either of the following according to the type of your printer connection.
For a network printer:
a
Select
FUJI XEROX DocuPrint P255 X(XX:XX:XX) (Fuji Xerox FUJI XEROX DocuPrint
P255 X)
from
Discovered Network Printer
.
b
Click
Continue
.
c
Enter the name of the printer in
Name
in the
Add Printer
dialog box, and then click
Continue
.
You can optionally specify the location and description of the printer as additional
information.
If you want to share the printer, select the
Share This Printer
check box.
For a USB printer connected to a computer running the Ubuntu 10 (x86):
a
Select
FUJI XEROX DocuPrint P255 X (FUJI XEROX DocuPrint P255 X)
from the
Local
Printers
menu, and then click
Continue
.
b
Enter the name of the printer in
Name
in the
Add Printer
dialog box, and then click
Continue
.
You can optionally specify the location and description of the printer as additional
information.
If you want to share the printer, select the
Share This Printer
check box.
6
Select
FX
from the
Make
menu, and then click
Continue
.
7
Select
FX DocuPrint P255 XXX
from the
Model
menu, and then click
Add Printer
.
The setup is complete.
You can optionally specify the default options settings of the printer.
Summary of Contents for DocuPrint P255 dw
Page 1: ...User Guide DocuPrint P255 d P255 dw ...
Page 6: ...6 Contents ...
Page 26: ...26 Product Features ...
Page 38: ...38 Basic Operation ...
Page 69: ...Printer Connection and Software Installation 69 5 Select Advanced ...
Page 114: ...114 Printer Connection and Software Installation ...
Page 197: ...Troubleshooting 197 4 Lower the levers to the original position 5 Close the rear cover ...
Page 226: ...226 Troubleshooting ...
Page 248: ...248 Contacting Fuji Xerox ...
Page 252: ...252 Index X XML Paper Specification print driver 58 96 ...

