108
Printer Connection and Software Installation
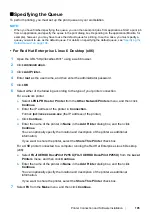
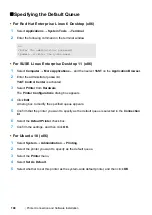
Specifying the Default Queue
• For Red Hat Enterprise Linux 6 Desktop (x86)
1
Select
Applications
→
System Tools
→
Terminal
.
2
Enter the following command in the terminal window.
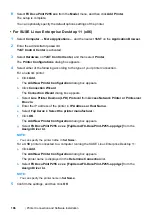
• For SUSE Linux Enterprise Desktop 11 (x86)
1
Select
Computer
→
More Applications...
, and then select
YaST
on the
Application Browser
.
2
Enter the administrator password.
YaST Control Center
is activated.
3
Select
Printer
from
Hardware
.
The
Printer Configurations
dialog box appears.
4
Click
Edit
.
A
dialog box to modify the specified queue appears.
5
Confirm that the printer you want to specify as the default queue is selected in the
Connection
list.
6
Select the
Default Printer
check box.
7
Confirm the settings, and then click
OK
.
• For Ubuntu 10 (x86)
1
Select
System
→
Administration
→
Printing
.
2
Select the printer you want to specify as the default queue.
3
Select the
Printer
menu.
4
Select
Set As Default
.
5
Select whether to set this printer as the system-wide default printer, and then click
OK
.
su
(Enter the administrator password)
lpadmin -d (Enter the queue name)
Summary of Contents for DocuPrint P255 dw
Page 1: ...User Guide DocuPrint P255 d P255 dw ...
Page 6: ...6 Contents ...
Page 26: ...26 Product Features ...
Page 38: ...38 Basic Operation ...
Page 69: ...Printer Connection and Software Installation 69 5 Select Advanced ...
Page 114: ...114 Printer Connection and Software Installation ...
Page 197: ...Troubleshooting 197 4 Lower the levers to the original position 5 Close the rear cover ...
Page 226: ...226 Troubleshooting ...
Page 248: ...248 Contacting Fuji Xerox ...
Page 252: ...252 Index X XML Paper Specification print driver 58 96 ...

