


3.3 Printing on Transparencies
49
6.
Press the <Eject/Set> button to confirm
your selection.
If the message on the right is displayed,
return to the print screen.
Printing on Transparencies
The following procedure uses Windows XP WordPad as an example.
Note
• The method of displaying the Properties dialog box varies depending on the application being used.
Consult the documentation for your application.
• Leaving printed transparencies in the output tray can cause them to stick together. Remove them from
the tray every 20 prints or so and fan them to cool them off.
1.
On the [File] menu, click [Print].
2.
Select the printer from the [Select Printer] list box, and then click [Preferences].
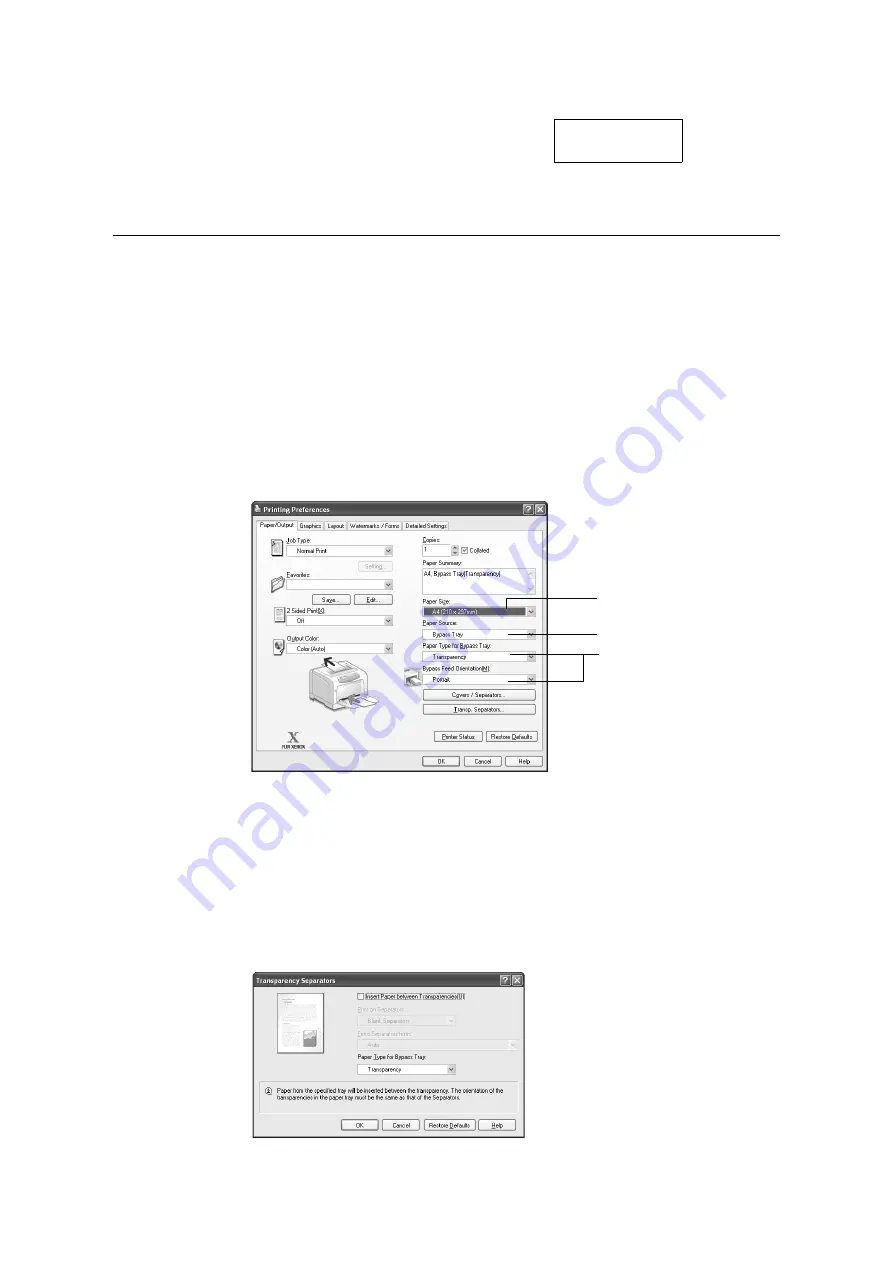
3.
The [Paper/Output] tab appears.
From [Paper Source], select the tray where you loaded the transparencies.
4.
When [Auto] is selected, select [Transparency] from [Paper Type].
When [Bypass Tray] is selected, select [Transparency] from [Paper Type] and the
orientation on the transparencies from [Bypass Feed Orientation].
5.
From [Paper Size], select the size of the document to be printed.
6.
If you are using the Transparency Separators feature, click [Transp. Separators...].
In the dialog box displayed, select [Insert Paper between Transparencies], and set the
rest of the items as necessary. Click [OK] to close the dialog box.
Tray Settings
refreshed.
3
4
5
Summary of Contents for DocuPrint C3055 DX
Page 1: ...DocuPrint C3055 C3055 DX User Guide ...
Page 238: ...2 ...


