


338
Data Dis
p
lay
/Edit/Managem
ent
E
d
it
P
ic
tu
re
1
Picture Edit display
(
)
Do the following operations.
Information
p
You can edit the still images of 1616 x 1212 dots, and 1632 x 1224 dots
as well.
p
You can execute “Edit picture” only for the “File unrestricted” files of still
images shot by the cameras, obtained by data communication,
downloaded from sites, or retrieved from i-mode mail.
p
You may not be able to execute “Edit picture” depending on the still
image.
p
If you repeat editing image such as pasting frames or marker stamps to
the shot still image, the image quality may deteriorate or the file size
may become large.
p
You cannot edit some still images as you like.
p
If you edit and save the JPEG image in excess of 10,000 bytes that is
attached to the mail you are composing, it is saved anew and the
source image before editing stays attached to the mail. If the JPEG
image in excess of 10,000 bytes attached to the mail other than that
you are editing (sent mail etc.) is edited and overwritten, the mail
attachment is released.
p
If the battery runs out during editing, the edited contents are discarded.
p
The file name, title, storage location, and acquired source of the saved
still image are as follows:
・
File name: “YYYYMMDDhhmmnnn”
(Y: year, M: month, D: date, h: hour, m: minute, n: number)
image (when date and time are not set)
・
Title: “YYYY/MM/DD hh:mm”
(Y: year, M: month, D: date, h: hour, m: minute)
image (when date and time are not set)
・
Storage location: Folder the source file is saved to
・
Acquired source:
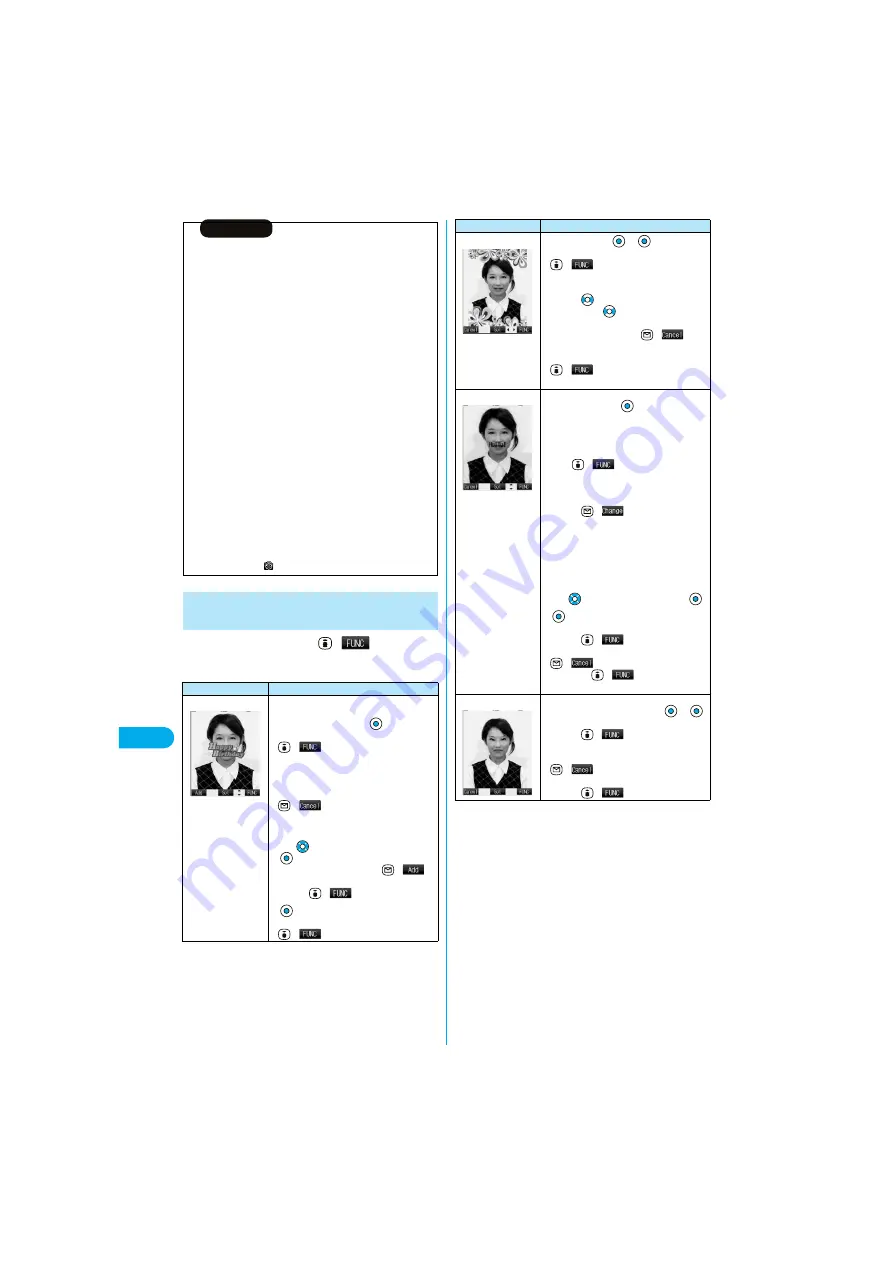
Function Menu of the Picture Edit
Display
Function menu
Operations
Marker stamp
You can add the marker stamp inside the
“Stamp” folder.
Select a marker stamp
p
You can rotate the marker stamp by pressing
(
) and selecting “90° to right/90° to
left/180°”.
Select “Scale up/Scale down” to enlarge or
shrink the marker stamp.
p
To cancel a selected marker stamp, press
(
).
p
See page 455 for the pre-installed marker
stamps.
Use
to position the marker stamp
p
To add a marker stamp, press
(
).
You can add the marker stamp also by
pressing
(
) and selecting “Add”.
p
You can fix the marker stamp also by pressing
(
) and selecting “Set”.
Frame
Select a frame
p
You can fix the frame also by pressing
(
) from the display on the left and
selecting “Set”.
p
You can display the previous or next frame by
pressing
from the display on the left.
Press and hold
for at least one second to
display sequentially.
p
To reselect a frame, press
(
) from
the display on the left.
You can reselect a frame also by pressing
(
) and selecting “Cancel”.
p
See page 454 for the pre-installed frames.
Character stamp
You can add text.
Enter characters
You can enter up to 15 full-pitch or 30 half-pitch
characters. However, the number of characters
you can enter decreases depending on the size
of the still image.
p
Press (
)
and
select
“Character
color” to select a color; then, you can change
the color of characters. You can switch
between “16 Color” and “256 Color” by
pressing (
).
Select
“Font”
and
“Gothic style/Pop style” to change the fonts.
Select “Character size” and “Enlargement size/
Standard size/Reduction size” to enlarge or
shrink characters.
Select “Character Input” to edit entered
characters.
Use
to position the characters
p
You can fix the character stamp also by
pressing
(
) and selecting “Set”.
p
To select another position, press
(
). You can reselect a position also
by pressing
(
) and selecting
“Cancel”.
Funny transform
You can change person’s expression.
Select an expression pattern
p
You can fix the funny transform also by
pressing
(
) from the display on the
left and selecting “Set”.
p
To reselect an expression pattern, press
(
) from the display on the left.
You can reselect an expression pattern also by
pressing
(
) and selecting “Cancel”.
Function menu
Operations
Summary of Contents for P901ITV
Page 85: ...78 ...
Page 145: ...138 ...
Page 235: ...228 ...
Page 305: ...298 ...
Page 317: ...310 ...
Page 321: ...314 ...
Page 443: ...436 ...


