Installation Instructions for Wi-Q™ Technology 9KQ Cylindrical Locks
6
Preparing the door and door jamb
BEST
a Product Group of dormakaba USA Inc.
6
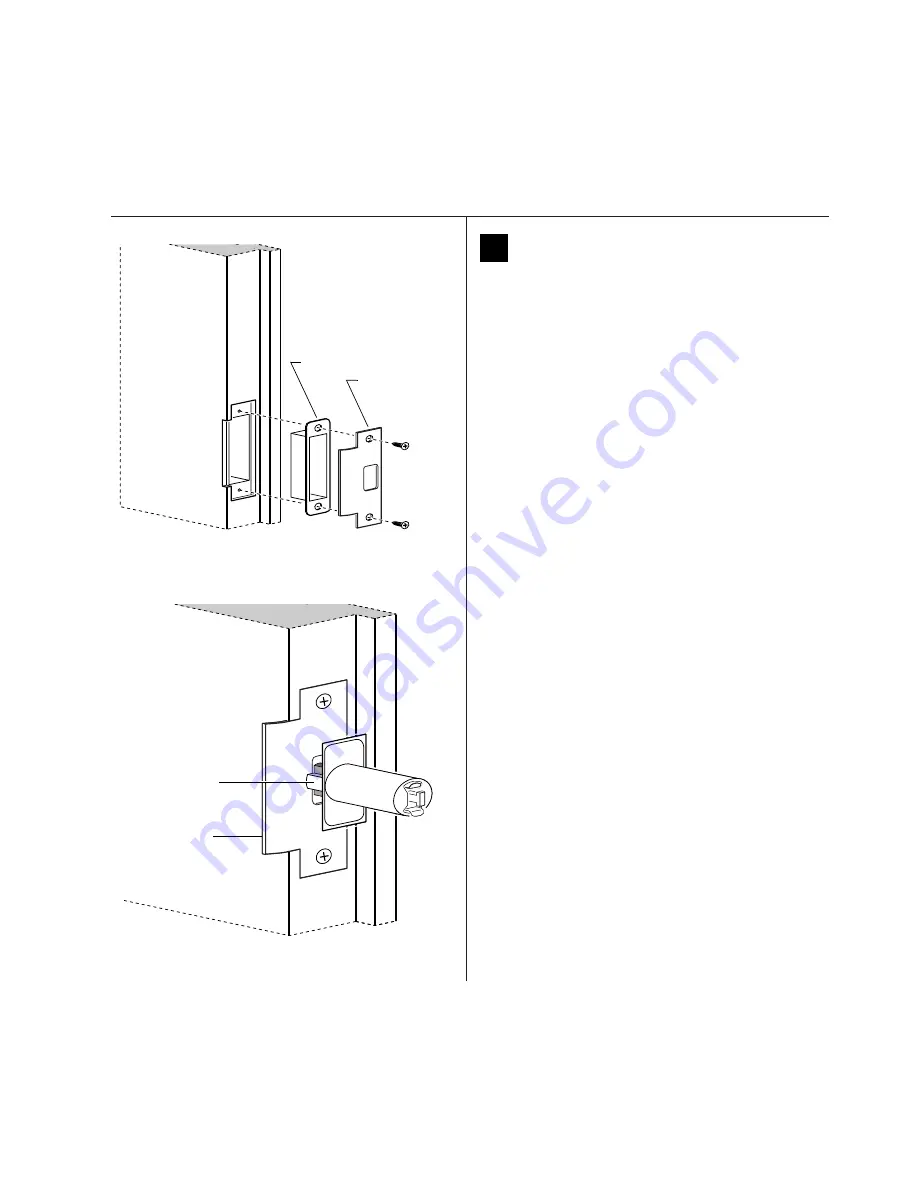
Install strike box and strike plate
1 In alignment with the center of the latchbolt, mortise
the door jamb to fit the strike box and strike plate.
2 Drill the holes for the screws used to install the strike
box and strike plate.
3 Insert the strike box and secure the strike with the two
screws provided.
4 Check the position of the deadlocking plunger against
the strike plate.
Caution:
The deadlocking plunger of the latchbolt
must make contact with the strike plate, as shown
in Figure 6b. The plunger deadlocks the latchbolt
and helps prevents someone from forcing the
latch open when the door is closed.
Door jamb
Figure 6a Installing the strike box and strike plate
Strike box
Strike plate
Figure 6b Aligning the deadlocking plunger with the
strike plate
Strike plate
Deadlocking
plunger
Door jamb
Installation Instructions for Wi-Q™ Technology 9KQ Cylindrical Locks
5
Installation Instructions for Wi-Q™ Technology 9KQ Cylindrical Locks
Preparing the door and door jamb
BEST
a Product Group of dormakaba USA Inc.
5
Use drill jig to drill through-bolt holes
1 Press the drill jig (KD303) onto the door, engaging it
with the latch tube prongs (see the close-up in
Figure 5). Make sure the front edge of the jig is parallel
with the door edge.
2 Drill the through-bolt holes (5/16
″
diameter) halfway
into the door.
3 Turn over the drill jig and repeat steps 1 and 2 from the
opposite side of the door.
Note: Replace the drill jig after 10 door preparations.
Inside of door
Figure 5 Installing the drill jig and drilling the
through-bolt holes
Latch
tube
prongs
Drill upper through-bolt
hole.
Drill lower through-bolt hole.
Summary of Contents for BEST Wi-Q ONGUARD
Page 7: ...A Glossary Glossary 109 B Lock Installation Lock Installation 113 ...
Page 40: ...40 2 Select Inbound Rules Figure 13 Inbound Rules Select Inbound Rules ...
Page 45: ...45 7 De select the Public option Click Next Figure 18 De select Public ...
Page 52: ...52 Figure 27 Wi Q Interface Setup Wizard Click Next ...
Page 57: ...57 Figure 33 Custom Setup Options Click Next ...
Page 75: ...75 To add a new Sign On Credential 1 Select Add Figure 52 Add Segment Sign On Credential 1 ...
Page 113: ...B Lock installation ...


