16
ENGLISH
3
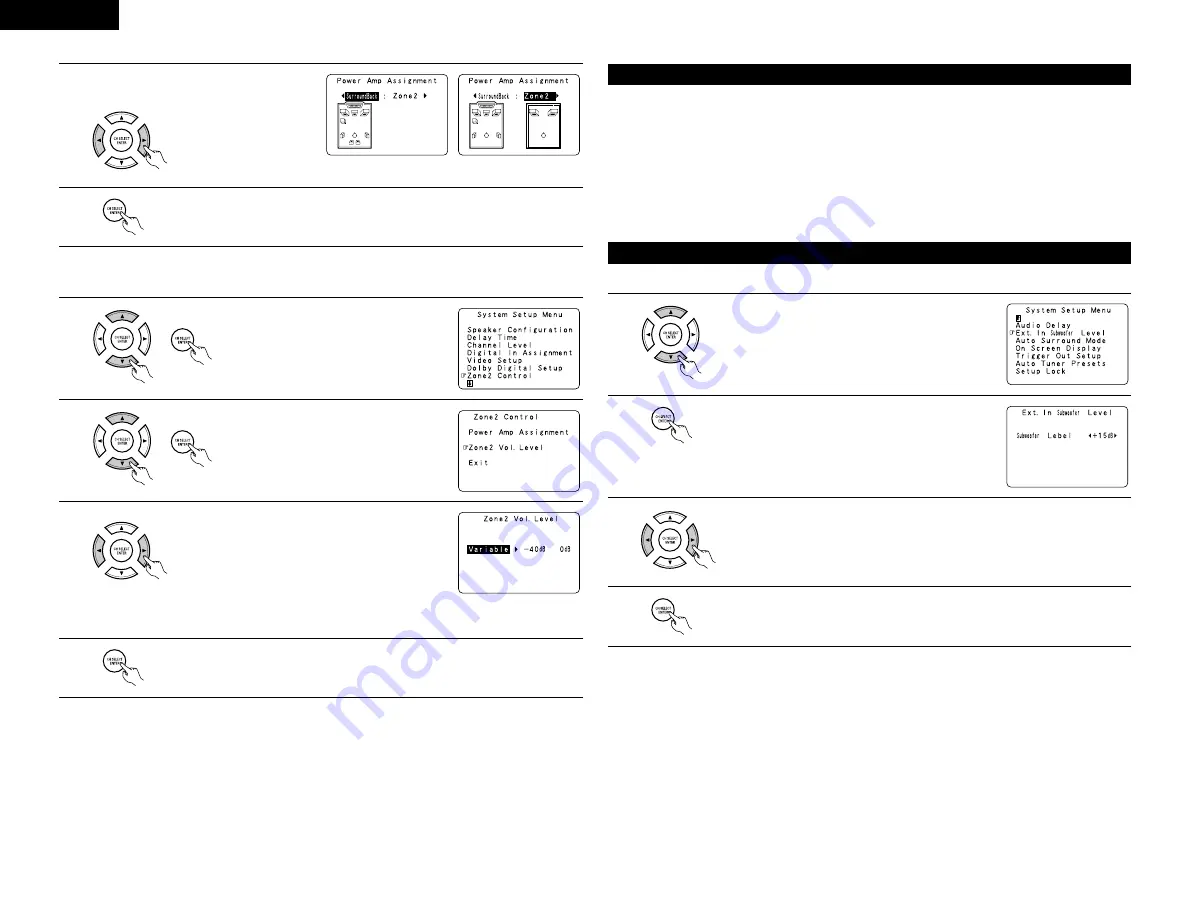
Select “Surround Back” to use as the surround
back channel, “Zone2” to use as Zone 2 out.
4
Enter the setting.
At the “Zone2 Control” screen, select “Exit” and press the ENTER button.
The System Setup Menu reappears.
When “Zone2” is selected
When “Surround Back” is selected
[2] Setting the Zone2 vol. level
Set the Zone 2 pre-out output level adjustment.
1
At the System Setup Menu select “Zone2
Control” and press the ENTER button.
2
The “Zone2 Control” screen appears.
Select “Zone2 Vol. Level” and press the
ENTER button.
3
Select the desired setting.
Variable:
The level can be adjusted freely using the buttons on the
remote control unit.
0 dB, -40 dB:
The output level is fixed at the set level and the volume
can no longer be adjusted.
4
Enter the setting.
At the “Zone2 Control” screen, select “Exit” and press the ENTER button.
The System Setup Menu reappears.
This function allows you to adjust the time delay of the video and audio signals and store these settings for the
different input sources.
The setting is made while watching a DVD or other software, so it is not made here.
By default, this is not displayed when no digital signals are being input.
For instructions on making the setting, refer to page 35.
NOTE:
The audio delay setting does not apply when playing in the EXT. IN mode or in the analog input direct mode or
stereo mode (TONE DEFEAT “ON”).
Setting the Audio Delay
• Set the method of playback of the analog input signal connected to the Ext.In Subwoofer.
Setting the Ext. In Subwoofer Level
1
At the System Setup Menu select “Ext.In Subwoofer Level”.
2
Switch to the Ext.In Subwoofer Level screen.
3
Select the desired setting.
Select according to the specifications of the player being used. Also refer to the player’s
operating instructions.
+15dB (default) recommended. (0, +5, 10 and +15 can be selected.)
4
Enter the setting.
The System Setup Menu reappears.


