background image


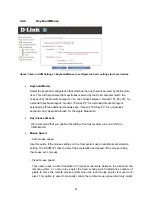
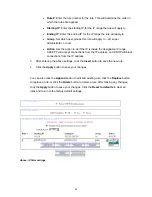
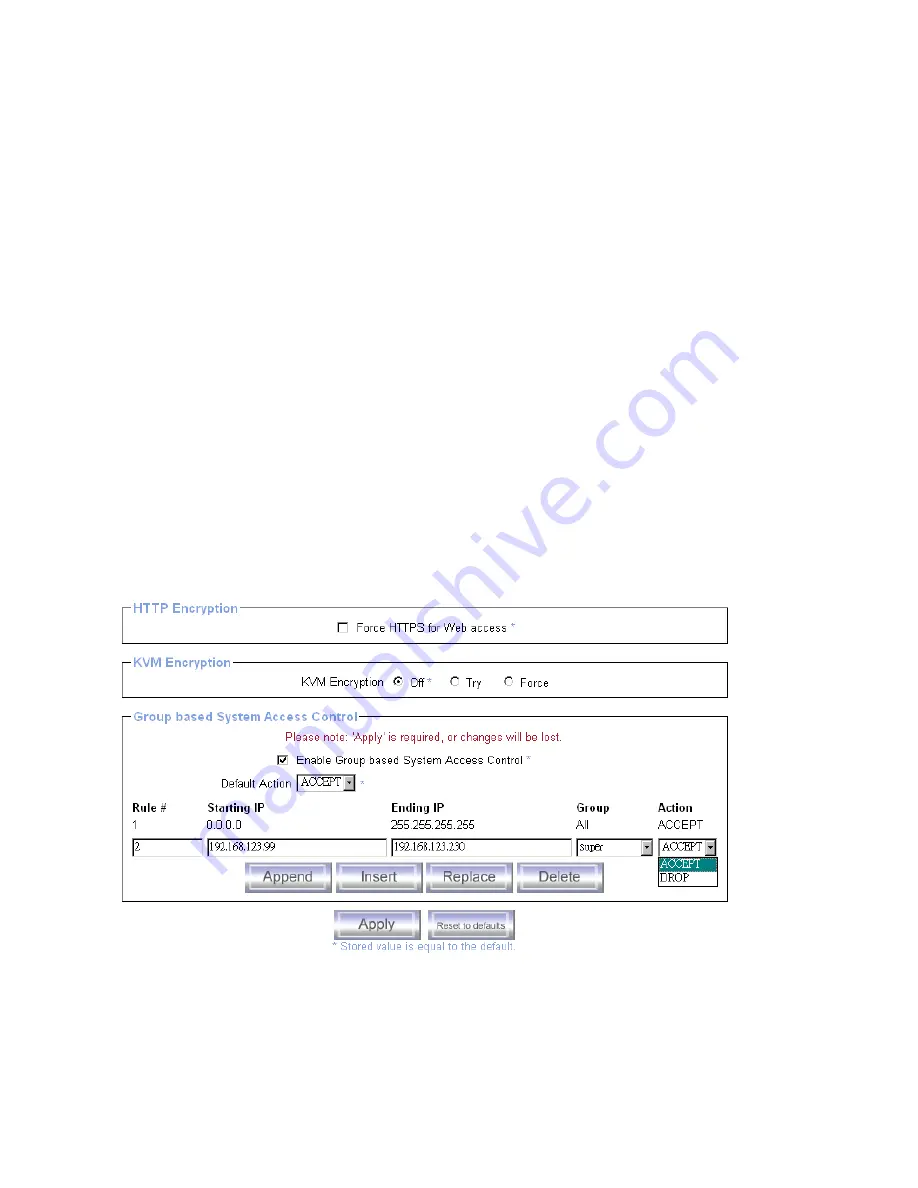
Rule #

: Enter the rule number for the rule. This will determine the order in 

which the rules are applied.


Starting IP

: Enter the starting IP for the IP range the rule will apply to. 


Ending IP

: Enter the ending IP for the IP range the rule will apply to. 


Group

: Set which user groups this rule will apply to – all, super, 

administrator, or user. 


Action

: Set the action to do if the IP is inside the designated IP range. 

ACCEPT will accept connections from the IP address, and DROP will block 
connections from the IP address. 

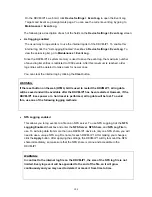
3.  After entering the above settings, click the 

Insert

 button to save the new rule. 

4. Click 

the 

Apply 

button to save your changes. 


You can also click the 

Append

 button to edit and existing rule, click the 

Replace 

button 

to replace a rule, or click the 

Delete

 button to delete a rule. After making any changes, 

click the 

Apply

 button to save your changes. Click the

 Reset to defaults

 to clear all 

rules and return to the factory default settings. 

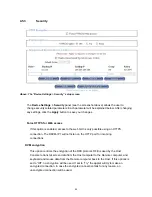
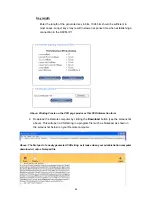
Above: IP filter settings.


95


Summary of Contents for DKVM-IP1

Page 1: ...D Link DKVM IP1 1 port COMBO KVM Over IP User Manual v 1 00 ...

Page 2: ...nfiguration 15 2 1 Initial Network Configuration with the setup software 15 2 2 Configuration Setup via Serial based Console 20 2 3 Keyboard Mouse and Video configuration 21 2 3 1 DKVM IP1 keyboard settings 22 2 3 2 Mouse settings for the Host and Remote systems 22 2 3 3 Mouse Synchronization Modes 24 2 3 4 Creating a Hotkey for Fast Sync Free Mouse 25 2 3 5 Synchronizing the Mouse Pointers Double...

Page 3: ... 1 2 Telnet Console 50 4 1 3 Remote Wakeup 55 4 2 Virtual Media 60 4 2 1 Drive Redirection 62 4 2 2 Virtual Drive 64 4 2 3 CD DVD Disk Image 65 4 2 4 Floppy Disk Image 69 4 2 5 Creating a Disk Image 72 4 2 6 Making a Drive Redirection 74 4 3 User Management 78 4 3 1 Change Password 78 4 3 2 User Management 79 4 4 KVM Settings 81 4 4 1 User Console 81 4 4 2 Keyboard Mouse 85 4 4 3 Video 86 4 5 Devi...

Page 4: ...tion 111 4 6 2 Event log 112 4 6 3 Update Firmware 113 4 6 4 Unit Reset 115 5 Resetting the DKVM IP1 to Factory Defaults 116 6 FAQ 117 7 Troubleshooting 118 8 Addendum 124 8 1 Key Codes 124 8 2 Video Modes 126 8 3 User Role Permissions 127 8 4 Suggested Video Settings for Different Bandwidths 128 8 5 Well known TCP UDP Port Numbers 129 8 6 Protocol Glossary 130 3 ...

Page 5: ...cific definition of the word Remote Host Local etc and not the general definition of the word The DKVM IP1 provides convenient remote KVM access and control via LAN or Internet It is installed on the Host side and transmits a Remote computer s control INPUT mouse and keyboard to the Host computer It also captures digitizes and compresses the video OUTPUT signal of a Host computer and then transmit...

Page 6: ...6 bit SSL encryption binding with all transmitted data Persistent logging of all important events Up to 63 user profiles that can each be assigned to one of three levels of user authorization Auto optimization of the frame rate and video quality according to bandwidth availability Automatic sensing of video resolution for best possible screen capture High performance mouse tracking and synchroniza...

Page 7: ...ble bandwidth 1 2 Package Contents The product you purchased should contain the equipment and accessories in this list 1 port Combo KVM Over IP device DKVM IP1 External power adapter DC 5 V 2 A RS 232 Female to Female cable 1 8 m null modem type 3 in 1 cable containing a PS 2 keyboard cable a PS 2 mouse cable and a VGA cable USB cable 1 Type A Male to 1 Type B Male connector to connect the DKVM IP...

Page 8: ...Female Console Ports Mouse 1 PS 2 mini DIN 6 pin Female Firmware upgrade connector 1 x mini USB Female Serial port 1 x RS 232 Male Ethernet port 1 x RJ45 Virtual media port 1 x USB B type Female Remote computer screen resolution Up to 1600 x 1200 at 60 Hz DDC DDC2 Monitor Supports DDC2B max resolution up to 2048 x 1536 at 60 Hz Operating systems supported Windows 98 98SE ME 2000 XP Vista 7 2003 Ma...

Page 9: ...or These peripherals will only be needed for normal operation and will become redundant during the periods when the Host computer will be controlled remotely via the DKVM IP1 On the Remote computer side Any computer that is connected to the same network that the target DKVM IP1 is connected to whether that be a LAN or the Internet Software on the Remote computer Java Runtime Environment version 1 ...

Page 10: ...1 5 Physical Diagrams Front View Rear View LED Functions PC Link Red indicates that the DKVM IP1 is linked to a PC Ready Green blinks once every second when the system is ready 9 ...

Page 11: ...1 6 Cable Connection Diagram 10 ...

Page 12: ...d to connect a PS 2 keyboard and mouse for direct control of the Host computer by Host side users This saves the trouble of unplugging any cables when Local Host side control is required PS 2 back Use the included PS 2 keyboard and mouse to connect the PS 2 mouse keyboard ports on the back of the DKVM IP1 to the mouse keyboard ports on the Host computer Alternatively if you will be using a USB mou...

Page 13: ...P1 and relevant network as depicted in the Cable Connection Diagram above After switching on the DKVM IP1 it will take about 60 seconds to complete the startup process before entering normal operational mode 1 7 2 Connecting the DKVM IP1 to a Multi Port KVM Switch Instead of connecting to a single Host computer the DKVM IP1 can be connected to a multi port KVM Switch on the Host side In this scena...

Page 14: ...s of the DKVM IP1 via the Internet The firmware also allows the Remote side user to control the keyboard and mouse input of the Host system as well as view the video output of the Host computer server that is connected to the DKVM IP1 In addition it allows the Remote side user to send special commands to the Host and it lets the Remote side user perform periodic maintenance of the Host From the Ho...

Page 15: ...rent categories These categories are listed below together with the percentage of times that such failures were caused by the specific type of problem See the table below for a list of Host system failures and how they are detected Type of failure Detected by Hard disk failure 50 of all failures Console screen CMOS set up information Power cable detached power supply failure 28 of all failures Ser...

Page 16: ...u ever need to view or change the network settings of the unit If the initial or default basic configuration does not meet your requirements use the DKVM IP1_Utility exe program to change the configuration to suit your needs To open the DKVM IP1 Utility on your computer simply insert the CD ROM and double click on the DKVM IP1_Utility exe icon when the CD ROM s content window appears The DKVM IP1 ...

Page 17: ...ID is the same as the MAC Address c After selecting your DKVM IP1 s MAC address click Query Device see the screenshot below to view the device s Network Configuration in the top right area d By default the DHCP function is disabled and None will be selected for IP auto configuration This means there would initially be no IP address for the device You can now configure the DKVM IP1 to use a static ...

Page 18: ...DHCP you can use the DKVM IP1 Utility to find the dynamic IP address of the DKVM IP1 DHCP automatically assigns a dynamic IP address to the DKVM IP1 This allows a device to be automatically assigned an IP eliminating the need for intervention by a network administrator who would otherwise have to manually assign the DKVM IP1 a static IP address 1 Before connecting the DKVM IP1 to your network make...

Page 19: ...ress c After selecting your DKVM IP1 s MAC address click Query Device see the screenshot below to view the device s Network Configuration in the top right area d In the IP auto configuration line at the top right select DHCP e In the Authentication area enter the Super User login and password for the DKVM IP1 The default login is super and the default password is pass f Click the Setup Device butt...

Page 20: ...act a DHCP server in the network to which it is physically connected If contact is made with a DHCP server it will provide the DKVM IP1 with a dynamic IP address gateway address and subnet mask NB Changing your device s password through the DKVM IP1 Utility To change your password with the DKVM IP1 Utility select your device from the Device MAC Address drop down box then in the Authentication sect...

Page 21: ...pt cookies or else you won t be able to log in If you experience login problems check to see if your browser has been set up to accept cookies 2 2 Configuration Setup via Serial based Console For connecting to serial based terminals the DKVM IP1 has a serial cable interface for setup on the Host side This connector is compliant with the RS 232 standard for serial connections The serial connection ...

Page 22: ... Enter the IP address of the DKVM IP1 This option is only available if IP auto configuration is disabled Net mask Enter the subnet mask of the connected IP subnet This option is only available if IP auto configuration is disabled Gateway address Enter the IP address of the default router for the connected IP subnet If you do not have a default router enter 0 0 0 0 This option is only available if ...

Page 23: ...ttings Keyboard Mouse Settings see the screenshot below Above Click on KVM Settings Keyboard Mouse in the left hand panel of the Web Management GUI to configure the correct settings for the keyboard model to emulate for the Host computer The correct settings are required for the Remote keyboard s input to be transmitted to the Host computer properly 2 3 2 Mouse settings for the Host and Remote sys...

Page 24: ...Mouse Pointer Options and make sure Enhance Pointer Precision is disabled On the Remote computer go to the web GUI screen and open the Host Console window Click the Auto Adjust Video button at the top right of the Host Console window For best results click the button with the white mouse pointer icon at the top right of the Host Console window until it displays two pointers side by side Double Mou...

Page 25: ... previous note for instructions on how to do this on different editions of Windows 2 3 3 Mouse Synchronization Modes The DKVM IP1 features two different mouse synchronization modes Double Mouse mode and Single Mouse mode Double Mouse Mode In this mode both the Remote and Host mouse pointers are visible allowing you to control the Host computer on your Remote computer while allowing you to move the...

Page 26: ...o to the Mouse Hotkey field and type in your choice of keystroke sequence Click Apply to activate the hotkey sequence see the image below Note The default hotkey for the Fast Sync Free Mouse function is Alt F12 When in Double Mouse mode this hotkey will perform a Fast Sync When in Single Mouse mode this hotkey will release the mouse from the captured state it enters when the Remote user clicks on ...

Page 27: ...window on the Remote computer s screen This is used to correct a temporary but fixed difference in positions of the Remote and Host mouse pointers You can also perform a Fast Sync by pressing the Fast Sync Free Mouse hotkey combination as described in the previous section Intelligent Sync Above The Intelligent Sync option can be found by clicking on Options Mouse Handling If Fast Sync does not wor...

Page 28: ...perly If you experience issues with mouse synchronization please try the following Special Mouse Drivers Specific mouse drivers may influence the synchronization process and impede synchronization of dual mouse pointers If this happens make sure you are not using a special vendor specific mouse driver on your Host system Windows Settings All versions of Windows on Host computer In the DKVM IP1 s w...

Page 29: ... use the CDE Control Panel to set the mouse to 1 1 no acceleration Alternatively you could use the Single Mouse mode only On SUN operating systems Double Mouse Mode only functions if you use SUN JVM 1 5 or higher 2 3 7 Video Modes The DKVM IP1 recognizes a limited number of common video modes If you run X11 on the Host system please do not use any custom mode lines with special video modes If you ...

Page 30: ...HTTPS whenever possible Telnet A standard Telnet client can be used to access any device that is connected to the DKVM IP1 s serial port RS 232 in terminal mode 3 1 1 HTTP as the Primary Interface The primary interface of the DKVM IP1 is the HTTP web interface This will be covered extensively in this chapter Other interfaces will be addressed in sub topics The Host Console window is the redirected...

Page 31: ...ion you need a browser that supports the HTTPS protocol Strong security is only assured by using a browser that supports a 128 bit passkey Some older browsers do not have strong 128 bit encryption algorithms If you are using Internet Explorer click on the top toolbar menu option marked then click on About Internet Explorer to see the current Cipher Strength the passkey length that is currently act...

Page 32: ...Above Internet Explorer versions 8 and 6 displaying the encryption key length cipher strength NOTE Newer web browsers generally support strong encryption by default 31 ...

Page 33: ...er can add or remove a user easily on the User Management page accessed by moving the mouse pointer to the left hand column and clicking UserManagement Users Please refer to Addendum C for details on what access rights are assigned for each user level Getting Started Launch a web browser and type in the IP address that you configured for your DKVM IP1 during the installation process http IP addres...

Page 34: ...rst time Leaving the password as it is represents a severe security risk and may result in unauthorized access to the DKVM IP1 as well as the entire Host system and connected devices NOTE Your web browser has to be set up to accept cookies or else you won t be able to log in 3 2 2 Using the Web GUI Home Screen After successfully logging into the DKVM IP1 the Home Screen of the DKVM IP1 web managem...

Page 35: ...rn to the home screen of the DKVM IP1 s web GUI Graphic User Interface LOGOUT Click this button to log out and exit from the DKVM IP1 s web GUI Clicking on this button logs out the current user and presents a new login screen NOTE If there is no user activity for 30 minutes the DKVM IP1 will log you out automatically Clicking on any of the menu items will bring you back to the login screen 34 ...

Page 36: ... window when the user logged into the web GUI or when the Refresh button was last clicked Click on Refresh to refresh the picture Click on the Click to open link to open the redirected screen view of the Host computer the Host Console Alternatively you can also click Remote Control KVM Console in the left hand column 35 ...

Page 37: ... HTTP nor HTTPS but RFB Remote Frame Buffer Protocol By default RFB tries to establish a connection to TCP port 443 Your local network environment must allow this connection to be made Therefore your firewall and in case you have a private internal network your NAT Network Address Translation settings have to be configured accordingly You may need to configure port forwarding on your router to all...

Page 38: ...ed to open the Host Console window the redirected view of the Host system s screen on the Remote computer s screen Above The Host Console window the redirected view of the Host system s screen This is the view the Remote side user will see if the Host system is running on Windows XP and has the Desktop view open The Remote side user can now open any of the files and programs on this Host system si...

Page 39: ...board layout and the Host system is set up for an English keyboard layout special German specific keys on the German keyboard will not work as expected Instead the keys will have the same effect as those of an English layout keyboard The Remote side user can circumvent such problems by adjusting the keyboard settings of the Host system to have the same mapping as the Remote user s keyboard You can...

Page 40: ...c Free Mouse hotkey The default hotkey for this is Alt F12 but this hotkey can be reconfigured manually 3 3 2 Control Bar of the Host Console The upper part of the Host Console window contains a control bar shown below By clicking on the icons on this bar you can view the status of the Host Console and adjust the Host Console s local settings The following is a description for each control Above T...

Page 41: ...ote side mouse cursor Double Mouse Mode only Single Double Mouse Mode icon Clicking this button switches between Single Mouse Mode where only the Host side mouse pointer is visible and the Double Mouse Mode where the Host side and Remote side mouse pointers are both visible and need to be synchronized On SUN operating systems Double Mouse Mode only functions if you use SUN JVM 1 5 or higher We rec...

Page 42: ... one can re open the selected Host Consoles until this user deactivates Exclusive Access or logs off The Access Mode icon in the status bar at the bottom of the screen will indicate the current status of the Exclusive Access function see the screenshot below Left This icon will appear at the bottom right of the Remote side user s screen if Exclusive Access has been activated in the Options menu It...

Page 43: ...ding to the Host video settings and the scaling algorithm When you select Scale to fit the Host video display will fit into the size and shape of the window for the Host Console no matter how this window is resized by the Remote side user Mouse Handling The Options Mouse Handling submenu offers two options for synchronizing the Host side and Remote side mouse cursors when in Double Mouse Mode Fast...

Page 44: ...s user opens the Host Console The number of available pointer shapes depends on the version of the Java Virtual Machine installed on the Remote computer version 1 5 or above will offer the full list Above The Host Console window s Options menu Local Cursor options The term local refers to the cursor of the Remote side user s mouse in this case Video Settings This submenu opens a panel for changing...

Page 45: ...has problems after auto adjustment you can try adjusting this setting together and the Phase setting as mentioned below Phase Defines the phase for video sampling This is used with the above mentioned Clock setting to control the display quality Horizontal Offset Defines the horizontal positioning of the video Vertical Offset Defines the vertical positioning of the video Reset this Mode Resets vid...

Page 46: ...f network traffic even if the display content is not actually changing depending on the quality of the video input signal In general the default setting should be suitable for most situations Click the Force Composite Sync button if you are using a SUN computer or server on the Host side After adjusting any settings click the Apply button to save your changes Refresh Video Click this menu item in ...

Page 47: ...pping of the Soft Keyboard Local Keyboard This submenu is used to change the language specific mapping of the Remote computer The term Local is from the perspective of the Remote side user Normally the software of the Host Console determines the correct value automatically However depending on the particular Remote side Java Virtual Machine and browser settings this is not always possible A typica...

Page 48: ...as CTRL ALT DEL Click any entry and that specific command will be sent to the Host system A confirmation dialog will appear before the system sends the selected command to the Host system Click the OK button execute the key combination on the Host system Left The confirmation dialog box for confirming the sending of hotkey commands 47 ...

Page 49: ...e of the bar Other variables that may be displayed on the left hand side of the bar at include the size of the Host screen in pixels or Norm SSL to indicate a standard and a secure connection respectively The right hand side of the Status Bar may show the frame rate of the video in frames per second Fps and the current incoming In and outgoing Out transmission rates If compressed encoding is enabl...

Page 50: ...bove the Host Console Preview screen on the web GUI s Home Screen The Host Console window displays the redirected screen output as well as the remote controlled keyboard and mouse Input of the remotely located Host system which is controlled by the Remote side user via the DKVM IP1 The Host Console window is a Java Applet that establishes its own TCP connection to the DKVM IP1 See the screenshot b...

Page 51: ...ol the computer in front of him or her Due to network bandwidth limitations the Remote computer user may experience slight lag 4 1 2 Telnet Console In general the Telnet or SSH interface supports two operating modes command line mode and terminal mode Command line mode is used to control or display some parameters In terminal mode the passthrough access to the DKVM IP1 s serial port is activated i...

Page 52: ...click the relevant setting on the Serial Port Settings page screenshot below 2 Also before accessing Telnet or SSH click on Device Settings Serial Port to open the Serial Port Settings screen see the screenshot below Make sure Passthrough access to serial port via Telnet SSH is selected 51 ...

Page 53: ...be possible to perform a console redirection as long as the DKVM IP1 Host machine is using a text mode screen resolution To log into the Telnet console 1 In the left hand column of the web GUI click Remote Control Telnet Console 2 The Telnet Console screen will appear see the screenshot below 3 Type in the Login and Password These will be the same as the login and password you use to log into the ...

Page 54: ...mation version build number description terminal Activate terminal passthrough mode for the RS 232 serial port This mode provides Serial over IP functionality The hotkey sequence ESC e x i t type exit while holding the ESC key will switc the screen back to command mode vscaa Auto adjust the Host Console s video vscreset This command resets the video modes This is similar to the settings in the Hos...

Page 55: ...is telnet 192 168 0 70 SSH Console SSH2 The administrator can also run an SSH supported terminal emulation program such as PuTTY see the screenshots below The DKVM IP1 supports the SSH security protocol The device uses version 2 of the SSH protocol SSH2 to encrypt the transferred data and secure transmissions The SSH configuration interface is the same as that of Telnet except for the fact that SS...

Page 56: ...gin and password you use for the DKVM IP1 s web GUI Once you have successfully logged into the DKVM IP1 a command line will appear and you can enter the relevant management commands Above The login screen of an SSH supported terminal emulation program called PuTTY Type in help and press Enter to list all available commands The SSH interface uses the same commands as explained in the Telnet Console...

Page 57: ...ems to wake up The target computers servers first need to be configured to react to a Remote Wakeup command The DKVM IP1 also has to be pre configured with the address details of the target systems Please follow the configuration steps below Configuring the target computer server for Remote Wakeup To wake up a remotely located computer server via the DKVM IP1 some settings have to be pre configure...

Page 58: ...n click on the Advanced tab This will open up a screen similar to the screens below The two screens below are slightly different because they represent different brands of network controllers E Enable the Wake on Magic packet function which may be listed in the Property list on the left or may be a sub option of one of those entries depending on the brand of the network controller in the Host syst...

Page 59: ...G Click the OK button to save your changes 58 ...

Page 60: ...escription and the computer server s IP address C Click on the Get MAC button to obtain and automatically add the corresponding MAC address of the selected computer server D Click on the Apply button to save the entry E Click on the Reset to defaults button if you want to clear all entries F If you want to configure multiple target systems click on the More entries button to add more target comput...

Page 61: ...M IP1 Use a Type A Male to Type B Male USB cable to connect the port labeled USB DATA on the DKVM IP1 to an available USB port on the Host system After connecting the cable you should see a Removable Disk listed on the My Computer screen of the Host Console see the screenshot below Above Before using any Virtual Media functions the Host system should be linked via USB cable to the USB DATA port of...

Page 62: ... other removable devices such as USB storage drives with the Host system over a TCP network connection Thus with Drive Redirection you can use a virtual disk drive on the Host computer instead of an image file It is also possible to enable a Host computer to write data to the Remote user s local disk using it as if it was connected directly to the Host computer NOTE For the Drive Redirection featu...

Page 63: ...t write onto the same disk at the same time as computer operating systems cannot distinguish a local system from a redirected system WARNING If both the Host system and the Remote system try to write data on the same device at the same time data may be damaged and or lost Please use this feature only if you know what you are doing Above Click on Drive Redirection to see the status and setting opti...

Page 64: ...e Redirection function with care especially if write support is enabled Disabling Drive Redirection To disable the Drive Redirection function click Disable Drive Redirection on the Virtual Media Drive Redirection screen and then click Apply Force read only connections If you enable the Force read only connections function write support for the Drive Redirection feature will be switched off once yo...

Page 65: ...g a disk image file or drive to the Host system After ticking or unticking the checkbox click the Apply button to save your changes NOTE If the above setting is not enabled and if no disk image file is detected the Host system could possibly hang in boot mode due to changes in the boot order or the boot manager LILO GRUB Such incidents were reported for some Windows versions Windows 2000 and Windo...

Page 66: ...VD Image from the submenu In the screen on the right fill in the information below Share host Enter the server name or its IP address the computer server that shares out the image file Note For Windows 95 98 and Windows ME do not enter the IP address enter the server name e g NetBIOS Name Share folder name Enter the name of the relevant share folder Image file name Enter the name of the image file...

Page 67: ...cess rights Please log in as a system administrator or as root on UNIX systems It is also important to specify the correct IP addresses and device names Otherwise the DKVM IP1 may not be able to access the referenced image file properly This will cause the DKVM IP1 to leave the given file unmounted and instead display an error message 4 The specified Share file must be configured correctly Adminis...

Page 68: ...our network administrator Above To create a sharing folder and set up the usage permission levels of each user right click on the folder and follow this sequence Sharing and Security Sharing Share this folder Permissions UNIX and UNIX like OS UNIX Solaris Linux If you would like to access the share folder via SAMBA SAMBA must be set up properly You may either edit the etc samba smb conf SAMBA conf...

Page 69: ...and click the Set button to save the settings see the screenshot below 8 If the disk image file was set successfully a screen like the one below will appear 9 On the Remote computer in the Host Console window open My Computer The virtual CD will be listed as cd_boot F and described as a CD Drive see the screenshot below 68 ...

Page 70: ...oppy Image Upload screen When uploading a floppy disk image keep in mind that the maximum image size is limited to 1 44 MB To use a larger image mount this image via Windows Share or SAMBA see Using a Disk Image from a Windows Share file via SAMBA in section 5 2 3 for more details 69 ...

Page 71: ... suitable folder on your computer 3 Open your browser and log into the DKVM IP1 web GUI Click Virtual Media Floppy Image then click the Browse button to choose the image file 4 Click the Upload button to upload the selected image file to the DKVM IP1 s onboard memory 5 After you have uploaded the image file you will see the information screen below 6 Open the Host system s My Computer folder The f...

Page 72: ...ve if the motherboard BIOS on the Host computer supports the USB BOOTABLE function Notes 1 For any image creating software the output image s file extension must be img e g floppy_vir img 2 The uploaded disk image file will be kept in the onboard memory of the DKVM IP1 until the end of the current session A session ends when you log out or initiate a reboot of the DKVM IP1 71 ...

Page 73: ...m In this case we used the RawWrite program 2 On the program s configuration screen select the Read tab 3 Browse for or type in the name of the pre created file in which you would like to save the floppy disk image 4 Click the Read button to start the image creation process On UNIX and UNIX like OSes To create a disk image file you can use the dd command This is one of the original UNIX utilities ...

Page 74: ...e you would like to create an image from Specify the filename of the image and save the CD ROM content in that file Above The Nero program is one of several programs you can use to create a CD DVD disk image On UNIX and UNIX like OSes To create a disk image file you can use the dd command This is one of the original UNIX utilities and is included in every UNIX like OS UNIX Sun Solaris and Linux To...

Page 75: ...ick on the floppy disk button at the top right of the window see the screenshot below The Drive Redirection field will open above the Host Console window as shown in the screenshot below To close this field click on the floppy disk button again 3 The Remote side user can either redirect a local drive only available for Windows systems or an ISO CD DVD disk image 74 ...

Page 76: ...h to enable Write Support tick the Enable Write support checkbox Write support enables the Host computer to write on the Remote side user s local drive Use this feature with extreme caution as it may lead to loss of data WARNING If both the Host system and the Remote system try to write data on the same device at the same time data may be damaged and or lost Please use this feature only if you kno...

Page 77: ...tion field use the window that appears to select the ISO image file to redirect then click the Open button 6 Once the Drive Redirection configuration has been completed successfully the connected drive s name will be displayed in the Drive Redirection window 76 ...

Page 78: ...e local drive before it is redirected That means that it will try to prevent the local operating system from accessing the drive as long as it is redirected This attempt may fail especially if a file on the drive is open when the attempt is made In the case of such a locking failure you will be prompted if you want to establish the connection anyway If Write Support is enabled a drive which is not...

Page 79: ...M IP1 each username has permission levels that are assigned to it These permission settings affect how the user interfaces with the Host Console Permissions allow or forbid the user from performing various actions on the DKVM IP1 s web GUI pages There are three permission ranks that can be assigned to any user at any time by any user that has the relevant permission rank The highest permission ran...

Page 80: ... super and pass Make sure you change the password immediately after you have installed your DKVM IP1 User Management Settings Page Name Description Existing users Select an existing user for modification Once a user has been selected click the Lookup button to display the user s information New User name Enter a name for the new user account Password Enter a password for the selected user It must ...

Page 81: ...d use all functions Administrator Has permission to change most configurations and use most functions User Has permission to access only the basic functions of the Host Console NOTE The DKVM IP1 is equipped with a built in processor and memory unit which both have limitations in terms of the processing instructions and memory space To guarantee an acceptable response time we recommend that you do ...

Page 82: ...t above are user specific The super user can customize these settings for every user separately Changing the settings for one user does not affect the settings for the other users The following is a detailed description of each setting field Host Console Settings for User user selection box 81 ...

Page 83: ...connection speed to automatically choose the best settings for compression and color depth for the indicated network speed Manually This field lets you adjust both the compression rate and the color depth individually Depending on the selected compression rate the data stream between the DKVM IP1 and the Host Console will be compressed in order to save bandwidth Since high compression rates use mo...

Page 84: ...loaded The DKVM IP1 will provide a link to the JVM plugin if the Remote computer does not already have it installed The user could also install the latest Java software later if needed The advantage of downloading Sun s JVM is that it provides a stable and identical experience across different platforms The Host Console software is optimized for this JVM version and offers a wider range of functio...

Page 85: ...Typical examples are Control Alt Delete in Windows and DOS or Control Alt Backspace on Unix or Unix like operating systems for restarting X Server The syntax to define a new Button Key is as follows confirm keycode keycode confirm programs the system to display a confirmation dialog box Yes No before a keystroke sequence is sent to the remote host keycode is the key sequence that will be sent Mult...

Page 86: ...board and Apple Macintosh for the Apple Macintosh Key release timeout We recommend that you enable this setting if the Host system runs on a UNIX or UNIX like OS Mouse Speed Auto mouse speed Use this option if the mouse settings on the Host system use an additional acceleration setting The DKVM IP1 tries to detect the acceleration and speed of the mouse during the mouse sync process Fixed mouse sp...

Page 87: ...e filter setting needs less network data traffic and enables a faster video display but some small changes in the display may not be recognized immediately A small filter setting displays all changes instantly but may lead to a constant stream of network traffic even if the display content is not actually changing depending on the quality of the video input signal In general the default setting sh...

Page 88: ...gs click the Apply button to save your changes Once applied the new network settings will immediately come into effect WARNING Changing the network settings of the DKVM IP1 may result in losing your connection to it In case you change the settings remotely make sure that all the values are correct and that you still have a way to access the DKVM IP1 if the connection is lost such as through a loca...

Page 89: ... the subnet mask for the DKVM IP1 Gateway IP address Here you can set the gateway for the DKVM IP1 In case the DKVM IP1 needs to be accessible from networks other than the local one this IP address must be set to the local network router s IP address Primary DNS Server IP Address Here you can set the primary DNS server for the DKVM IP1 This option may be left blank but the DKVM IP1 will then be un...

Page 90: ...t of 22 will be used Bandwidth Limit This lets you limit the bandwidth used by the DKVM IP1 If this is blank no bandwidth limit will be applied Enable Telnet access This enables the Telnet function Enable SSH access This enables the SSH Secure Shell function Disable Setup Protocol Enable this option to exclude the DKVM IP1 from the setup protocol Setup protocol is a proprietary layer 2 MAC based p...

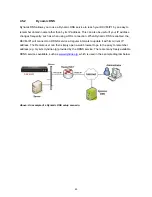
Page 91: ... When Dynamic DNS is enabled the DKVM IP1 will connect to a DDNS service at regular intervals to update it with its current IP address The Remote user can then simply open a web browser to go to the easy to remember address e g mykvm dyndns org provided by the DDNS service There are many freely available DDNS services available such as www dyndns org which is used in the example diagram below DKVM...

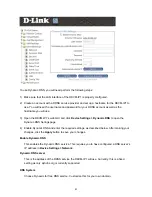
Page 92: ...ngs Dynamic DNS to open the Dynamic DNS Setings page 4 Enable Dynamic DNS and enter the required settings as described below After making your changes click the Apply button to save your changes Enable Dynamic DNS This enables the Dynamic DNS service This requires you to have configured a DNS server s IP address in Device Settings Network Dynamic DNS server This is the address of the DDNS service ...

Page 93: ... contain any spaces Password Enter the password for your DDNS service account Check time The DKVM IP1 registers itself for initiating the IP address of DKVM IP1 stored in the Dynamic DNS server at this time Check interval Set the interval the DKVM IP1 will use between IP address updates to the DDNS service WARNING The DKVM IP1 has its own independent real time clock Make sure the time settings of ...

Page 94: ...ly possible using an HTTPS connection The DKVM IP1 will not listen on the HTTP port for incoming connections KVM encryption This option controls the encryption of the RFB protocol RFB is used by the Host Console to transmit screen data from the Host computer to the Remote computer and keyboard and mouse data from the Remote computer back to the Host If this options is set to Off no encryption will...

Page 95: ...lease contact your network administrator When the DKVM IP1 receives a TCP packet from an IP address each rule will be run in order in a chain rule fashion to determine whether to allow access to the DKVM IP1 If an IP address matches the first rule the rule s action will be used to determine access If the IP address does not match the specified rule the IP address will be checked against the next r...

Page 96: ...esignated IP range ACCEPT will accept connections from the IP address and DROP will block connections from the IP address 3 After entering the above settings click the Insert button to save the new rule 4 Click the Apply button to save your changes You can also click the Append button to edit and existing rule click the Replace button to replace a rule or click the Delete button to delete a rule A...

Page 97: ...nerate and install a new base64 X 509 certificate that is unique for a particular DKVM IP1 In order to do this the DKVM IP1 can generate a new cryptographic key and the associated Certificate Signing Request CSR that will need to be certified by a Certification Authority CA A CA verifies that you are the person who you claim you are and signs and issues an SSL certificate to you Above The Certific...

Page 98: ...City Enter the city where your organization is located State Province Enter the state or province where your organization is located Country ISO code Enter the country where your organization is located This is the two letter ISO code e g DE for Germany or US for the USA Note the country code must be entered in CAPITAL LETTERS Challenge Password Some certification authorities require a challenge p...

Page 99: ...icking Create on the CSR page produces this CSR information form 2 Download the Remote computer by clicking the Download button see the screenshot above This will open a CSR string in a program file such as Notepad as shown in the screenshot below on your Remote computer Above The first part of a newly generated CSR string as it looks when your administration computer downloads it onto a Notepad f...

Page 100: ...nce you receive the certificate upload the certificate to the DKVM IP1 by clicking on the Browse button selecting the certificate file then clicking the Upload button as shown in the screenshot below Above Once you receive the certificate upload it to the DKVM IP1 using the Browse and Upload buttons on the Certificate Upload box After completing these three steps the DKVM IP1 will have its own cer...

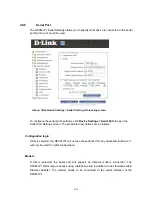
Page 101: ...rial Port Settings screen The parameter descriptions are as follows Configuration login If this is selected the DKVM IP1 will not use the serial port for any advanced functions it will only be used for initial configuration Modem If this is selected the serial port will support an Internet modem connection The DKVM IP1 offers remote access using a telephone line in addition to the standard built i...

Page 102: ...wering this speed Modem Init String Enter the initialization string used by the DKVM IP1 to initialize the modem The default value will work with most modern standard modems directly connected to a telephone line In case you have a special modem or if the modem is connected to a local telephone switch that requires a special dial sequence in order to establish a connection to the public telephone ...

Page 103: ... can also define Key Words for that serial port which will then trigger email notifications or SNMP traps that will be sent to an administrator if the keyword is found in the logged data The way in which the device deals with a detected keyword can be configured in the Event Log section on page 104 4 5 6 Date Time Above Click Device Settings Date Time to open this configuration screen On this scre...

Page 104: ...the date and time using the formats specified Synchronize with NTP Server Select this option to use an NTP server to set the time automatically Enter the address of the NTP server you want to use in the Primary Time server text box You can enter another NTP server in the Secondary Time server text box in the event that the Primary Time server is unavailable Also make sure you set the UTC Offset fo...

Page 105: ... or a firmware update can be logged to several different destinations Each type of event belongs to an event group for which logging can be separately activated or deactivated Above Click Device Settings Event Log to set the events that should be logged 104 ...

Page 106: ...L GUI is used to restart the DKVM IP1 all log data will be saved and will be available after the DKVM IP1 has been restarted However if the DKVM IP1 loses power or a hard reset is performed all log data will be lost To avoid this use one of the following logging methods NFS Logging enabled This allows you to log events to a file on an NFS server To use NFS Logging tick the NFS Logging Enabled chec...

Page 107: ...n IP address every time a log event occurs If the receiver requires a community string you can set it in the appropriate text field Most of the event traps only contain one descriptive string with all the information about the log event Only authentication and host power events have their own trap class that consists of several fields with detailed information about the event To receive SNMP traps...

Page 108: ... Device Host Power Host Host Reset Host Connection to Host Console failed reason Console Connection to client established Console Connection to client closed Console Security Violation Security Login failed Auth Login succeed Auth 107 ...

Page 109: ...an be very useful if you already use a RADIUS server to authenticate users for your network and allows you to use existing authentication information Above Click Device Settings Authentication to open this setup screen NOTE Whatever settings the superuser may configure he or she will always be able to log in via the network with the username password combination for the super username The superuse...

Page 110: ...g on your specific situation If there is no such profile your access via RADIUS authentication will be refused In terms of the remote activity mechanism logging in via RADIUS works similarly to the Host Console if there is no activity for half an hour your connection to the DKVM IP1 will be aborted and closed Server Enter either the IP address or the hostname of the RADIUS Server to connect to For...

Page 111: ... completed The default value is 3 4 5 9 USB This screen lets you set whether to force use of USB 1 1 with the DKVM IP1 You should only need to enable this setting if the Host computer does not support USB 2 0 After making any changes to this screen click the Apply button to save your changes 4 5 10 Config File On this screen you can save the configuration of the DKVM IP1 to file Click the Backup b...

Page 112: ... status updating its firmware viewing the event log and resetting the unit 4 6 1 Device Information The Device Status page contains a table with information about the DKVM IP1 s hardware and firmware This information is useful if technical support is required Click Maintenance Device Information to view this table 111 ...

Page 113: ...ctive on that user s computer If the Host Console is opened in Exclusive Access mode the term exclusive is added For more information about this option see the section 3 3 2 Control Bar of the Host Console The column on the far right displays either the term active for an active user or shows the number of minutes that the user has been inactive 4 6 2 Event log The Event Log displays all events th...

Page 114: ...lled firmware If you need to update the firmware to the latest version the DKVM IP1 s firmware can be updated remotely You can obtain the latest firmware from the D Link website Before you can start updating the firmware of your DKVM IP1 the new uncompressed firmware file has to be accessible on the system that you use for connecting to the DKVM IP1 To update the DKVM IP1 s firmware please follow ...

Page 115: ...M IP1 with the new firmware The update process may take a few minutes to complete WARNING The update process cannot be stopped once it has started D process do not disconnect power or the Etherne shows you the version number of the DKVM IP1 s current firmware and the ersion of the uploaded firmware Clicking the Update button will proceed to update the uring this t cable as it may cause the update ...

Page 116: ...nit Reset to view the Reset panel To reset a specific functionality click on the related Reset button Clicking the Reset button in the Reset Device field will reboot the entire DKVM IP1 system It will close all current connections from the Host computer to any Remote computers The whole process will take about one minute Resetting subsystems e g the video engine will take only a few seconds and wi...

Page 117: ...Flow control none Enter the DKVM IP1 s debugging mode There are two ways to do this a Reboot the DKVM IP1 device During the first 2 seconds of boot up press the ESC key on the computer that s connecting through the serial port a few times to get to a prompt b Press and hold the computer s ESC button while you push and release the DKVM IP1 s Reset button and then release the ESC button after 2 seco...

Page 118: ...ork with most standard KVMs 6 When you set up the username and password what is the maximum number of letters and digits that can be used The DKVM IP1 accepts up to 32 letters and digits for the username and password 7 How many users can access the DKVM IP1 at the same time The DKVM IP1 can accommodate up to 15 concurrent users 8 What level of data encryption does the DKVM IP1 provide The DKVM IP1...

Page 119: ...xception processing message This may be due to improper BIOS settings If the Host system is not equipped with a floppy disk drive check the BIOS to make sure it is set to No floppy drive installed 5 The DKVM IP1 web GUI pages are inconsistent or have errors Make sure your browser cache settings are not set to never check for newer pages or something similar Otherwise web pages may be loaded from y...

Page 120: ...to system cache than to applications Try the following steps to solve this issue a Go to Control Panel System In Windows XP go to Control Panel Performance and Maintenance System Advanced Performance Settings Advanced In Windows 2000 in the Advanced tab click Performance Settings b If System cache is selected in Memory Usage change it to Programs and click the OK button to save your changes See th...

Page 121: ...sync even after clicking the Sync button Check to make sure that the mouse settings on your Host computer have the options Enhance pointer precision or Automatically move mouse pointer to the default button in a dialog box disabled For Windows XP go to Control Panel Printers and Other Hardware Mouse Pointer Options See page 23 for detailed information 10 In Windows Vista the mouse won t work in th...

Page 122: ...eo quality is bad or the picture is grainy Adjust the brightness and contrast settings by clicking Options Video Settings in the top bar of the Host Console window or click on the Auto Adjust Video button to correct flickering video 14 The video on the Remote computer s Host Console window is surrounded by a black border The black bars may be caused by a fixed video mode where the resolution of th...

Page 123: ...ost Console Button Key to send the keystroke combination for you This can be done in the KVM Settings User Console screen of the DKVM IP1 s web GUI For more information refer to section 4 4 1 User Console 18 I can t upload the signed certificate in Mac OS X If an internal error occurs while uploading the signed certificate either change the extension of the file to txt or add a file helper using t...

Page 124: ...enough permissions if the signature of the applet cannot be verified To solve the problem add the following lines to the java policy file of Opera e g usr share opera java opera policy grant codeBase nn pp rc RemoteConsoleApplet permission java lang RuntimePermission accessClassInPackage sun 123 ...

Page 125: ...alphanumeric keys used for hotkey purposes in application programs are in an identical position no matter what language mapping you are using Some of the keys may have aliases meaning that they can be named by 2 key codes in the table these are separated by a comma The key codes in the table below refer to a standard 104 key PC keyboard with US English language mapping The layout for this keyboard...

Page 126: ...T RCTRL RSHIFT LCTRL CTRL LALT ALT F9 F10 F11 F12 PRINTSCREEN SCROLL LOCK BREAK INSERT HOME PAGE UP DELETE END NUMPAD5 NUMPAD6 NUMPAD7 NUMPAD8 NUMPAD9 NUMPADPLUS NUMPAD PLUS NUMPAD NUMPADMUL NUMPAD MUL NUMPADMINUS NUMPAD MINUS NUMPADENTER WINDOWS MENU 125 ...

Page 127: ... able to detect them Resolution x y Refresh Rates Hz 640 x 350 70 85 640 x 400 56 85 640 x 480 60 72 75 85 90 100 120 640 x 480 66 6 720 x 400 70 85 800 x 600 56 60 70 72 75 85 90 100 832 x 624 75 1024 x 768 60 70 72 75 85 90 100 1152 x 864 75 1152 x 870 75 1152 x 900 66 76 1280 x 960 60 85 1280 x 1024 60 75 85 1600 x 1200 60 2048 x 1536 local console 85 126 ...

Page 128: ...ntrol Telnet Console Yes Yes Yes Virtual Media Yes Yes Yes User Management Change Password Yes Yes Yes User Management Users Yes KVM Settings User Console Yes but not Misc Settings Yes Yes KVM Settings Keyboard Mouse Yes Yes KVM Settings Video Yes Yes Device Settings Yes Maintenance Device Information Yes Yes Yes Maintenance Event Log Yes Maintenance Update Firmware Yes Maintenance Unit Reset Keyb...

Page 129: ...nnection Type Video Compression Color Depth Bandwidth Used Comments Video Optimized Video Optimized 8 bit 3 3 3 MB s uncompressed synchronized video data most bandwidth needed Video Optimized high color Video Optimized 16 bit 4 3 5 0 MB s uncompressed synchronized video data most bandwidth needed LAN high color 0 no compression 16 bit 1 0 1 3 MB s uncompressed video data LAN 0 no compression 8 bit...

Page 130: ...cesses or by programs executed by privileged users The table below shows some of the well known port numbers For more details please visit the IANA website http www iana org assignments port numbers Port Number Protocol TCP UDP 21 FTP File Transfer Protocol TCP 22 SSH Secure Shell TCP 23 Telnet TCP 25 SMTP Simple Mail Transfer Protocol TCP 37 Time TCP UCP 39 RLP Resource Location Protocol UDP 49 T...

Page 131: ...te text host names into numeric IP addresses LDAP Lightweight Directory Access Protocol A protocol for accessing directory information NAT Network Address Translation An Internet standard that enables a LAN to use one set of IP addresses for internal traffic and a second set of addresses for external traffic This enables a company to shield internal addresses from the public Internet NFS Network F...

Page 132: ...ication and accounting protocol It enables remote access servers to communicate with a central server to authenticate dial in users and their access permissions A company stores user profiles in a central database that all remote servers can share SNMP Simple Network Management Protocol A protocol that system administrators use to monitor networks and connected devices and to respond to queries fr...

Page 133: ...A secure transport protocol based on public key cryptography Telnet A terminal protocol that provides an easy to use method of creating terminal connections to a network host 132 ...

Page 134: ... has been tested and found to comply with the limits of a Class B computing device in accordance with the specifications in Part 15 of the FCC Rules These specifications are designed to provide reasonable protection against such interference in a residential installation However there is no guarantee that interference will not occur in a particular installation If this device does cause harmful in...

Reviews: