Fixing Unit
0U6X-0C6
Dirt may adhere to the fixing units inside the machine and cause black streaks to appear on printouts. To clean the
fixing unit, perform the following procedure. Note that you cannot clean the fixing unit when the machine has
documents waiting to be printed. To clean the fixing unit, you need plain A4 or Letter size paper. Set the paper in the
paper drawer or multi-purpose tray ( Loading Paper in the Paper Drawer(P. 39) Loading Paper in the Multi-
Purpose Tray(P. 43) ) before performing the following procedure.
●
Cleaning consumes the toner cartridge. Make sure that there is sufficient toner cartridge remaining
beforehand. Checking the Amount Remaining in the Toner Cartridge(P. 424)
1
Press
and tap <Menu>.
2
Tap <Adjustment/Maintenance>.
3
Tap <Clean Fixing Assembly>.
4
Check that the size and type of paper displayed is loaded in the machine, and tap
<OK>.
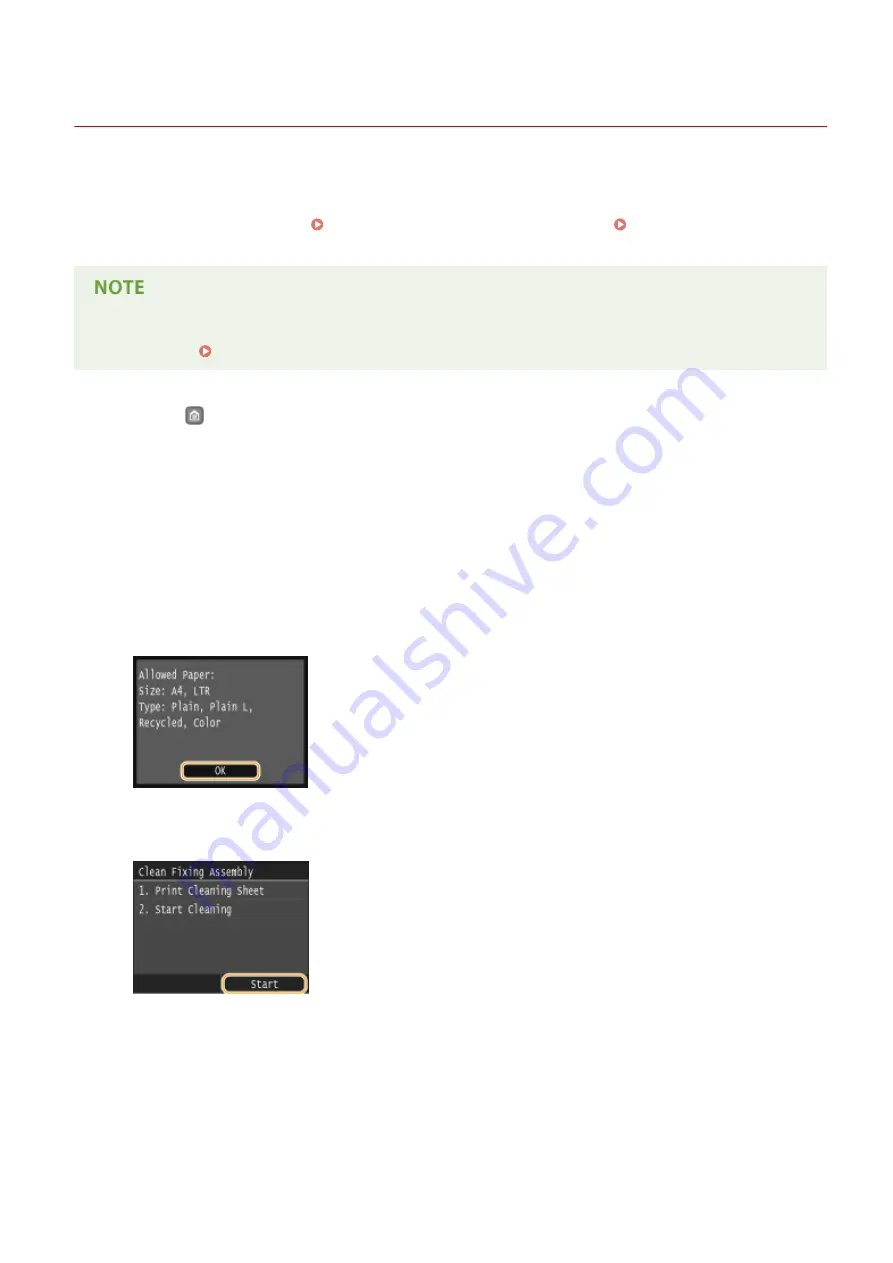
5
Tap <Start>.
➠
The cleaning sheet is printed out.
6
Load the printed cleaning sheet in the multi-purpose tray, with the printed side face
down.
Maintenance
421
Summary of Contents for LBP253 Series
Page 1: ...LBP253x User s Guide USRMA 0769 00 2016 06 en Copyright CANON INC 2015 ...
Page 79: ...Printing 73 ...
Page 121: ...LINKS Printing via Secure Print P 116 Printing 115 ...
Page 197: ...3 Click OK 4 Click Close LINKS Setting Up Print Server P 192 Network 191 ...
Page 381: ...Troubleshooting 375 ...
Page 467: ...For more information about this function see Basic Printing Operations P 74 Appendix 461 ...
Page 499: ...Appendix 493 ...
Page 506: ...Manual Display Settings 0U6X 0HF Appendix 500 ...

