Making Prints Using the Stack Bypass
2-30
2
Basic Operati
ons
Making Prints Using the Stack Bypass
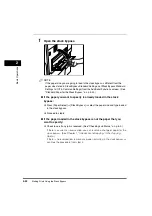
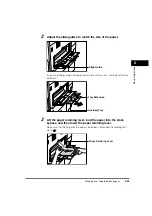
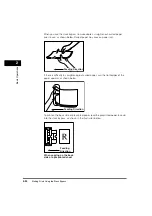
If you are making prints on tracing paper, labels, transparencies, nonstandard
paper size stock, or envelopes, load the paper stock into the stack bypass.
IMPORTANT
•
Note the following points when using the stack bypass:
- Paper Quantity: one to approximately 50 sheets (20 lb bond (80 g/m
2
), stack
approximately 1/4" (5 mm) high)
- Paper Size: 5 9/16" x 7 1/8" to 11 5/8" x 17" (140 mm x 182 mm to 297 mm x 432 mm)
- Paper Weight: 17 to 32 lb bond (64 to 128 g/m
2
)
- Paper which has been rolled or curled must be straightened out prior to use, to allow
the paper to feed smoothly through the stack bypass (allowable curl amount: less than
3/8" (10 mm) for normal paper, less than 1/5" (5 mm) for heavy paper). There are some
types of paper stock which may meet the above specifications, but cannot be fed into
the stack bypass.
•
Do not load different size/type paper at the same time.
•
Feed tracing paper one sheet at a time, and remove each sheet as it is delivered to the
output tray. Loading several sheets of tracing paper together may cause paper jams.
•
Depending on the type of heavy paper you want to load, if you load multiple sheets of
heavy paper into the stack bypass, a paper jam may occur. In this case, load only one
sheet of heavy paper at a time.
•
If you are making two-sided prints, select the Two-sided mode. The printed paper may
crease depending on the moisture absorption condition of the paper, and if you copy the
two pages as two one-sided documents.
•
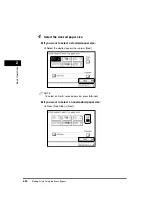
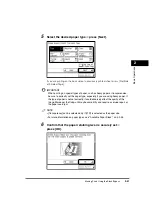
To print on the back side of preprinted paper, load the paper into the stack bypass, and
press [2nd Side of 2-Sided Page] on the paper selection screen that appears.
•
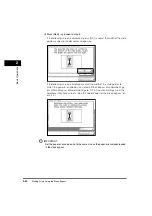
When printing on special types of paper, such as heavy paper or transparencies, be sure
to correctly set the paper type, especially if you are using heavy paper. If the type of
paper is not set correctly, it could adversely affect the quality of the image. Moreover, the
fixing unit may become dirty and require a service repair, or the paper could jam.
•
If you are printing on envelopes, do not allow more than 10 envelopes to accumulate in
the output tray. Always empty the output tray once 10 envelopes have accumulated.
•
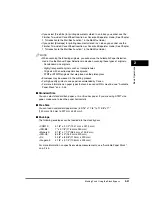
If you select [Free Size] for copying, you cannot use the Auto, Entire Image, Finisher,
1 2-Sided, 2 2-Sided, Book 2-Sided, Two-page Separation, Cover/Sheet Insertion,
Image Combination, Shift, Transparency Interleaving, or Image Repeat mode. (See
Chapter 1, "Introduction to Copying," in the
Copying Guide
.)
•
If you select [Envelope] for copying, you cannot use the Finisher, 1 2-Sided, 2 2-Sided,
Book 2-Sided, Two-page Separation, Cover/Sheet Insertion, Image Combination, or
Transparency Interleaving mode. (See Chapter 1, "Introduction to Copying," in the
Copying Guide
.)
Summary of Contents for imageRUNNER 3530
Page 2: ...0 ...
Page 3: ...imageRUNNER 3530 2830 2230 Reference Guide 0 ...
Page 234: ...Adjusting the Machine 4 78 4 Customizing Settings ...
Page 252: ...Printing Secured Documents 5 18 5 Checking Job and Device Status ...
Page 300: ...License Registration 6 48 6 System Manager Settings ...
Page 352: ...Consumables 7 52 7 Routine Maintenance ...
Page 430: ...If the Power Does Not Turn ON 8 78 8 Troubleshooting ...
Page 450: ...Index 9 20 9 Appendix ...
Page 458: ...System Management of the imageRUNNER 3530 2830 2230 VIII ...
Page 459: ...0 ...


