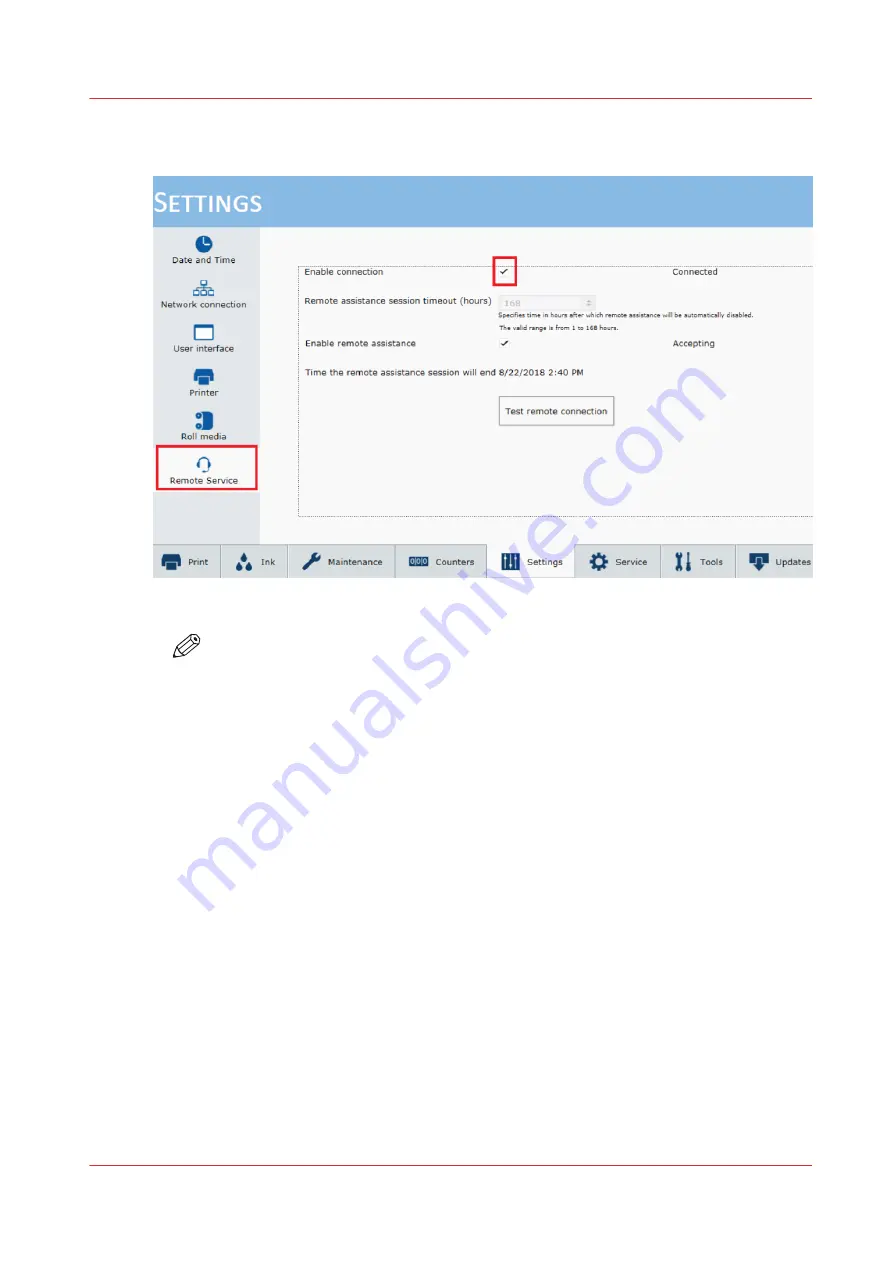
3.
Click on [Remote Service] and tick the checkbox [Enable connection] to allow the Arizona printer
to connect to the Remote Service server.
4.
The status should now change to 'Connected'.
NOTE
If the status remains 'Not connected' do the following.
1. Check that the Arizona printer is connected to the internet.
2. Make sure the proxy setting are configured correctly.
3. In the [Remote Service] window click on [Test remote connection] to try to connect
to the Remote Service server again.
If the status still remains ''Not connected' power Off and On the printer and repeat the
'Enable the Remote Service connection' procedure.
Enable the Remote Service connection
Chapter 12 - Troubleshooting and Support
227
Summary of Contents for Arizona 1300 Series
Page 1: ...Arizona 1300 Series User guide Canon Production Printing 2018 2020 ...
Page 6: ...Contents 6 ...
Page 7: ...Chapter 1 Introduction ...
Page 11: ...Chapter 2 Product Compliance ...
Page 14: ...Product Compliance 14 Chapter 2 Product Compliance ...
Page 15: ...Chapter 3 Safety Information ...
Page 38: ...Roll Media Safety Awareness 38 Chapter 3 Safety Information ...
Page 39: ...Chapter 4 Navigate the User Interface ...
Page 62: ...Software Update Module 62 Chapter 4 Navigate the User Interface ...
Page 63: ...Chapter 5 Operate the Printer ...
Page 85: ...Chapter 6 Operate the Arizona 13x0 XT ...
Page 93: ...Chapter 7 Roll Media Option ...
Page 120: ...Media Edge Protectors 120 Chapter 7 Roll Media Option ...
Page 121: ...Chapter 8 Static Suppression Option ...
Page 125: ...Chapter 9 Manage a White Ink Workflow ...
Page 173: ...Chapter 10 Ink System Management ...
Page 178: ...Change Ink Bags 178 Chapter 10 Ink System Management ...
Page 179: ...Chapter 11 Maintenance ...
Page 223: ...Chapter 12 Troubleshooting and Support ...
Page 234: ...Install software updates without Remote Service 234 Chapter 12 Troubleshooting and Support ...
Page 235: ...Chapter 13 Regulation Notices ...
Page 241: ...Appendix A Application Information ...
Page 247: ......


