you have a roll that is not even, before loading it, hold the roll in a vertical position and carefully
and evenly drop one end onto the floor, then tap lightly a few times. If any edges are crushed,
unwind and throw away the crushed area or cut off the crushed end of roll. If it is not possible to
repair, do not use it.
NOTE
If media has been stored on its side and has a pronounced flat side, do not use it as it will not
advance evenly.
Required tools
5mm hex key (supplied with the Roll Media Option)
Load Supply Media Roll and Position a Take-up Shaft
Procedure
1.
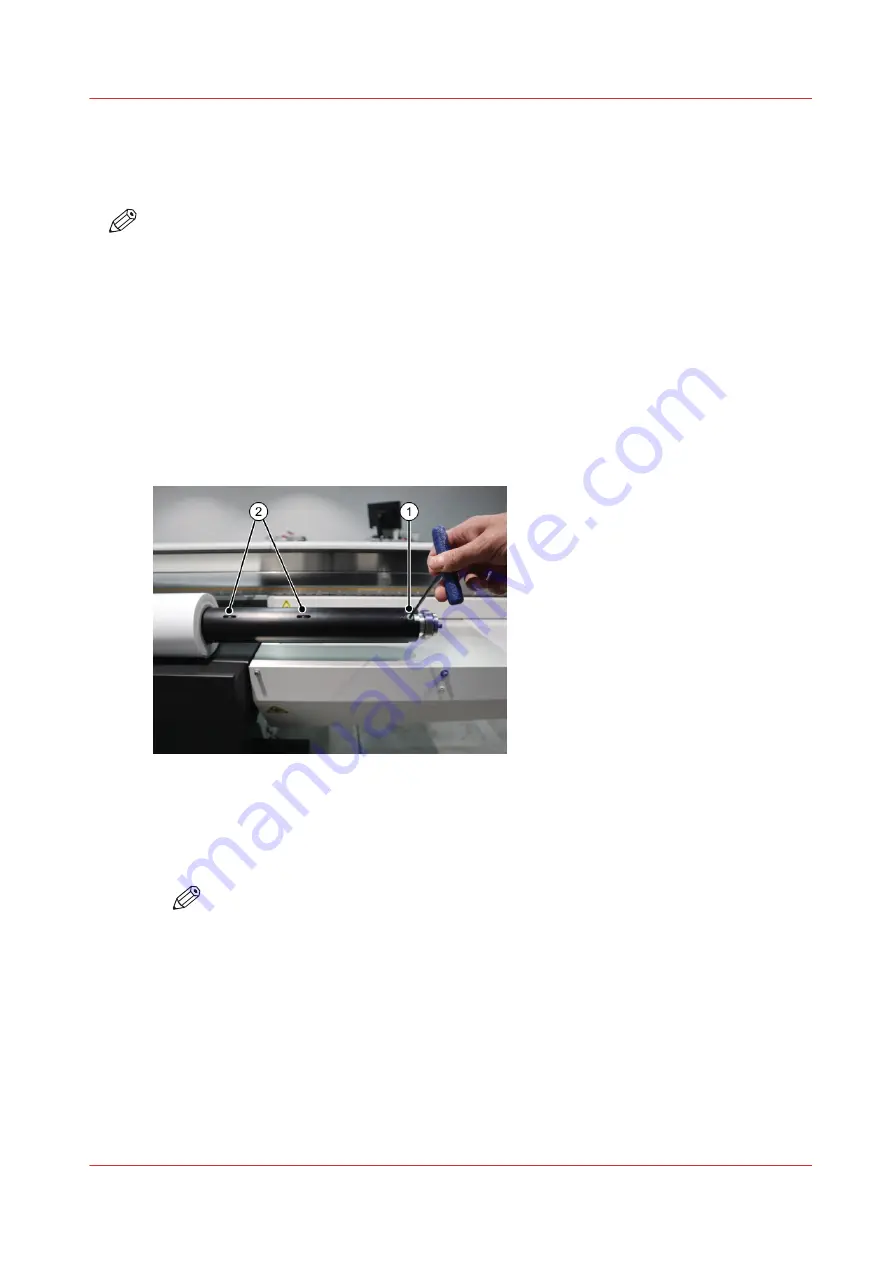
Place an empty media shaft on a suitable flat work area, positioned as shown, so that the 5mm
hex key is inserted on the right side of the shaft to lock and unlock the core locks.
[32] Unlock the Media Shaft Core Locks
2.
Turn counterclockwise with the supplied 5mm hex key (1) to unlock the media shaft core locks (2).
3.
Slide a new roll of media onto the supply shaft.
4.
Roughly center the roll on the shaft, and then insert the shaft into the Supply (bottom) position on
the printer. Insert one end of the shaft at a time.
NOTE
Load the shaft with the core lock and coupler end on the right side of the printer.
Load Media
Chapter 7 - Roll Media Option
101
Summary of Contents for Arizona 1300 Series
Page 1: ...Arizona 1300 Series User guide Canon Production Printing 2018 2020 ...
Page 6: ...Contents 6 ...
Page 7: ...Chapter 1 Introduction ...
Page 11: ...Chapter 2 Product Compliance ...
Page 14: ...Product Compliance 14 Chapter 2 Product Compliance ...
Page 15: ...Chapter 3 Safety Information ...
Page 38: ...Roll Media Safety Awareness 38 Chapter 3 Safety Information ...
Page 39: ...Chapter 4 Navigate the User Interface ...
Page 62: ...Software Update Module 62 Chapter 4 Navigate the User Interface ...
Page 63: ...Chapter 5 Operate the Printer ...
Page 85: ...Chapter 6 Operate the Arizona 13x0 XT ...
Page 93: ...Chapter 7 Roll Media Option ...
Page 120: ...Media Edge Protectors 120 Chapter 7 Roll Media Option ...
Page 121: ...Chapter 8 Static Suppression Option ...
Page 125: ...Chapter 9 Manage a White Ink Workflow ...
Page 173: ...Chapter 10 Ink System Management ...
Page 178: ...Change Ink Bags 178 Chapter 10 Ink System Management ...
Page 179: ...Chapter 11 Maintenance ...
Page 223: ...Chapter 12 Troubleshooting and Support ...
Page 234: ...Install software updates without Remote Service 234 Chapter 12 Troubleshooting and Support ...
Page 235: ...Chapter 13 Regulation Notices ...
Page 241: ...Appendix A Application Information ...
Page 247: ......


