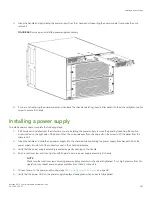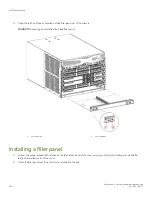
3. Pull out the spring-loaded latch release at each end of the cover and slide each latch towards the end of the cover.
This should slide the latches into the chassis and lock the panel in place. If not, the cover may not be seated fully into the slot.
Try unlatching both ends, pushing the cover firmly into the slot, then latching both ends again.
NOTE
Be sure filler panels are securely latched. If not, high pressure from fan operation may unseat blade from chassis
connectors.
FIGURE 74
Removing and installing the blade filler panel
1.
Latch pull tab
2.
Latch release
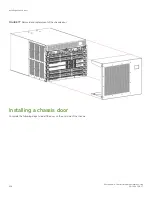
4. Reinstall the chassis door. The door must be installed to meet EMI compliance.
Installing a filler panel
Brocade X6-4 Director Hardware Installation Guide
53-1004106-07
199
Summary of Contents for X6-4
Page 12: ...Brocade X6 4 Director Hardware Installation Guide 12 53 1004106 07...
Page 20: ...Brocade X6 4 Director Hardware Installation Guide 20 53 1004106 07...
Page 28: ...Brocade X6 4 Director Hardware Installation Guide 28 53 1004106 07...
Page 64: ...Brocade X6 4 Director Hardware Installation Guide 64 53 1004106 07...
Page 86: ...Brocade X6 4 Director Hardware Installation Guide 86 53 1004106 07...
Page 102: ...Brocade X6 4 Director Hardware Installation Guide 102 53 1004106 07...
Page 130: ...Brocade X6 4 Director Hardware Installation Guide 130 53 1004106 07...
Page 140: ...Brocade X6 4 Director Hardware Installation Guide 140 53 1004106 07...
Page 166: ...Brocade X6 4 Director Hardware Installation Guide 166 53 1004106 07...
Page 196: ...Brocade X6 4 Director Hardware Installation Guide 196 53 1004106 07...
Page 200: ...Brocade X6 4 Director Hardware Installation Guide 200 53 1004106 07...
Page 204: ...Brocade X6 4 Director Hardware Installation Guide 204 53 1004106 07...
Page 210: ...Brocade X6 4 Director Hardware Installation Guide 210 53 1004106 07...
Page 224: ...Brocade X6 4 Director Hardware Installation Guide 224 53 1004106 07...
Page 238: ...Brocade X6 4 Director Hardware Installation Guide 238 53 1004106 07...


