LabelMark 3.1 User Guide
Gap between labels
– space between each label.
Horizontal
The horizontal space between each label column.
Vertical
The vertical space between each label row.
Label size
– full physical label size.
Width
Physical width of the label part.
Height
Physical height of the label part.
Printable area
– the portion of the label that will print. See Creating Zones on a Label for
information regarding utilizing more than one printable area.
Width
The width of the printable area of the label.
Height
The height of the printable area of the label.
X-Offset
The distance between the left side of the label and the
printable area.
Y-Offset
The distance between the top of the label and the printable
area.
Permashield
TM
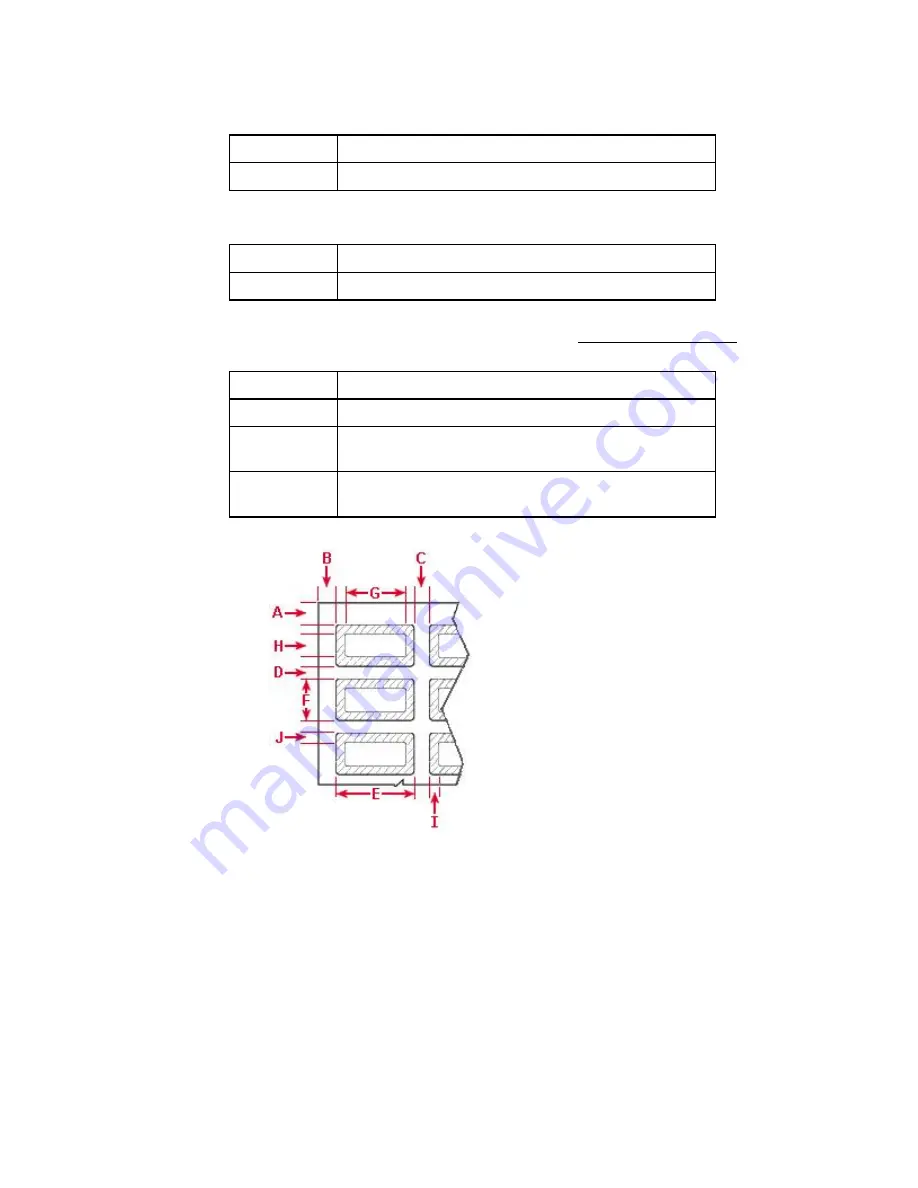
Part Layout
A – Top margin
B – Left margin
C – Horizontal gap
D – Vertical gap
E – Label width
F – Label height
G – Printable width
H – Printable height
I – X-Offset
J – Y-Offset
Note:
A clear overlaminate extends
past the label on each side. As a
result, the printable area is smaller
than the label size.
4. Save your changes:
Click
Save Part to Database
to make your custom part available along with the master Brady
parts the next time you create a label file.
LabelMark
prompts for a part name and ensures that
you do not overwrite a master part. Your new part will appear at the bottom of the
Master
parts list.
Click
Apply to File
to use the modified part only in the current file. You will
not
see your
custom part along with the master Brady parts the next time you create a new label file. The
system adds an asterisk to the part in the status bar to indicate it is modified.
40
Advanced
LabelMark
Techniques
Summary of Contents for LabelMark 3.1
Page 1: ...LabelMark 3 1 User Guide...
Page 2: ......
Page 6: ......
Page 26: ......
Page 72: ......
Page 102: ......
Page 104: ...LabelMark 3 1 User Guide 98 Symbols Guide...
Page 105: ...Symbols Guide Symbols Guide 99...
Page 106: ......


