LabelMark 3.1 User Guide
Inserting Date and Time Information
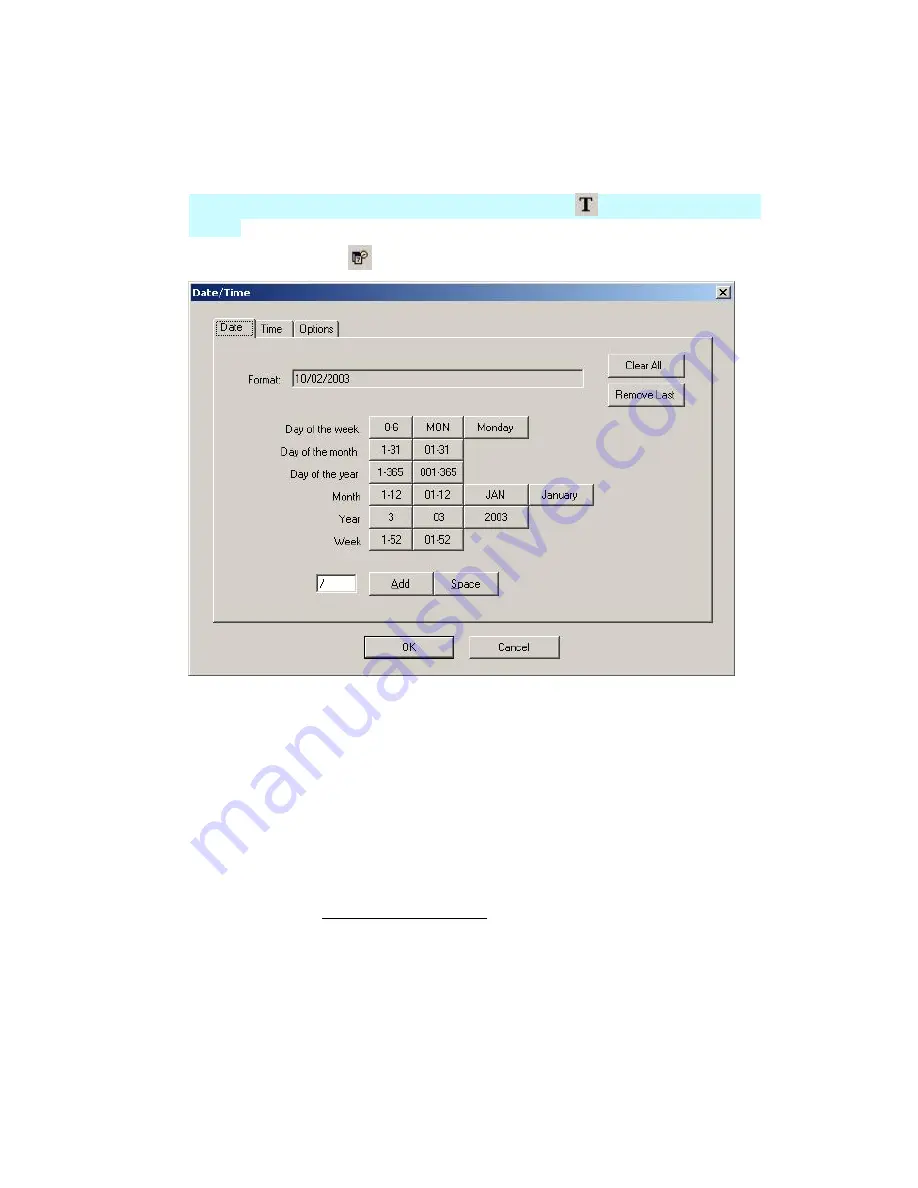
To insert date/time information into your label(s):
1. Click the desired location on the label to place the date/time information.
LabelMark Plus
Note:
In
LabelMark Plus
, select the
Text
icon
before clicking the desired
location.
2. Click
the
Date/Time
icon
on the
Action
toolbar.
3. Build the date/time string that appears in the
Format:
box:
Clear All
deletes the contents of the
Format:
box, so you can start over.
Add date/time elements by clicking on the desired buttons e.g. January, AM/PM, etc.:
o
Click the
Date
tab to add date elements to the string or click
Time
to add time elements.
o
Click
Space
to insert a space.
o
Click
Add
to insert the character in the text box (you may change the character at any
time).
Remove Last
deletes the date/time element you added most recently.
Specify the number of labels and which labels the date/time should appear on with the
Options
tab. See Serializing Labels (Simple) for an explanation of the options.
4. Specify the data and copy options:
Specify the date/time data to use:
o
Click
Use system date/time
to use the current date/time setting on your computer.
o
Or, click
Select date/time
and type the specific date and time you want to insert.
Set the number of labels on which to insert the date/time field with
Copies
.
Select an
Include date/time on
radio button to skip labels if desired.
30
Basic LabelMark Techniques
Summary of Contents for LabelMark 3.1
Page 1: ...LabelMark 3 1 User Guide...
Page 2: ......
Page 6: ......
Page 26: ......
Page 72: ......
Page 102: ......
Page 104: ...LabelMark 3 1 User Guide 98 Symbols Guide...
Page 105: ...Symbols Guide Symbols Guide 99...
Page 106: ......


