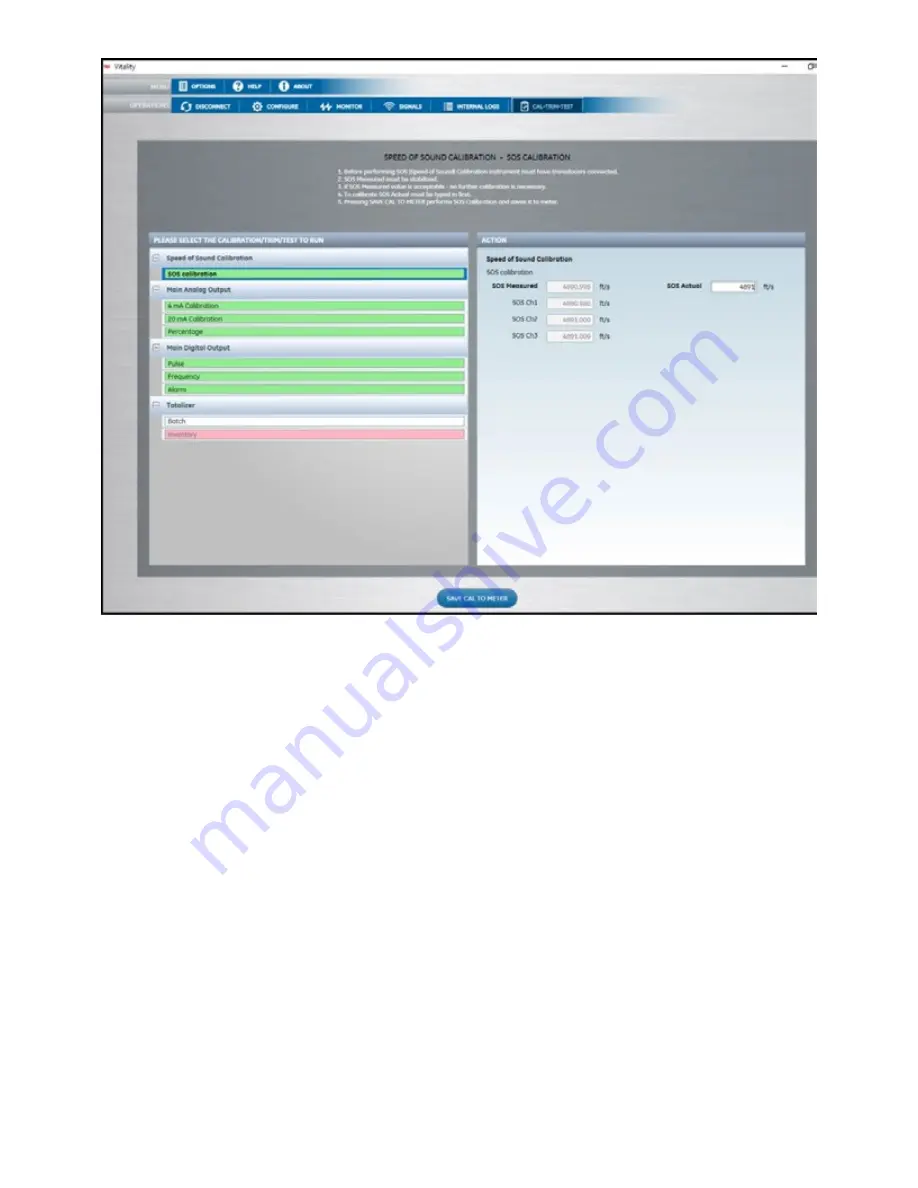
Figure 78: SOS calibrations
Depending on the path configuration, the SOS values for SOS
Measured (composite), SOS Ch1, SOS Ch2, SOS Ch3 will be
displayed and dynamically updated.
6. Enter the expected SOS value for your specific flow
conditions in [SOS Actual] to fine-tune the meter for all
its channels.
7. Click on [Save CAL TO METER], the displayed SOS values
shall be updated accordingly.
8. Acceptance Criteria: ± 1 ft/s or 0.3 m/s.
3.7 Calibration
This menu is used to Calibrate the XMT1000 meter to another
flow rate reference. Use steps as in section “Log-in and
Primary Pages” to navigate to the Calibration page.
Note:
Use either [Meter Factor] or [K-Table], do not use both
at the same time.
1. Scroll and highlight [Meter Factor] and press [ENTER].
Meter Factor is a single multiplier that is applied to
the Composite Velocity measurement. The default
value is 1.0 and if a single factor would suffice to bring
the velocity range measured towards another flow
rate reference, this option is used. If a single factor is
insufficient to cover the flow velocity range or viscosity
range use K-Table option.
2. If using [Meter Factor], skip the following steps, otherwise
Scroll and highlight [Calibration Mode] and press
[ENTER]. The meter supports Gate(Totalizer) or Frequency
Output Calibration methods.
a. If Gate(Totalizer) is chosen, connect the Gate inputs to E1
and E2 test points found on the bottom left front side of
the main PCB once the front cover is removed.
b. If Frequency Output is used for calibration, set the
[Measurement Type], its corresponding
[Base Value], [Full Value], and respective [Base
Frequency], [Full Frequency]. Set a [Test Frequency]
value to test the Frequency Output connection before
starting Calibration.
3. Scroll and highlight [Calibration Type] and press [ENTER].
The calibration type can be set to either Velocity or
Reynolds number. Depending on the selection the
K-Table points will be updated to accept Velocity or
Reynolds number entries.
4. Scroll and highlight [Reset K-Table] and press [ENTER].
Select the table to reset. You can choose to reset all
tables, or composite K-Table or any specific channel
K-Table.
5. Scroll and highlight [K-Table Selection] and press
[ENTER]. The default option is Off. For “as found”
calibration leave the [K-Table Selection] as OFF. After
51
Summary of Contents for Panametrics PanaFlow LC
Page 1: ...PanaFlow LC User s manual 910 327 Rev A...
Page 2: ...ii...
Page 3: ...PanaFlow LC Panametrics liquid ultrasonic flowmeter User s manual 910 327 Rev A Sep 2019 iii...
Page 4: ...no content intended for this page iv...
Page 12: ...no content intended for this page xii...
Page 44: ...Figure 58 Setting up pulse output 32...
Page 49: ...Figure 60 Setting up alarm output 37...
Page 80: ...no content intended for this page 68...
Page 82: ...no content intended for this page 70...
Page 86: ...no content intended for this page 74...
Page 98: ...Table 30 Service Record Date Description of Service Performed By 86...
Page 104: ...no content intended for this page 92...
Page 106: ...no content intended for this page 94...
Page 114: ...no content intended for this page 102...
Page 138: ...no content intended for this page 126...
Page 140: ...no content intended for this page 128...


