Application of
Assembly
3 - 167
Needle-presser module
Application o
f
Assembly
Application of
Assembly
16
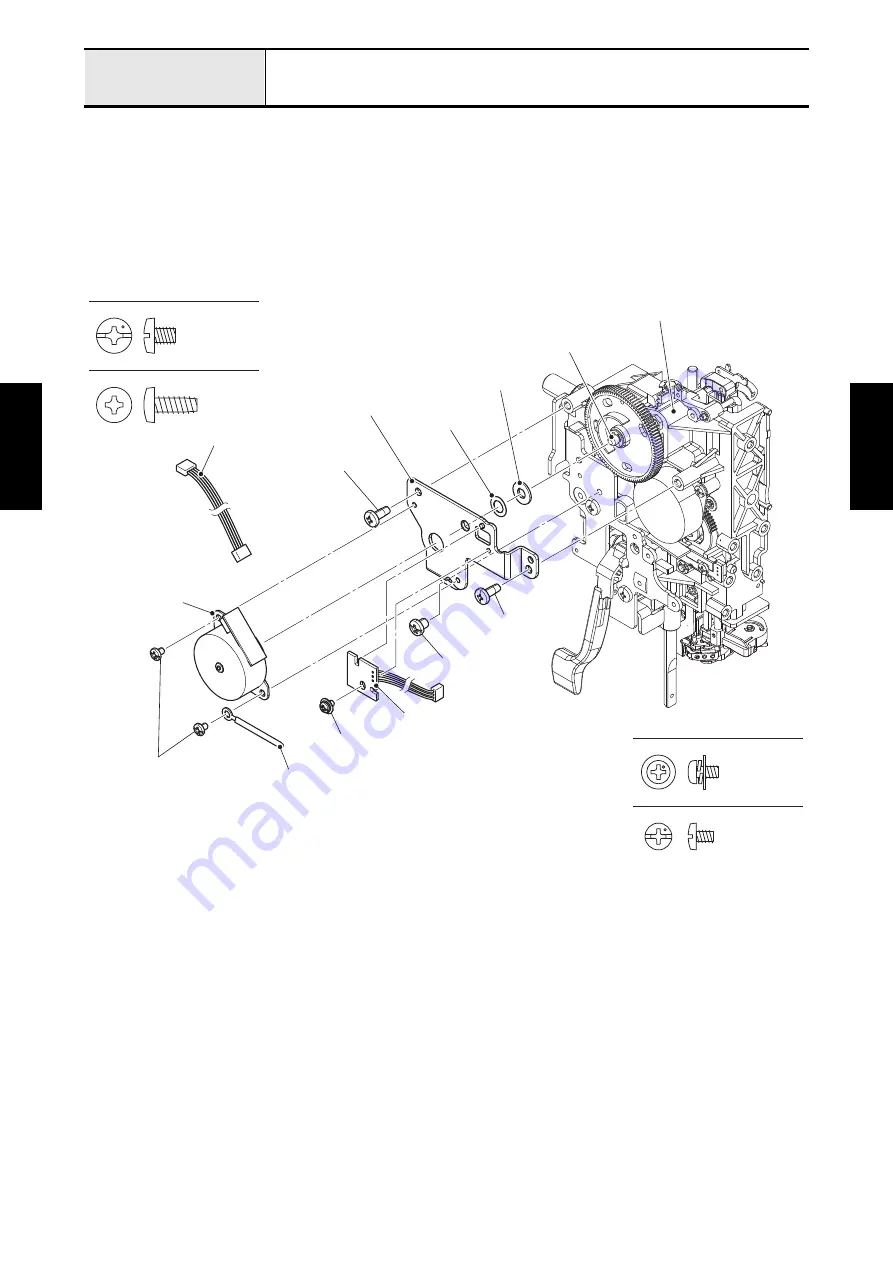
Attachment of Presser PM holder, PF INIT PCB assy and PFPM insulation assy
1. Set the washer, washer, wave spring and presser PM holder to the presser dial shaft assy, and secure
them to the upper unit holder assy with the screw (screw, bind M4x5) and two screws (taptite, bind B
M4x10).
2. Align the positioning notch of PF INIT PCB assy with the boss of presser PM holder, and attach the PF
INIT PCB assy to the presser PM holder with the screw (screw, pan (S/P washer) M3x5).
3. Connect the lead wire assy PFPM to the PFPM insulation assy. Attach the PFPM insulation assy and
the clip to the presser PM holder with two screws (screw, bind M3x4).
Screw, Bind M4X5
Taptite, Bind B M4X10
Screw, Bind M3X4
Screw, Pan (S/P washer) M3X5
Lead wire assy PFPM
Taptite, bind B M4x10
Presser PM holder
Washer, wave spring
Washer
Presser dial shaft assy
Screw, bind M4x5
PF INIT PCB assy
Screw, pan
(S/P washer) M3x5
Clip
PFPM insulation assy
Screw, bind M3x4
Taptite, bind B M4x10
Upper unit holder assy
Summary of Contents for BLDY
Page 2: ......


