30
one sequencing position. If not all sequencing positions are needed,
choose
Circular
to cause the sequence to return to the beginning.
To set a monitor sequence schedule, follow these instructions.
1. Click
Sequence Schedule
.
2. Select the camera channels you want to be shown in the sequence
in the order you want them to appear.
3. Click
Confirm
to save your sequence.
Monitor Dwell allows you to select the amount of time a camera or
screen division will appear on the live screen when the display has been
set to sequence (1 second – 120 seconds).
1. Click
Monitor Dwell
.
2. Click
Keyboard Icon
and use the on-screen keyboard to enter the
amount of time
– OR –
hover the mouse arrow and move up and
down the scroll wheel
– OR –
use the up and down arrow buttons
to change the number of seconds for the dwell.
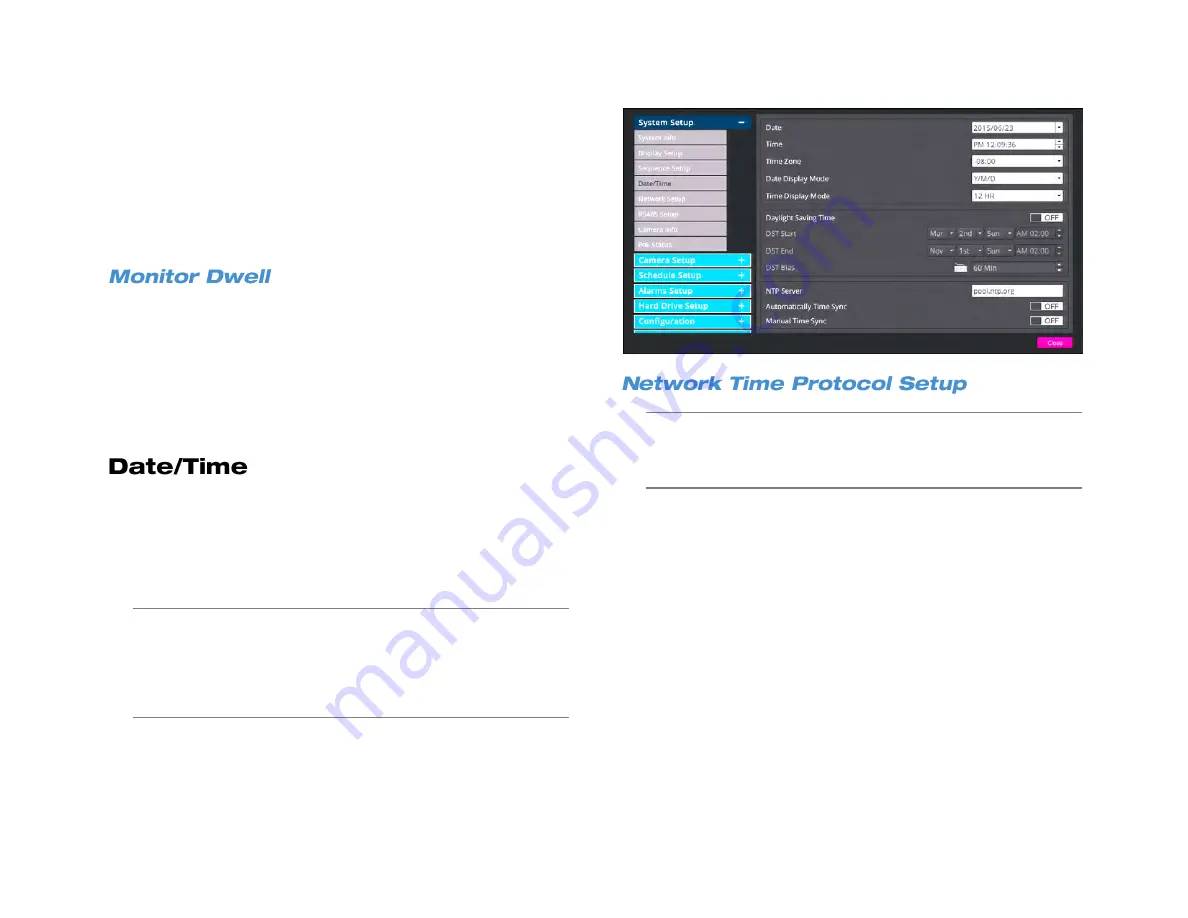
This option allows you to adjust the date, time, time zone, the format of
the date and time displays, as well as to set up for daylight savings time
or to use a Network Time Protocol.
To set the
Date
,
Time
,
Time Zone
,
Date/Time Display
,
Date Display
Mode
, and
Time Display Mode
, click
Date/Time
and use your mouse
to adjust the values.
Note
Changing the date or time after initial configuration, requires
formatting the hard drive(s) to avoid data mismatch.
Note
In the United States, the Pacific Time Zone is
-8:00
, the
Mountain Time Zone is
-7:00
, the Central Time Zone is
-6:00
,
and the Eastern Time Zone is
-5:00
.
Caution: Be sure to select the correct time zone during initial
setup.
Changing the time zone later will require formating the
entire hard drive and losing all recordings so the video time
stamps match.
Using a network time protocol allows you to ensure that your recorder is
keeping accurate time in coordination with other time-sensitive devices.
This is ideal if you are using multiple recorders in multiple locations and
plan on accessing them remotely. This function is only available when
the Time Zone function is set to On and if the recorder is connected to
the Internet.
1. Type the IP address of your desired
NTP Server
. The default
server is time-nw.nist.gov.
2. Set
Automatically Time Sync
to
On
.
3. When desired, you can manually sync with the NTP server by
clicking
Manual Time Sync
.
Summary of Contents for NV160 Series
Page 1: ...High Definition Network Video Recorder PRO Series User Manual ...
Page 16: ...16 Product Description Features Basic Setup Password Protection ...
Page 19: ...33672AB 19 Front Panel Rear Panel Remote Control ...
Page 20: ...20 USB 2 0 Network LED Record LED Power Button Power LED Indicator IR Remote Port Alarm LED ...
Page 23: ...33672AB 23 Connection Guide Turning On the Recorder Turning Off the Recorder ...
Page 93: ...33672AB 93 Using Cameras from Other Manufacturers Using an External PoE Switch ...


