Installation Overview
Using Quick Assist
Octel 50 Installation Guide
12-9
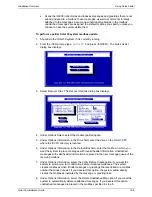
8. Under Options Information, select the Delete Unattached Msg option if you want the
system to automatically delete unattached messages. If you deselect this option,
unattached messages are placed in the mailbox specified in step 6.
9. Under Report Information, select the Disk option if you want to create a report file.
When you select this option, the system creates a report with the specified filename in
the \CVR1 directory. Select Printer if you want to send the report to the printer
attached to the Octel 50 PC. Do not select the Printer option if there is not a printer
attached to the PC.
10. Under Report Information, enter the name of the report you want the system to
generate, if you do not want to accept the default QASSIST.RPT.
11. To begin the update, select Start. The system prompts you to confirm that you want to
continue.
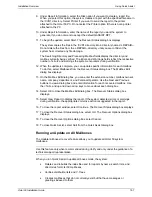
12. Select Yes to continue. The Recover Status dialog box displays.
The system copies the files in the \CVR1 directory into a directory named \~REPAIR~.
Do not delete the files from the \~REPAIR~ directory until you are confident the
system has corrected any file damage.
The Searching Directory and Processing Mailbox fields display the directory and
mailbox currently being verified. The Errors and Warnings fields reflect the respective
number of errors and warnings the system encounters during verification.
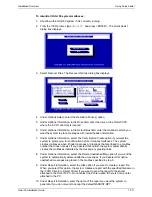
13. When the update is complete, you can update specific information for each mailbox.
To do this, select Mailboxes from the Recover Status dialog box. The Mailbox Entry
dialog box displays.
14. On the Mailbox Edit dialog box, you can enter the extension number, mailbox owner’s
name, company, department, and Personal Operator. Use the Next and Previous
buttons to view a dialog box and enter information for each recovered mailbox. Use
the <TAB> and up and down arrow keys to move about each dialog box.
15. Select OK to close the Mailbox Entry dialog box. The Recover Status dialog box
displays.
16. Select View Report to display the report. If the system detected errors or warnings
during verification, the appropriate corrective action is suggested in the report.
17. To close the report window, select Continue. The Recover Status dialog box displays.
18. To close the Recover Status dialog box, select OK. The Recover Options dialog box
displays.
19. To close the Recover Options dialog box, select Cancel.
20. To close Quick Assist, select Quit from the Quick Assist dialog box.


