Resistor braking 193
Placing the brake resistor
Install the resistors outside the drive in a place where they will cool.
Arrange the cooling of the resistor in a way that:
• no danger of overheating is caused to the resistor or nearby materials
• the temperature of the room the resistor is located in does not exceed the allowed
maximum.
Supply the resistor with cooling air/water according to the resistor manufacturer’s
instructions.
WARNING!
The materials near the brake resistor must be non-flammable. The
surface temperature of the resistor is high. Air flowing from the resistor is of
hundreds of degrees Celsius. If the exhaust vents are connected to a ventilation
system, ensure that the material withstands high temperatures. Protect the resistor
against physical contact.
Protecting the system in brake circuit fault situations
Protecting the system in cable and brake resistor short-circuit situations
The input fuses will also protect the resistor cable when it is identical with the input
cable.
Protecting the system against thermal overload
Equipping the drive with a main contactor is highly recommended for safety reasons.
Wire the contactor so that it opens in case the resistor overheats. This is essential for
safety since the drive will not otherwise be able to interrupt the main supply if the
chopper remains conductive in a fault situation. An example wiring diagram is shown
below. We recommend that you use resistors equipped with a thermal switch (1)
inside the resistor assembly. The switch indicates overtemperature and overload.
Summary of Contents for ACS580-01 drives
Page 1: ...ABB general purpose drives Hardware manual ACS580 01 drives 0 75 to 250 kW...
Page 4: ......
Page 11: ...Table of contents 11 Document library on the Internet 225...
Page 12: ...12 Table of contents...
Page 72: ...72 Planning the electrical installation...
Page 79: ...Electrical installation 79 R6 R9 3 3 4...
Page 132: ...132 Maintenance and hardware diagnostics...
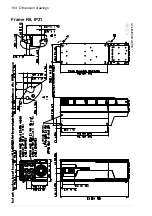
Page 168: ...168 Dimension drawings Frame R0 IP21 3AXD10000257110...
Page 169: ...Dimension drawings 169 Frame R0 IP55 3AXD10000341562...
Page 170: ...170 Dimension drawings Frame R1 IP21 3AXD10000257188...
Page 171: ...Dimension drawings 171 Frame R1 IP55 3AXD10000336766...
Page 172: ...172 Dimension drawings Frame R2 IP21 3AXD10000257203...
Page 173: ...Dimension drawings 173 Frame R2 IP55 3AXD10000341578...
Page 174: ...174 Dimension drawings Frame R3 IP21 3AXD10000257219...
Page 175: ...Dimension drawings 175 Frame R3 IP55 3AXD10000335424...
Page 176: ...176 Dimension drawings Frame R4 IP21 3AXD10000332430...
Page 177: ...Dimension drawings 177 Frame R4 IP55 3AXD10000427933...
Page 178: ...178 Dimension drawings Frame R5 IP21 3AXD10000412280...
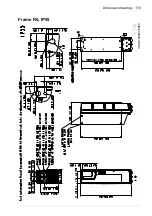
Page 179: ...Dimension drawings 179 Frame R5 IP55 3AXD10000415964...
Page 180: ...180 Dimension drawings Frame R6 IP21 3AXD10000258705...
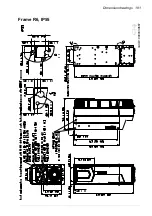
Page 181: ...Dimension drawings 181 Frame R6 IP55 3AXD10000330667...
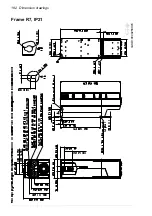
Page 182: ...182 Dimension drawings Frame R7 IP21 3AXD10000258995...
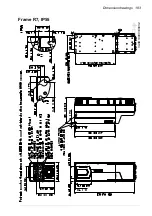
Page 183: ...Dimension drawings 183 Frame R7 IP55 3AXD10000330932...
Page 184: ...184 Dimension drawings Frame R8 IP21 3AXD10000287670...
Page 185: ...Dimension drawings 185 Frame R8 IP55 3AXD10000332446...
Page 186: ...186 Dimension drawings Frame R9 IP21 3AXD10000287428...
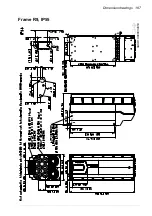
Page 187: ...Dimension drawings 187 Frame R9 IP55 3AXD10000334310...
Page 188: ...188 Dimension drawings...
Page 196: ...196 Resistor braking...

