14 Safety instructions
General safety in installation, start-up and maintenance
These instructions are for all personnel that install the drive and do maintenance work
on it.
WARNING!
Obey these instructions. If you ignore them, injury or death, or
damage to the equipment can occur.
• Use safety shoes with a metal toe cap to avoid foot injury. Wear protective gloves
and long sleeves. Some parts have sharp edges.
• Handle the drive carefully.
•
Frames R5…R9: Lift the drive with a lifting device. Use the lifting eyes of the
drive.
•
Frames R5…R9: Do not tilt the drive. The drive is heavy and its center of
gravity is high. An overturning drive can cause physical injury.
• Beware of hot surfaces. Some parts, such as heatsinks of power semiconductors,
remain hot for a while after disconnection of the electrical supply.
• Keep the drive in its package or protect it otherwise from dust and burr from
drilling and grinding until you install it.
• Protect also the installed drive against dust and burr. Electrically conductive
debris inside the drive may cause damage or malfunction.
• Vacuum clean the area below the drive before the start-up to prevent the drive
cooling fan from drawing the dust inside the drive.
• Do not cover the air inlet and outlet when the drive runs.
• Make sure that there is sufficient cooling. See sections
on page
for more information.
• Before you connect voltage to the drive, make sure that the drive covers are on.
Keep the covers on during the operation.
• Before you adjust the drive operation limits, make sure that the motor and all
driven equipment can operate throughout the set operation limits.
• Before you activate automatic fault reset functions of the drive control program,
Summary of Contents for ACS580-01 drives
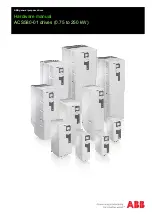
Page 1: ...ABB general purpose drives Hardware manual ACS580 01 drives 0 75 to 250 kW...
Page 4: ......
Page 11: ...Table of contents 11 Document library on the Internet 225...
Page 12: ...12 Table of contents...
Page 72: ...72 Planning the electrical installation...
Page 79: ...Electrical installation 79 R6 R9 3 3 4...
Page 132: ...132 Maintenance and hardware diagnostics...
Page 168: ...168 Dimension drawings Frame R0 IP21 3AXD10000257110...
Page 169: ...Dimension drawings 169 Frame R0 IP55 3AXD10000341562...
Page 170: ...170 Dimension drawings Frame R1 IP21 3AXD10000257188...
Page 171: ...Dimension drawings 171 Frame R1 IP55 3AXD10000336766...
Page 172: ...172 Dimension drawings Frame R2 IP21 3AXD10000257203...
Page 173: ...Dimension drawings 173 Frame R2 IP55 3AXD10000341578...
Page 174: ...174 Dimension drawings Frame R3 IP21 3AXD10000257219...
Page 175: ...Dimension drawings 175 Frame R3 IP55 3AXD10000335424...
Page 176: ...176 Dimension drawings Frame R4 IP21 3AXD10000332430...
Page 177: ...Dimension drawings 177 Frame R4 IP55 3AXD10000427933...
Page 178: ...178 Dimension drawings Frame R5 IP21 3AXD10000412280...
Page 179: ...Dimension drawings 179 Frame R5 IP55 3AXD10000415964...
Page 180: ...180 Dimension drawings Frame R6 IP21 3AXD10000258705...
Page 181: ...Dimension drawings 181 Frame R6 IP55 3AXD10000330667...
Page 182: ...182 Dimension drawings Frame R7 IP21 3AXD10000258995...
Page 183: ...Dimension drawings 183 Frame R7 IP55 3AXD10000330932...
Page 184: ...184 Dimension drawings Frame R8 IP21 3AXD10000287670...
Page 185: ...Dimension drawings 185 Frame R8 IP55 3AXD10000332446...
Page 186: ...186 Dimension drawings Frame R9 IP21 3AXD10000287428...
Page 187: ...Dimension drawings 187 Frame R9 IP55 3AXD10000334310...
Page 188: ...188 Dimension drawings...
Page 196: ...196 Resistor braking...

