


Page: 40
SmartPad LCD
™
© 2008 Xantech Corporation
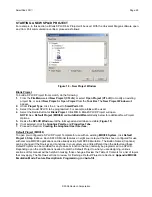
Bold
1.
Continually click to select
Bold
(True) or
Normal
(False), or select
True/False
from the
pull-down
.
Italic
1.
Continually click to select
Italic
(True) or
Normal
(False), or select
True/False
from the
pull-down
.
Strikeout
1.
Continually click to select
Strikeout
(True) or
Normal
(False), or select
True/False
from the
pull-
down
.
Underline
1.
Continually click to select
Underline
(True) or
Normal
(False), or select
True/False
from the
pull-
down
.
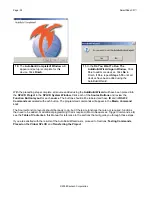
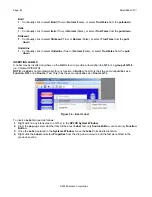
INSERTING LABELS
A Label may be inserted anywhere on the
GUI
screen to provide a
description
to a
GTL
or a
group of GTL’s
.
(i.e. Volume UP/DOWN).
NOTE:
A
Label
is not programmable for any function. A
Button
(Text Only) has the same capabilities as a
Function GTL
and a
Source
(Text Only) has the same capabilities as a
Source GTL
.
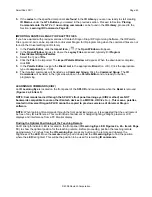
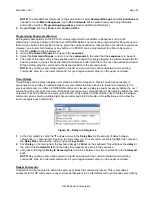
Figure 24 – Insert Label
To insert a
Label
proceed as follows:
1.
Right click on any blank area (no GTL’s) in the
SPLCD System Window
.
2.
From the
pop-up
, select whether this will be a text
Label
, text-only
Source Button
, or a text-only
Function
Button
.
3.
Once the
Label
is placed in the
Systems Window
, move the
Label
to its desired location.
4.
Right click the
Label
and select
Properties
from the drop-down menu to edit the text as outlined in the
previous section.