1
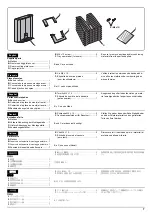
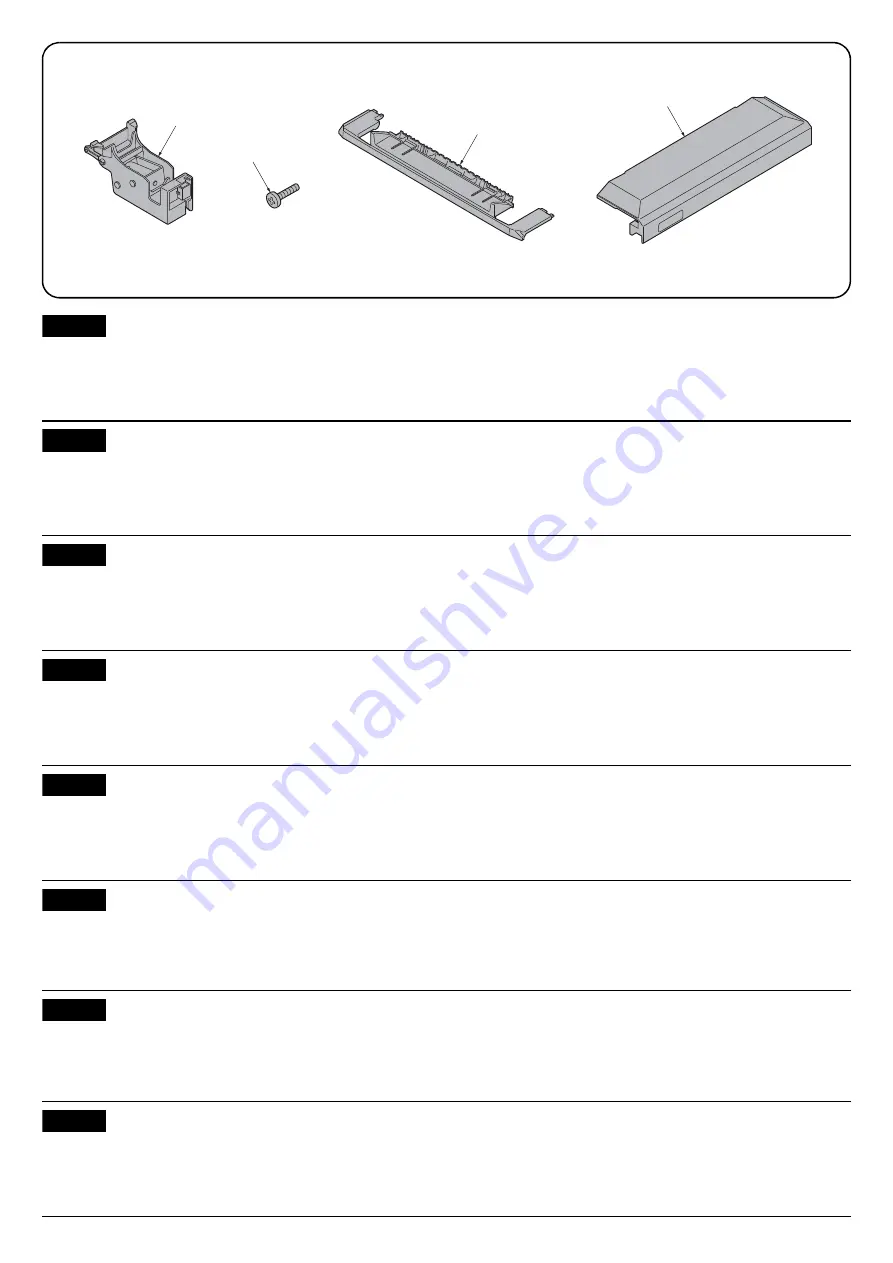
Z
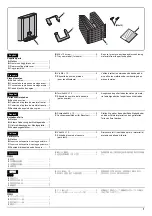
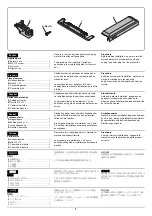
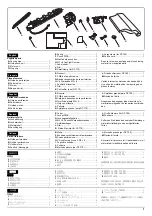
B (M4x12)
Y
A
Supplied parts
A.
Solenoid unit.............................................. 1
B.
M4 × 12 screw ........................................... 1
Y.
Left cover................................................... 1
Z.
Right cover ................................................ 1
English
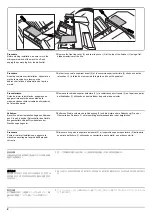
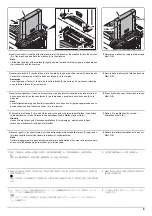
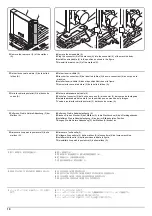
Be sure to remove any tape and/or cushioning
materials from the parts supplied.
The procedures for installing Y and Z are
described in the installation guide for the mail-
box.
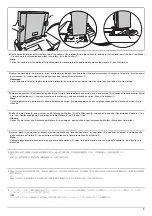
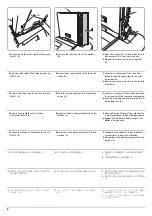
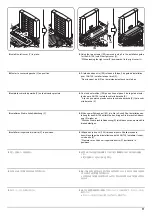
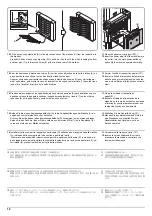
Procedure
Before starting installation, be sure to turn the
main power switch of the machine off, and
unplug the power plug from the wall outlet.
Pièces fournies
A.
Unité solénoïde.......................................... 1
B.
Vis M4 × 12................................................ 1
Y.
Couvercle gauche...................................... 1
Z.
Couvercle droit .......................................... 1
Français
Veillez à retirer les morceaux de bande adhé-
sive et/ou les matériaux de rembourrage des
pièces fournies.
Les procédures pour installer Y et Z sont
décrites dans le manuel d'installation de la boîte
à lettres.
Procédure
Avant de commencer l'installation, s'assurer de
mettre la machine hors tension et de
débrancher la fiche d'alimentation de la prise
murale.
Partes suministradas
A.
Unidad solenoide....................................... 1
B.
Tornillo M4 × 12 ......................................... 1
Y.
Cubierta izquierda...................................... 1
Z.
Cubierta derecha ....................................... 1
Español
Asegúrese de quitar todas las cintas y/o mate-
rial amortiguador de las partes suministradas.
Los procedimientos de instalación Y y Z se
describen en la guía de instalación del buzón de
correo.
Procedimiento
Antes de iniciar la instalación, asegúrese de
apagar el interruptor de encendido de la
máquina y desenchufar el cable de alimentación
de la toma de pared.
Enthaltene Teile
A.
Magnetspule .............................................. 1
B.
Schraube M4 x 12 ..................................... 1
Y.
Linke Abdeckung ....................................... 1
Z.
Rechte Abdeckung .................................... 1
Deutsch
Stellen Sie sicher, dass sämtliche Klebebänder
und/oder Polstermaterial von den gelieferten
Teilen entfernt wurden.
Die Vorgehensweise zur Installation von Y und
Z wird in der Installationsanweisung der Mailbox
beschrieben.
Vorgehensweise
Bevor Sie mit der Installation beginnen überzeu-
gen Sie sich, dass der Netzschalter des Geräts
ausgeschaltet und das Stromkabel aus der
Steckdose gezogen ist.
Parti fornite
A.
Unità solenoide.......................................... 1
B.
Vite M4 × 12 .............................................. 1
Y.
Coperchio di sinistra .................................. 1
Z.
Coperchio di destra ................................... 1
Italiano
Rimuovere tutti i nastri adesivi e/o i materiali di
protezione dalle parti fornite.
Le procedure di installazione Y e Z sono
descritte nella guida di installazione del vassoio
mailbox.
Procedura
Prima di iniziare l'installazione, spegnere la
macchina e scollegare la spina dalla presa di
corrente.
同梱品
A.
ソレノイドユニット................... 1
B.
ビス M4×12 .......................... 1
Y.
左カバー............................. 1
Z.
右カバー............................. 1
日本語
同梱品に固定テープ、緩衝材がついている場合
は、
必ず取り外すこと。
Y,Z の取付け手順は、
メールボックス設置手順書
に記載されています。
取付手順
必ず機械本体の主電源スイッチを OFF にし、
機
械本体の電源プラグを抜いてから作業するこ
と。
附属品
A.
电磁铁单元........................... 1
B.
M4×12 螺丝.......................... 1
Y.
左盖板............................... 1
Z.
右盖板............................... 1
简体中文
如果附属品上带有固定胶带,缓冲材料时务必揭
下。
Y,Z 的安装步骤记载在邮箱的安装手册中。
安装步骤
安装前务必关闭机器的主电源开关,并从墙壁插
座拔下电源插头。
동봉품
A.
솔레노이드 유니트............................... 1
B.
나사 M4×12....................................... 1
Y.
좌측 커버........................................... 1
Z.
우측 커버........................................... 1
한국어
동봉품에 고정 테이프 , 완충재가 붙어 있는 경우
에는 반드시 제거하십시오 .
Y 및 Z 설치 절차는 메일박스의 설치 설명서에
설명되어 있습니다 .
설치순서
설치를 시작하기 전에 반드시 본체의 주 전원 스
위치를 끄고 벽 콘센트에서 전원 플러그를 분리
하십시오 .
Содержание UTAX AK 730
Страница 5: ...This page is intentionally left blank ...
Страница 11: ...This page is intentionally left blank ...
Страница 15: ...3NB 3ND 3N0 3NK This page is intentionally left blank ...
Страница 25: ...3NB 3ND 3N0 3NK 1 1 10 This page is intentionally left blank ...
Страница 43: ...3NB 3ND 3N0 3NK 1 2 18 3 Remove tape and pad Figure 1 2 23 Tape Pad ...
Страница 45: ...3NB 3ND 3N0 3NK 1 2 20 This page is intentionally left blank ...
Страница 81: ...3NB 3ND 3N0 3NK 1 3 36 This page is intentionally left blank ...
Страница 157: ...3NB 3ND 3N0 3NK 1 4 76 This page is intentionally left blank ...
Страница 169: ...3NB 3ND 3N0 3NK 1 5 12 This page is intentionally left blank ...
Страница 206: ...3NB 3ND 3N0 3NK 2 2 11 This page is intentionally left blank ...
Страница 246: ...1 1 INSTALLATION GUIDE INSTALLATION GUIDE FOR 4000 SHEETS FINISHER ...
Страница 269: ...INSTALLATION GUIDE FOR FINISHER ATTACHMENT KIT MFP A ...
Страница 283: ...INSTALLATION GUIDE FOR FINISHER ATTACHMENT KIT MFP B ...
Страница 284: ...E F A H G I J B D C ...
Страница 291: ...INSTALLATION GUIDE FOR FINISHER ATTACHMENT KIT PRINTER ...
Страница 295: ...INSTALLATION GUIDE FOR CENTER FOLDING UNIT ...
Страница 312: ...INSTALLATION GUIDE FOR MULTI TRAY ...
Страница 326: ...INSTALLATION GUIDE FOR MULTI TRAY ATTACHMENT KIT PRINTER ...
Страница 330: ...INSTALLATION GUIDE FOR PUNCH UNIT ...


