13
a
a
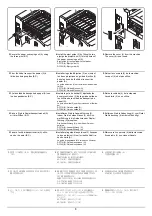
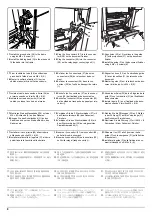
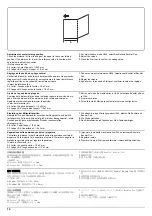
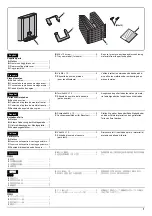
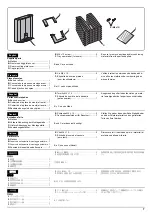
Adjustment of centerfold-stapling position
Check the distance (a) from the stapling position to the center of the paper.
If the distance (a) is over the reference value, follow the procedure below
to adjust the position.
<Reference value (a)> ±2 mm
1.
Set maintenance mode U246, select Booklet and Staple Pos.
2.
Adjust the values.
3.
Press the Start key to confirm the setting value.
Réglage de la position d'agrafage des pages centrales dépliables
Vérifier la distance (a) entre la position d'agrafage et le milieu de la feuille
de papier. Si cette distance (a) est supérieure à la valeur de référence,
régler la position en procédant de la manière suivante.
<Valeur de référence (a)> ±2 mm
1.
Passer en mode maintenance U246, sélectionner Booklet et Staple
Pos.
2.
Régler les valeurs.
3.
Appuyer sur la touche de Start pour confirmer la valeur de réglage.
Ajuste de la posición de grapado de la unidad de plegado
Compruebe la distancia (a) desde la posición de grapado con respecto al
centro del papel. Si dicha distancia (a) supera el valor de referencia,
realice el siguiente procedimiento para ajustar la posición.
<Valor de referencia (a)> ±2 mm
1.
Entre en el modo de mantenimiento U246, seleccione Booklet y Staple
Pos.
2.
Ajuste los valores.
3.
Pulse la tecla de Start para confirmar el valor de configuración.
Einstellung der Mittenfalt-Heftposition
Überprüfen Sie den Abstand (a) zwischen der Heftposition und der Papier-
mitte. Falls der Abstand (a) größer als der Bezugswert ist, ist die Position
gemäß der nachstehenden Prozedur nachzustellen.
<Bezugswert (a)> ±2 mm
1.
Schalten Sie in den Wartungsmodus U246, wählen Sie Booklet und
Staple Pos.
2.
Die Werte einstellen.
3.
Den Einstellwert durch Drücken der Start-Taste bestätigen.
Regolazione della posizione di cucitura dell’unità di piegatura cen-
trale
Controllare la distanza (a) dalla posizione di spillatura al centro del foglio.
Se la distanza (a) è superiore al valore di riferimento, seguire la procedura
riportata sotto per regolare la posizione.
<Valore di riferimento (a)> ±2 mm
1.
Impostare la modalità manutenzione U246, selezionare Booklet e Sta-
ple Pos.
2.
Regolare i valori.
3.
Premere il tasto di Start per confermare il valore dell'impostazione.
中とじステープル位置調整
ステープル位置から用紙センターまでの距離 (a) を確認する。距離 (a) が
基準値外の場合、
次の手順で調整を行う。
<基準値 (a) > ±2mm
1.
メンテナンスモード U246 をセットし、
Booklet、
Staple Pos を選択す
る。
2.
設定値を調整する。
3.
スタートキーを押し、
設定値を確定する。
中缝装订位置调整
检查从装订位置到纸张中心的距离 (a)。如果距离 (a) 超出标准值范围,按
照下列步骤调节装订位置。
<标准值 (a) > ±2mm
1.
设置维护模式 U246,选择 Booklet、Staple Pos。
2.
调整设定值。
3.
按 Start 键,以确定设定值。
접기 스테이플 위치조정
스테이플 위치에서 용지 중앙까지의 거리離 (a) 를 확인합니다 . 거리 (a)
가 기준치 외의 경우에는 다음 순서로 조정을 합니다 .
<기준치 (a) > ±2mm
1.
메인터넌스 모드 U246 을 세트하고 Booklet, Staple Pos 를 선택합니
다 .
2.
설정치를 조정합니다 .
3.
시작키를 누르고 설정치를 확인합니다 .
Содержание UTAX AK 730
Страница 5: ...This page is intentionally left blank ...
Страница 11: ...This page is intentionally left blank ...
Страница 15: ...3NB 3ND 3N0 3NK This page is intentionally left blank ...
Страница 25: ...3NB 3ND 3N0 3NK 1 1 10 This page is intentionally left blank ...
Страница 43: ...3NB 3ND 3N0 3NK 1 2 18 3 Remove tape and pad Figure 1 2 23 Tape Pad ...
Страница 45: ...3NB 3ND 3N0 3NK 1 2 20 This page is intentionally left blank ...
Страница 81: ...3NB 3ND 3N0 3NK 1 3 36 This page is intentionally left blank ...
Страница 157: ...3NB 3ND 3N0 3NK 1 4 76 This page is intentionally left blank ...
Страница 169: ...3NB 3ND 3N0 3NK 1 5 12 This page is intentionally left blank ...
Страница 206: ...3NB 3ND 3N0 3NK 2 2 11 This page is intentionally left blank ...
Страница 246: ...1 1 INSTALLATION GUIDE INSTALLATION GUIDE FOR 4000 SHEETS FINISHER ...
Страница 269: ...INSTALLATION GUIDE FOR FINISHER ATTACHMENT KIT MFP A ...
Страница 283: ...INSTALLATION GUIDE FOR FINISHER ATTACHMENT KIT MFP B ...
Страница 284: ...E F A H G I J B D C ...
Страница 291: ...INSTALLATION GUIDE FOR FINISHER ATTACHMENT KIT PRINTER ...
Страница 295: ...INSTALLATION GUIDE FOR CENTER FOLDING UNIT ...
Страница 312: ...INSTALLATION GUIDE FOR MULTI TRAY ...
Страница 326: ...INSTALLATION GUIDE FOR MULTI TRAY ATTACHMENT KIT PRINTER ...
Страница 330: ...INSTALLATION GUIDE FOR PUNCH UNIT ...

