21
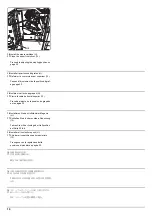
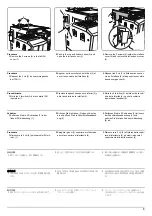
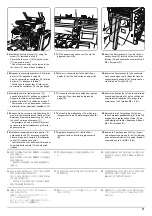
(a)
(b)
4.
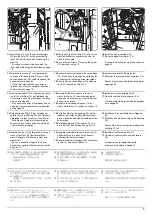
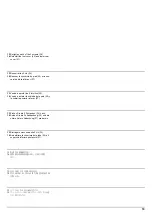
Set maintenance mode U246, select Finisher and Staple HP.
5.
Adjust the values.
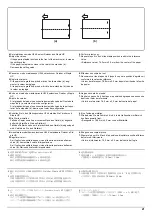
If the paper is stapled too close to the front of the machine (a): Increase
the setting value.
If the paper is stapled too close to the rear of the machine (b):
Decrease the setting value.
6.
Perform a test copy.
7.
Repeat steps 4 to 6 until the staple position is within the reference
value.
<Reference value> 78.5 mm ±2.5 mm from the center of the paper
4.
Passer en mode maintenance U246, sélectionner Finisher et Staple
HP.
5.
Régler les valeurs.
Si le papier est agrafé trop près de l'avant de la machine (a): aug-
menter la valeur de réglage.
Si le papier est agrafé trop près de l'arrière de la machine (b): réduire
la valeur de réglage.
6.
Effectuer une copie de test.
7.
Recommencer les étapes 4 à 6 jusqu'à ce que la position d'agrafe soit
conforme à la valeur de référence
<Valeur de référence> 78,5 mm ±2,5 mm depuis le milieu de la feuille
de papier.
4.
Entre en el modo de mantenimiento U246, seleccione Finisher y Staple
HP.
5.
Ajuste los valores.
Si el grapado del papel se encuentra demasiado cerca del frente de la
máquina (a): aumente el valor de configuración.
Si el grapado del papel se encuentra demasiado cerca de la parte pos-
terior de la máquina (b): disminuya el valor de configuración.
6.
Haga una copia de prueba.
7.
Repita los pasos 4 a 6 hasta que la posición de grapado se encuentre
dentro del valor de referencia.
<Valor de referencia> 78,5 mm ± 2,5 mm del centro del papel
4.
Schalten Sie in den Wartungsmodus U246, wählen Sie Finisher und
Staple HP.
5.
Die Werte einstellen.
Falls das Papier zu nahe am vorderen Rand des Geräts (a) abgesta-
pelt wird: Vergrößern Sie den Stellwert.
Falls das Papier zu nahe am hinteren Rand des Geräts (b) abgestapelt
wird: Verkleinern Sie den Stellwert.
6.
Eine Testkopie erstellen.
7.
Wiederholen Sie die Schritte 4 bis 6, bis die Heftposition im Bereich
des Bezugswerts liegt.
<Bezugswert> 78,5 mm ±2,5 mm von der Blattmitte
4.
Impostare la modalità manutenzione U246, selezionare Finisher e Sta-
ple HP.
5.
Regolare i valori.
Se il foglio viene spillato troppo vicino alla parte anteriore della mac-
china (a): Aumentare il valore di impostazione.
Se il foglio viene spillato troppo vicino alla parte posteriore della mac-
china (b): Diminuire il valore di impostazione.
6.
Eseguire una copia di prova.
7.
Ripetere i passi 4 to 6 finché la posizione di spillatura risulta all'interno
del valore di riferimento.
<Valore di riferimento> 78,5 mm ± 2,5 mm dal centro del foglio
4.
メンテナンスモード U246 をセットし、Finisher、
Staple HP を選択す
る。
5.
設定値を調整する。
ステープル位置が機械前側にずれている場合 (a):設定値を上げる。
ステープル位置が機械後側にずれている場合 (b):設定値を下げる。
6.
テストコピーを行う。
7.
ステープル位置が基準値内になるまで、手順 4 ~ 6 を繰り返す。
<基準値> 用紙センターより 78.5mm± 2.5mm
4.
设置维护模式 U246,选择 Finisher、Staple HP。
5.
调整设定值。
装订位置向机器前部偏移时 (a):调高设定值。
装订位置向机器后部偏移时 (b):调低设定值。
6.
进行测试复印。
7.
重复步骤 4 ~ 6,直到装订位置在基准范围内为止。
<基准值> 距离纸张中心 78.5mm± 2.5mm
4.
메인터넌스 모드 U246 을 세트하고 Finisher, Staple HP 를 선택합니
다 .
5.
설정치를 조정합니다 .
스테이플 위치가 기기앞측으로 벗어난 경우 (a):설정치를 높입니다 .
스테이플 위치가 기기뒷측으로 벗어난 경우 (b):설정치를 내입니다 .
6.
시험복사를 합니다 .
7.
스테이플 위치가 기준치내가 될 때까지 순서 4 ~ 6 을 반복합니다 .
<기준치> 용지 센터에서 78.5mm± 2.5mm
Содержание UTAX AK 730
Страница 5: ...This page is intentionally left blank ...
Страница 11: ...This page is intentionally left blank ...
Страница 15: ...3NB 3ND 3N0 3NK This page is intentionally left blank ...
Страница 25: ...3NB 3ND 3N0 3NK 1 1 10 This page is intentionally left blank ...
Страница 43: ...3NB 3ND 3N0 3NK 1 2 18 3 Remove tape and pad Figure 1 2 23 Tape Pad ...
Страница 45: ...3NB 3ND 3N0 3NK 1 2 20 This page is intentionally left blank ...
Страница 81: ...3NB 3ND 3N0 3NK 1 3 36 This page is intentionally left blank ...
Страница 157: ...3NB 3ND 3N0 3NK 1 4 76 This page is intentionally left blank ...
Страница 169: ...3NB 3ND 3N0 3NK 1 5 12 This page is intentionally left blank ...
Страница 206: ...3NB 3ND 3N0 3NK 2 2 11 This page is intentionally left blank ...
Страница 246: ...1 1 INSTALLATION GUIDE INSTALLATION GUIDE FOR 4000 SHEETS FINISHER ...
Страница 269: ...INSTALLATION GUIDE FOR FINISHER ATTACHMENT KIT MFP A ...
Страница 283: ...INSTALLATION GUIDE FOR FINISHER ATTACHMENT KIT MFP B ...
Страница 284: ...E F A H G I J B D C ...
Страница 291: ...INSTALLATION GUIDE FOR FINISHER ATTACHMENT KIT PRINTER ...
Страница 295: ...INSTALLATION GUIDE FOR CENTER FOLDING UNIT ...
Страница 312: ...INSTALLATION GUIDE FOR MULTI TRAY ...
Страница 326: ...INSTALLATION GUIDE FOR MULTI TRAY ATTACHMENT KIT PRINTER ...
Страница 330: ...INSTALLATION GUIDE FOR PUNCH UNIT ...

