2
4
3
101
1
102
102
2
3
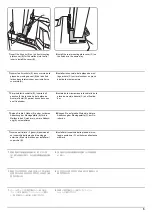
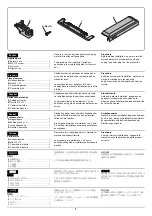
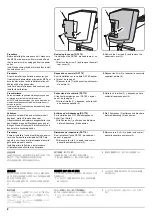
1.
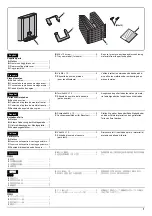
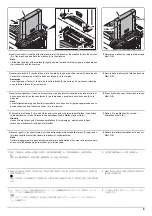
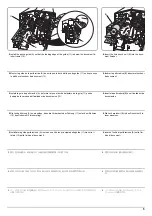
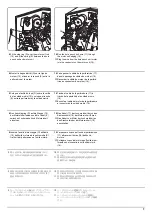
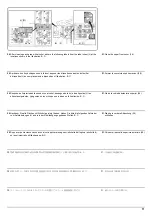
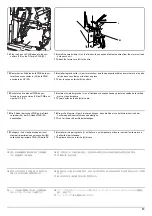
Pull out the paper conveying unit (101).
2.
Remove the two screws (102) and remove
the upper right cover (1).
(The upper right cover (1) which was
removed is not used.)
3.
Remove the screw (2) and remove the
retainer (3).
4.
Remove the breakaway part (4) from the
retainer (3).
1.
Sortir l'unité de transport du papier (101).
2.
Retirer les deux vis (102) et retirer le couver-
cle supérieur droit (1).
(Le couvercle supérieur droit (1) qui a été
retiré n'est pas utilisé.)
3.
Retirer la vis (2) et retirer le dispositif de
retenue (3).
4.
Retirer la partie détachable (4) du dispositif
de retenue (3).
1.
Extraiga la unidad de transporte de papel
(101).
2.
Quite los dos tornillos (102) y retire la cubi-
erta superior derecha (1).
(La cubierta superior derecha (1) que se ha
retirado no se utiliza.)
3.
Quite el tornillo (2) y retire el retén (3).
4.
Aparte la parte de separación (4) del retén
(3).
1.
Ziehen Sie die Papierführung (101) heraus.
2.
Entfernen Sie zwei Schrauben (102) und
entfernen Sie die obere rechte Abdeckung
(1).
(Die gerade entfernte obere rechte Abdeck-
ung (1) wird nicht mehr benötigt.)
3.
Entfernen Sie die Schraube (2) und ent-
fernen Sie die Halterung (3).
4.
Entfernen Sie die Sollbruchstelle (4) von der
Halterung (3).
1.
Estrarre l'unità trasporto carta (101).
2.
Togliere le due viti (102) e rimuovere il
coperchio destro superiore (1).
(Il coperchio destro superiore (1) rimosso
non viene utilizzato.)
3.
Togliere la vite (2) e rimuovere il fermo (3).
4.
Rimuovere la parte di separazione (4) dal
fermo (3).
1.
搬送ユニット (101) を引き出す。
2.
ビス (102)2 本を外し、右上カバー(1) を取
り外す。
(取り外した右上カバー(1) は使用しない。)
3.
ビス (2)1 本を外し、取付板 (3) を取り外す。
4.
取付板 (3) の割り部分 (4) を切り取る。
1.
拉出纸张传输单元 (101)。
2.
拆下两个螺丝(102)并拆下右上盖板(1)。
(不使用拆下的右上盖板(1)。)
3.
拆下螺丝(2)并拆下固定器(3)。
4.
从固定器(3)上拆下分离部件(4)。
1.
반송 유니트 (101) 를 밖으로 당깁니다 .
2.
나사 (102) 두 개를 제거하고 우측 상단 커버
(1) 를 제거합니다 .
( 분리한 우측 상단 커버 (1) 는 사용되지 않
습니다 .)
3.
나사 (2) 를 분리하고 리테이너 (3) 를 제거합
니다 .
4.
리테이너 (3) 에서 분리된 부분 (4) 을 제거합
니다 .
Содержание UTAX AK 730
Страница 5: ...This page is intentionally left blank ...
Страница 11: ...This page is intentionally left blank ...
Страница 15: ...3NB 3ND 3N0 3NK This page is intentionally left blank ...
Страница 25: ...3NB 3ND 3N0 3NK 1 1 10 This page is intentionally left blank ...
Страница 43: ...3NB 3ND 3N0 3NK 1 2 18 3 Remove tape and pad Figure 1 2 23 Tape Pad ...
Страница 45: ...3NB 3ND 3N0 3NK 1 2 20 This page is intentionally left blank ...
Страница 81: ...3NB 3ND 3N0 3NK 1 3 36 This page is intentionally left blank ...
Страница 157: ...3NB 3ND 3N0 3NK 1 4 76 This page is intentionally left blank ...
Страница 169: ...3NB 3ND 3N0 3NK 1 5 12 This page is intentionally left blank ...
Страница 206: ...3NB 3ND 3N0 3NK 2 2 11 This page is intentionally left blank ...
Страница 246: ...1 1 INSTALLATION GUIDE INSTALLATION GUIDE FOR 4000 SHEETS FINISHER ...
Страница 269: ...INSTALLATION GUIDE FOR FINISHER ATTACHMENT KIT MFP A ...
Страница 283: ...INSTALLATION GUIDE FOR FINISHER ATTACHMENT KIT MFP B ...
Страница 284: ...E F A H G I J B D C ...
Страница 291: ...INSTALLATION GUIDE FOR FINISHER ATTACHMENT KIT PRINTER ...
Страница 295: ...INSTALLATION GUIDE FOR CENTER FOLDING UNIT ...
Страница 312: ...INSTALLATION GUIDE FOR MULTI TRAY ...
Страница 326: ...INSTALLATION GUIDE FOR MULTI TRAY ATTACHMENT KIT PRINTER ...
Страница 330: ...INSTALLATION GUIDE FOR PUNCH UNIT ...

