11
Q
D
41
40
40
39
D
39
A
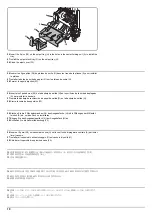
29.
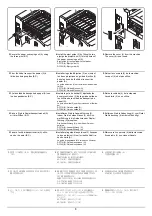
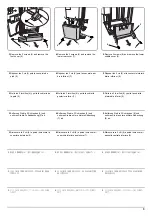
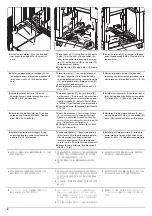
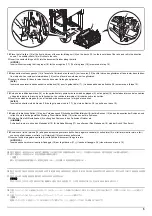
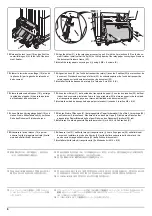
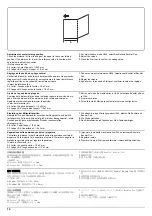
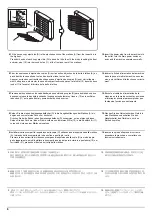
Insert the 2 projections (39) on the back of the output stopper (D) in the portions circled on the
center-folding unit (A).
Fit the 3 hooks (40) on the output stopper (D) in the holes (41) in the center-folding unit (A).
30.
Adhere the D7 label (Q) at the location
shown in the figure.
29.
Insérer les 2 saillies (39) au dos de la butée de sortie (D) dans les parties encerclées de la
plieuse (A).
Assujettir les 3 crochets (40) de la butée de sortie (D) dans les trous (41) de la plieuse (A).
30.
Apposer l'étiquette D7 (Q) à l'endroit repéré
sur la figure.
29.
Inserte los 2 resaltos (39) de la parte posterior del tope de salida (D) en las porciones marcadas
con un círculo de la unidad de plegado (A).
Coloque los 3 ganchos (40) del tope de salida (D) en los orificios (41) de la unidad de plegado
(A).
30.
Adhiera la etiqueta D7 (Q) en el lugar que se
muestra en la ilustración.
29.
Setzen Sie die 2 Vorsprünge (39) auf der Rückseite des Ausgabeanschlags (D) in die mit Kreis
bezeichneten Positionen der Mittenfalteinheit (A) ein.
Setzen Sie die 3 Haken (40) des Ausgabeanschlags (D) in die Öffnungen (41) der Mittenfaltein-
heit (A) ein.
30.
Kleben Sie den D7 Aufkleber (Q) an der
abgebildeten Stelle an.
29.
Inserire le 2 sporgenze (39) sulla parte posteriore del fermo di uscita (D) nelle porzioni cerchiate
sull'unità di piegatura centrale (A).
Fissare i 3 ganci (40) sul fermo di uscita (D) nei fori (41) nell'unità di piegatura centrale (A).
30.
Far aderire l'etichetta D7 (Q) alla posizione
mostrata nella figura.
29.
排紙ストッパー(D) の裏側にある突起 (39)2 箇所を中折ユニット (A) の丸枠部に挿入する。
排紙ストッパー(D) のフック (40)3 箇所を中折りユニット (A) の穴 (41) にはめ込む。
30.
D7 ラベル (Q) を図の位置に貼り付ける。
29.
将排纸挡板 (D) 内侧的 2 处突出部 (39) 插入到中缝装订-折页单元 (A) 的圆框部。
将排纸挡板 (D) 的 3 个挂钩 (40) 嵌入到中缝装订-折页单元 (A) 的孔 (41) 中。
30.
在图示位置黏贴 D7 标签 (Q)。
29.
배지 스토퍼 (D) 의 안쪽에 있는 돌기 (39) 2 곳을 접기 유니트 (A) 의에 삽입합니다 .
배지 스토퍼 (D) 의 후크 (40) 3 곳을 접기 유니트 (A) 의 구멍 (41) 에 끼웁니다 .
30.
D7 라벨 (Q) 을 그림의 위치에 붙입니다 .
Содержание UTAX AK 730
Страница 5: ...This page is intentionally left blank ...
Страница 11: ...This page is intentionally left blank ...
Страница 15: ...3NB 3ND 3N0 3NK This page is intentionally left blank ...
Страница 25: ...3NB 3ND 3N0 3NK 1 1 10 This page is intentionally left blank ...
Страница 43: ...3NB 3ND 3N0 3NK 1 2 18 3 Remove tape and pad Figure 1 2 23 Tape Pad ...
Страница 45: ...3NB 3ND 3N0 3NK 1 2 20 This page is intentionally left blank ...
Страница 81: ...3NB 3ND 3N0 3NK 1 3 36 This page is intentionally left blank ...
Страница 157: ...3NB 3ND 3N0 3NK 1 4 76 This page is intentionally left blank ...
Страница 169: ...3NB 3ND 3N0 3NK 1 5 12 This page is intentionally left blank ...
Страница 206: ...3NB 3ND 3N0 3NK 2 2 11 This page is intentionally left blank ...
Страница 246: ...1 1 INSTALLATION GUIDE INSTALLATION GUIDE FOR 4000 SHEETS FINISHER ...
Страница 269: ...INSTALLATION GUIDE FOR FINISHER ATTACHMENT KIT MFP A ...
Страница 283: ...INSTALLATION GUIDE FOR FINISHER ATTACHMENT KIT MFP B ...
Страница 284: ...E F A H G I J B D C ...
Страница 291: ...INSTALLATION GUIDE FOR FINISHER ATTACHMENT KIT PRINTER ...
Страница 295: ...INSTALLATION GUIDE FOR CENTER FOLDING UNIT ...
Страница 312: ...INSTALLATION GUIDE FOR MULTI TRAY ...
Страница 326: ...INSTALLATION GUIDE FOR MULTI TRAY ATTACHMENT KIT PRINTER ...
Страница 330: ...INSTALLATION GUIDE FOR PUNCH UNIT ...

