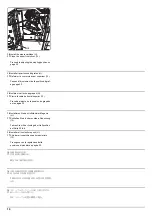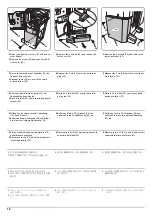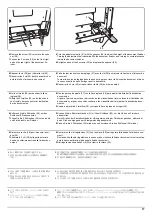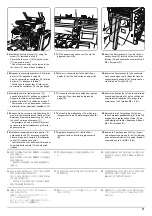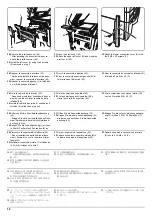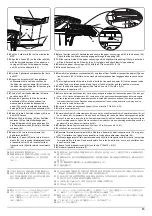
5
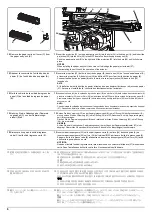
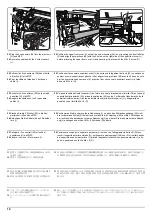
10.
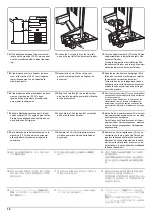
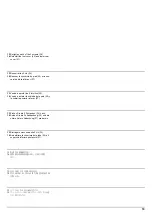
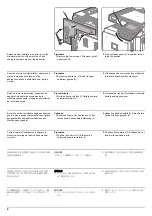
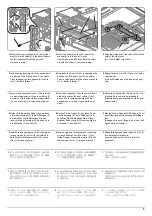
Remove the 2 M4 × 8 screws (black) (16)
and remove the rear tray cover (17) and
scanner bottom cover (18).
11.
Insert the hook (19) on the upper side of the drive unit (A) and the projection (20) on the under-
side into the respective positioning holes (21) (22) in the back plate and secure the drive unit
using the 2 M4 × 8 screws (black) (16) removed in step 10.
10.
Déposer les 2 vis M4 × 8 (noire) (16) et
déposer le couvercle du support arrière (17)
et le couvercle inférieur du scanner (18).
11.
Insérer le crochet (19) sur le côté supérieur de l'unité d'entraînement (A) et la projection (20)
inférieure dans les trous de positionnement correspondant (21) (22) de la tôle arrière et fixer
l'unité d'entraînement à l'aide des 2 vis M4 × 8 (noire) (16) déposées à l'étape 10.
10.
Quite los 2 tornillos M4 × 8 (negro) (16) y
quite la cubierta izquierda de la bandeja (17)
y la cubierta inferior del escáner (18).
11.
Inserte el gancho (19) del lado superior de la unidad de accionamiento (A) y el saliente (20) del
lado inferior en sus respectivos orificios de posición (21) (22) en la placa posterior y asegure la
unidad de accionamiento usando los 2 tornillos M4 × 8 (negro) (16) quitados en el paso 10.
10.
Entfernen Sie die 2 M4 × 8 (schwarz)
Schrauben (16) und nehmen Sie die hintere
Fachabdeckung (17) und die Scanner-Bode-
nabdeckung (18) ab.
11.
Setzen Sie den Haken (19) an der Oberseite der Antriebseinheit (A) und den Vorsprung (20) an
der Unterseite in die entsprechenden Positionierungsöffnungen (21) (22) der Rückplatte ein und
sichern Sie die Antriebseinheit mit den 2 in Schritt 10 entfernten M4 × 8 (schwarz) Schrauben
(16).
10.
Rimuovere le 2 viti M4 × 8 (nera) (16) e
quindi rimuovere il coperchio posteriore del
vassoio (17) e il coperchio in basso dello
scanner (18).
11.
Inserire il gancio (19) sul lato superiore dell'unità guida (A) e la parte sporgente (20) sulla parte
inferiore, nei rispettivi fori di posizionamento (21) (22) nella piastra posteriore e fissare l'unità
guida usando le 2 viti M4 × 8 (nera) (16) rimosse nel punto 10.
10.
ビス M4×8
(黒)(16)2 本を外し、
トレイ後カ
バー(17) およびスキャナー底カバー(18) を
取り外す。
11.
駆動ユニット (A) 上側のフック (19) および下側の突起 (20) を後板の位置決め穴 (21)(22) にそ
れぞれ入れ、
手順 10 のビス M4×8
(黒)
(16)2 本で固定する。
10.
卸下 2 颗螺丝 M4×8( 黒 )(16),拆下托盘后
部盖板 (17) 以及扫描仪底部盖板 (18)。
11.
将驱动单元 (A) 上部的卡扣 (19) 和下部的突出部 (20) 分别插入背板的定位孔 (21)(22) 中,使用
步骤 10 中卸下的 2 颗螺丝 M4×8( 黒 )(16) 进行固定。
10.
나사 M4×8(흑)(16) 2 개를 제거하고 트레
이 뒷커버 (17) 및 스캐너 밑커버 (18) 를 제
거합니다 .
11.
구동 유니트 (A) 윗쪽 후크 (19) 및 아래쪽 돌기 (20) 를 뒷판의 위치고정 구멍 (21)(22) 에 각각
넣고 순서 10 의 나사 M4×8(흑)(16) 2 개로 고정합니다 .
16
17
18
22
21
16
20
A
19
Содержание UTAX AK 730
Страница 5: ...This page is intentionally left blank ...
Страница 11: ...This page is intentionally left blank ...
Страница 15: ...3NB 3ND 3N0 3NK This page is intentionally left blank ...
Страница 25: ...3NB 3ND 3N0 3NK 1 1 10 This page is intentionally left blank ...
Страница 43: ...3NB 3ND 3N0 3NK 1 2 18 3 Remove tape and pad Figure 1 2 23 Tape Pad ...
Страница 45: ...3NB 3ND 3N0 3NK 1 2 20 This page is intentionally left blank ...
Страница 81: ...3NB 3ND 3N0 3NK 1 3 36 This page is intentionally left blank ...
Страница 157: ...3NB 3ND 3N0 3NK 1 4 76 This page is intentionally left blank ...
Страница 169: ...3NB 3ND 3N0 3NK 1 5 12 This page is intentionally left blank ...
Страница 206: ...3NB 3ND 3N0 3NK 2 2 11 This page is intentionally left blank ...
Страница 246: ...1 1 INSTALLATION GUIDE INSTALLATION GUIDE FOR 4000 SHEETS FINISHER ...
Страница 269: ...INSTALLATION GUIDE FOR FINISHER ATTACHMENT KIT MFP A ...
Страница 283: ...INSTALLATION GUIDE FOR FINISHER ATTACHMENT KIT MFP B ...
Страница 284: ...E F A H G I J B D C ...
Страница 291: ...INSTALLATION GUIDE FOR FINISHER ATTACHMENT KIT PRINTER ...
Страница 295: ...INSTALLATION GUIDE FOR CENTER FOLDING UNIT ...
Страница 312: ...INSTALLATION GUIDE FOR MULTI TRAY ...
Страница 326: ...INSTALLATION GUIDE FOR MULTI TRAY ATTACHMENT KIT PRINTER ...
Страница 330: ...INSTALLATION GUIDE FOR PUNCH UNIT ...


