5
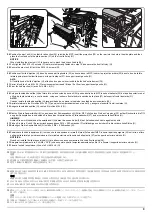
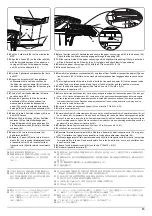
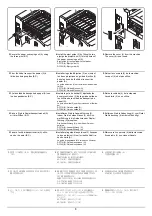
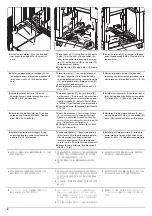
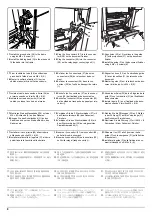
10.
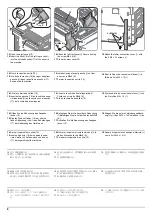
Insert the two projections(12) on the left front
stay(E) into the holes(13) of the left cover in
the machine.Secure the left front stay(E)
using the two screws M4×14(L) and the
screw(1) removed in step 1.
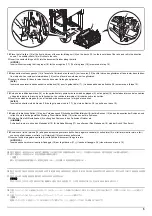
11.
Attach the front cover(G) to the left cover(F).
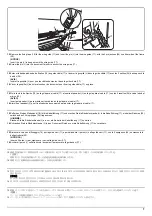
12.
Remove the interface cover (14).
* After installing the document finisher, re-
attach the interface cover (14).
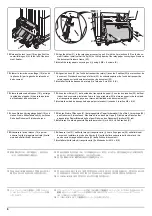
13.
Install the left cover(F) using the two screws
M4x8(K) .
10.
Introduire les deux ergots (12) du support
avant gauche (E) dans les trous (13) du
capot gauche de la machine.Fixer le support
avant gauche (E) à l'aide des deux vis
M4×14 (L) et de la vis (1) retirée à l'étape 1
11.
Installer le capot avant (G) sur le capot
gauche (F).
12.
Déposer le Capot d'interface (14).
* Après avoir installé le retoucheur de docu-
ment, reposer le Capot d'interface (14).
13.
Installer le capot gauche (F) à l'aide des
deux vis M4x8 (K).
10.
Inserte las dos proyecciones (12) de la
estancia izquierda frontal (E) en los orificios
(13) de la cubierta izquierda de la máquina.
Fije la estancia frontal izquierda (E) con los
dos tornillos M4×14 (L) con el tornillo (1) que
quitó en el paso 1.
11.
Conecte la cubierta frontal (G) a la cubierta
izquierda (F).
12.
Quite la cubierta de la interfaz (14).
* Después de instalar el finalizador de docu-
mentos, vuelva a colocar la cubierta de la
interfaz (14).
13.
Instale la cubierta izquierda (F) con los dos
tornillos M4x8 (K).
10.
Setzen Sie die beiden Nasen (12) des linken
vorderen Anschlags (E) in die Öffnungen
(13) der linken Abdeckung ins Gerät ein.Bef-
estigen Sie den linken vorderen Anschlag
(E). Benutzen Sie die zwei Schrauben
M4×14 (L) und die Schraube (1) aus Schritt
1.
11.
Befestigen Sie die vordere Abdeckung (G)
an der linken Abdeckung (F).
12.
Entfernen Sie die Schnittstellenabdeckung
(14).
* Bringen Sie nach der Installation des Doku-
ment-Finishers wieder die Schnittstellenab-
deckung (14) an.
13.
Installieren Sie die linke Abdeckung (F) mit
den beiden Schrauben M4x8 (K).
10.
Inserire le due sporgenze (12) del tirante
frontale sinistro (E) nei fori (13) del coper-
chio sinistro sulla macchina.Fissare il tirante
frontale sinistro (E) con le due viti M4×14 (L)
e la vite (1) rimossa al punto 1.
11.
Montare il coperchio frontale (G) sul coper-
chio sinistro (F).
12.
Rimuovere il coperchio interfaccia (14).
* Dopo l'installazione della finitrice di docu-
menti, fissare di nuovo il coperchio interfac-
cia (14).
13.
Installare il coperchio sinistro (F) utilizzando
le due viti M4x8 (K).
10.
左前ステー(E) の 2 箇所の突起 (12) を機械
本体の左カバーの穴 (13) に入れる。
ビス
M4×14(L) 2 本と手順 1 で外したビス (1)1
本で左前ステー(E) を固定する。
11.
左カバー(F) に前カバー(G) を取り付ける。
12.
インターフェイスカバー(14) を取り外す。
※ インターフェイスカバー(14) はドキュメ
ントフィニッシャー設置後に、元通り取り付
ける。
13.
ビス M4×8(K)2 本で左カバー(F) を取り付
ける。
10.
把左前部支架(E) 的 2 处突起部(12)插入机
器本体的左盖板的孔(13)中。使用 2 颗螺丝
M4×14(L) 和步骤 1 中取下的 1 颗螺丝(1)
来固定左前部支架(E)。
11.
把前盖板(G) 安装到左盖板(F) 上。
12.
拆下接口盖板 (14)。
※ 在装订器设置完成后,按原样安装接口盖
板 (14)。
13.
使用 2 颗螺丝 M4×8(K) 来安装左盖板(F)。
10.
좌측 전면 받침대 (E) 의 두 돌기 (12) 를 본
체의 좌측 커버의 구멍 (13) 에 산입합니다 .
나사 M4 × 14 (L) 2 개와 순서 1 에서 제거한
나사 (1) 를 사용하여 좌측 전면 받침대 (E)
를 고정합니다 .
11.
전면 커버 (G) 를 좌측 커버 (F) 에 부착합니
다 .
12.
인터페이스 커버 (14) 를 제거합니다 .
※ 인터페이스 커버 (14) 는 문서 피니셔 설
치 후에 원래대로 장착합니다 .
13.
나사 M4x8 (K) 2 개를 사용하여 좌측 커버
(F) 를 장착합니다 .
E
1
L(M4×14)
12
13
F
G
F
14
K (M4x8)
Содержание UTAX AK 730
Страница 5: ...This page is intentionally left blank ...
Страница 11: ...This page is intentionally left blank ...
Страница 15: ...3NB 3ND 3N0 3NK This page is intentionally left blank ...
Страница 25: ...3NB 3ND 3N0 3NK 1 1 10 This page is intentionally left blank ...
Страница 43: ...3NB 3ND 3N0 3NK 1 2 18 3 Remove tape and pad Figure 1 2 23 Tape Pad ...
Страница 45: ...3NB 3ND 3N0 3NK 1 2 20 This page is intentionally left blank ...
Страница 81: ...3NB 3ND 3N0 3NK 1 3 36 This page is intentionally left blank ...
Страница 157: ...3NB 3ND 3N0 3NK 1 4 76 This page is intentionally left blank ...
Страница 169: ...3NB 3ND 3N0 3NK 1 5 12 This page is intentionally left blank ...
Страница 206: ...3NB 3ND 3N0 3NK 2 2 11 This page is intentionally left blank ...
Страница 246: ...1 1 INSTALLATION GUIDE INSTALLATION GUIDE FOR 4000 SHEETS FINISHER ...
Страница 269: ...INSTALLATION GUIDE FOR FINISHER ATTACHMENT KIT MFP A ...
Страница 283: ...INSTALLATION GUIDE FOR FINISHER ATTACHMENT KIT MFP B ...
Страница 284: ...E F A H G I J B D C ...
Страница 291: ...INSTALLATION GUIDE FOR FINISHER ATTACHMENT KIT PRINTER ...
Страница 295: ...INSTALLATION GUIDE FOR CENTER FOLDING UNIT ...
Страница 312: ...INSTALLATION GUIDE FOR MULTI TRAY ...
Страница 326: ...INSTALLATION GUIDE FOR MULTI TRAY ATTACHMENT KIT PRINTER ...
Страница 330: ...INSTALLATION GUIDE FOR PUNCH UNIT ...

