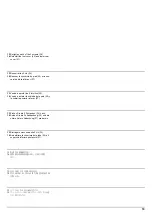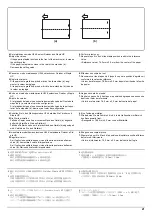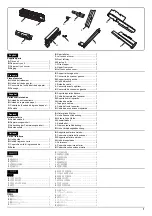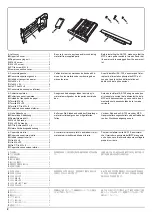
11
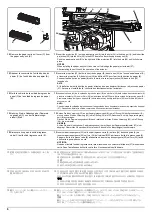
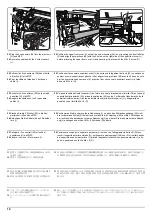
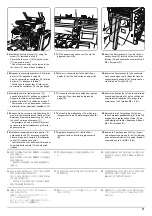
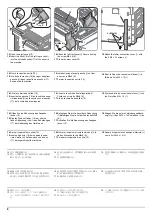
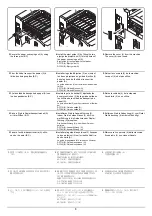
26.
Install the front right cover (14) using the
screw (12) removed in step 8.
Secure the fan cover (10) using the screw
(11) removed in step 7.
* Check that connector on the inside of the
fan cover (10) has not been dislodged.
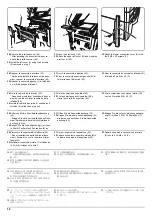
27.
Fit the paper entry unit cover (C) onto the
paper entry unit (B).
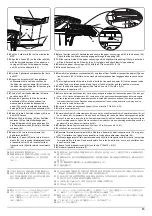
28.
Insert the 2 projections (41) on the left con-
nection cover (K) into the holes in the front
left stay (G) and secure the cover with the 2
M4 × 8 screws (O).
26.
Reposer le couvercle avant droit (14) à l'aide
de la vis (12) déposée à l'étape 8.
Fixer le couvercle du ventilateur (10) à l'aide
de la vis (11) déposée à l'étape 7.
* Vérifier que le connecteur à l'intérieur du
couvercle du ventilateur (10) n'a pas bougé.
27.
Monter le couvercle de l'unité d'entrée du
papier (C) sur l'unité d'entrée du papier (B).
28.
Insérer les 2 projections (41) du couvercle
de connexion gauche (K) dans les trous du
support avant gauche (G) et fixer le couver-
cle à l'aide de 2 vis M4 × 8 (O).
26.
Instale la cubierta frontal derecha (14)
usando el tornillo (12) quitado en el paso 8.
Asegure la cubierta del ventilador (10)
usando el tornillo (11) quitado en el paso 7.
* Compruebe si no se desplazó el conector
del interior de la cubierta del ventilador (10).
27.
Coloque la cubierta de la unidad de ingreso
de papel (C) en la unidad de ingreso de
papel (B).
28.
Inserte los 2 salientes (41) de la cubierta de
conexiones izquierda (K) en los orificios del
soporte frontal izquierdo (G) y asegure la
cubierta con los 2 tornillos M4 × 8 (O).
26.
Bringen Sie die vordere rechte Abdeckung (14)
mit der in Schritt 8 entfernten Schraube (12) an.
Befestigen Sie die Lüfterabdeckung (10) mit der
in Schritt 7 entfernten Schraube (11).
* Vergewissern Sie sich, dass der Stecker auf
der Innenseite der Lüfterabdeckung (10) nicht
abgetrennt wurde.
27.
Setzen Sie die Abdeckung (C) der Papiere-
inzugseinheit in die Papiereinzugseinheit (B)
ein.
28.
Setzen Sie die 2 Vorsprünge (41) an der
linken Verbindungsabdeckung (K) in die Öff-
nungen der vorderen linken Stütze (G) ein
und befestigen Sie die Abdeckung mit den 2
M4 × 8 Schrauben (O).
26.
Installare il coperchio anteriore destro (14)
utilizzando la vite (12) rimossa nel punto 8.
Fissare il coperchio ventola (10) utilizzando
la vite (11) rimossa nel punto 7.
* Controllare che il connettore sull'interno del
coperchio della ventola (10) non sia stato
rimosso.
27.
Applicare il coperchio (C) dell'unità di
ingresso carta, sull'unità di ingresso carta
(B).
28.
Inserire le 2 parti sporgenti (41) sul coper-
chio connessione sinistro (K) nei fori del sup-
porto anteriore sinistro (G) e quindi fissare il
coperchio con le 2 viti M4 × 8 (O).
26.
手順 8 で外したビス (12)1 本で右前カバー
(14) を取り付ける。
手順 7 で外したビス (11)1 本でファンカ
バー(10) を固定する。
※ ファンカバー(10) 内側にあるコネクター
が外れていないことを確認する。
27.
搬入ユニットカバー(C) を搬入ユニット (B)
に取り付ける。
28.
連結左カバー(K) の突起 (41)2 箇所を左前
ステー(G) の穴に入れ、ビス M4×8(O)2 本で
固定する。
26.
使用在步骤 8 中卸下的 1 颗螺丝 (12) 来固定
右前盖板 (14)。
使用在步骤 7 中卸下的 1 颗螺丝 (11) 来固定
风扇盖板 (10)。
※ 确认位于风扇盖板 (10) 内侧的接插件有
无露出。
27.
将进纸单元盖板 (C) 安装在进纸单元 (B)
上。
28.
连接左盖板 (K) 的 2 处突出部 (41) 插入左前
部支架 (G) 的孔中,使用 2 颗 M4×8 螺丝 (O)
来固定。
26.
순서 8 에서 제거한 나사 (12) 1 개로 오른쪽
전면커버 (14) 를 부착합니다 .
순서 7 에서 제거한 나사 (11) 1 개로 팬커버
(10) 를 고정합니다 .
※ 팬커버 (10) 안쪽에 있는 커넥터가 빠져
있지 않은지를 확인합니다 .
27.
반입 유니트 커버 (C) 를 반입 유니트 (B) 에
부착합니다 .
28.
연결 좌측커버 (K) 의 돌기 (41) 2 곳을 좌측
앞 받침대 (G) 의 구멍에 넣고 나사
M4×8(O) 2 개로 고정합니다 .
14
12
10
11
B
C
K
O
O
41
G
Содержание UTAX AK 730
Страница 5: ...This page is intentionally left blank ...
Страница 11: ...This page is intentionally left blank ...
Страница 15: ...3NB 3ND 3N0 3NK This page is intentionally left blank ...
Страница 25: ...3NB 3ND 3N0 3NK 1 1 10 This page is intentionally left blank ...
Страница 43: ...3NB 3ND 3N0 3NK 1 2 18 3 Remove tape and pad Figure 1 2 23 Tape Pad ...
Страница 45: ...3NB 3ND 3N0 3NK 1 2 20 This page is intentionally left blank ...
Страница 81: ...3NB 3ND 3N0 3NK 1 3 36 This page is intentionally left blank ...
Страница 157: ...3NB 3ND 3N0 3NK 1 4 76 This page is intentionally left blank ...
Страница 169: ...3NB 3ND 3N0 3NK 1 5 12 This page is intentionally left blank ...
Страница 206: ...3NB 3ND 3N0 3NK 2 2 11 This page is intentionally left blank ...
Страница 246: ...1 1 INSTALLATION GUIDE INSTALLATION GUIDE FOR 4000 SHEETS FINISHER ...
Страница 269: ...INSTALLATION GUIDE FOR FINISHER ATTACHMENT KIT MFP A ...
Страница 283: ...INSTALLATION GUIDE FOR FINISHER ATTACHMENT KIT MFP B ...
Страница 284: ...E F A H G I J B D C ...
Страница 291: ...INSTALLATION GUIDE FOR FINISHER ATTACHMENT KIT PRINTER ...
Страница 295: ...INSTALLATION GUIDE FOR CENTER FOLDING UNIT ...
Страница 312: ...INSTALLATION GUIDE FOR MULTI TRAY ...
Страница 326: ...INSTALLATION GUIDE FOR MULTI TRAY ATTACHMENT KIT PRINTER ...
Страница 330: ...INSTALLATION GUIDE FOR PUNCH UNIT ...

