4
ArbConnection
Generating Waveforms Using the Equation Editor
4-45
Notice on the left top and on the right top there are two triangles
pointing to the center of the screen. These are the anchors. The
anchors are used as the start and end pointers where your
waveform will be created. For example, if you want to create a sine
waveform between point 100 and point 500, you place the left
anchor at point 100 and the right at point 500 and then generate the
sine from the built-in library.
There are two ways to control anchor placements.
1) Click and hold your mouse cursor on the left anchor triangle and
then drag the curtain to the left position. Do the same for the
right anchor. Notice the X and Y coordinates at the top of the
waveform screen and how they change to correspond to your
anchor placement.
2) You can also place your anchors in a more precise manner from
the waveform library by programming the start and end points
for the waveform. An example of anchor placement using the
sine dialog box is shown in Figure 4-33.
Finally, when you are done creating and editing your waveform, you
can save your work to a directory of your choice. The name at the
title will show you the name you selected for storing your waveform
and its path.
Generating
Waveforms Using
the Equation
Editor
One of the most powerful feature within ArbConnection and
probably the feature that will be used most is the Equation Editor.
The Equation Editor let you write equations the same way as you
would do on a blank piece of paper. The equations are then
translated to sequential points that form waveforms and are
displayed on the waveform screen. The Equation Editor will detect
and inform you on syntax errors and, with its self adjusting feature,
will automatically adjust your parameters so that none of the points
on your waveform will exceed the maximum scale limits.
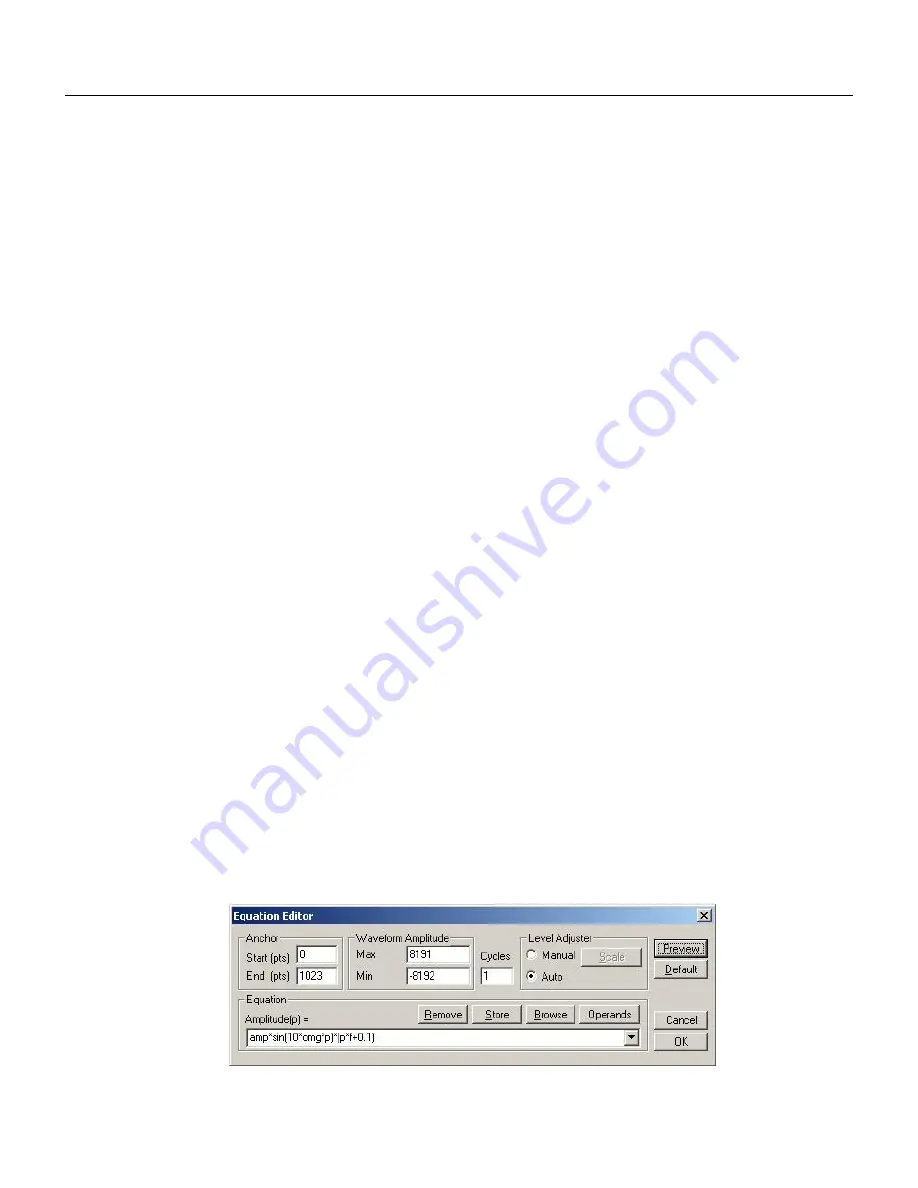
When you invoke the Equation Editor, the dialog box, as shown in
Figure 4-36 will display. Use the following paragraphs to learn how
to use this dialog box and how to write your equations.
Figure
4-36, the Equation Editor Dialog Box
Содержание 5064
Страница 26: ...1 5 Figure 1 2 ArbConnection The Control Panels Figure 1 3 ArbConnection The Wave Composer...
Страница 71: ...2074 User Manual 2 18 This page intentionally left blank...
Страница 145: ...2074 User Manual 3 74 Figure 3 48 Reading the 2074 Internal Temperature...
Страница 207: ...2074 User Manual 4 62 Figure 4 47 Complete Pulse Train Design Figure 4 48 Section 5 of the Pulse Train Design...
Страница 220: ...4 ArbConnection Logging SCPI Commands 4 75 Figure 4 58 Log File Example...
Страница 221: ...2074 User Manual 4 76 This page was intentionally left blank...
Страница 333: ...2074 User Manual 7 2...
Страница 358: ...7 Adjustments and Firmware Update Updating 2074 Firmware 7 27 Figure 7 9 Firmware Update Completed...
Страница 359: ...2074 User Manual 7 28 This page was intentionally left blank...
Страница 360: ...Appendices Appendix Title Page A Specifications A 1 1...
Страница 361: ...2074 User Manual 2...


