PN-L803C/80TC3 INSTALLATION, ADJUSTMENT, SETTING, OPERATION 2 - 40
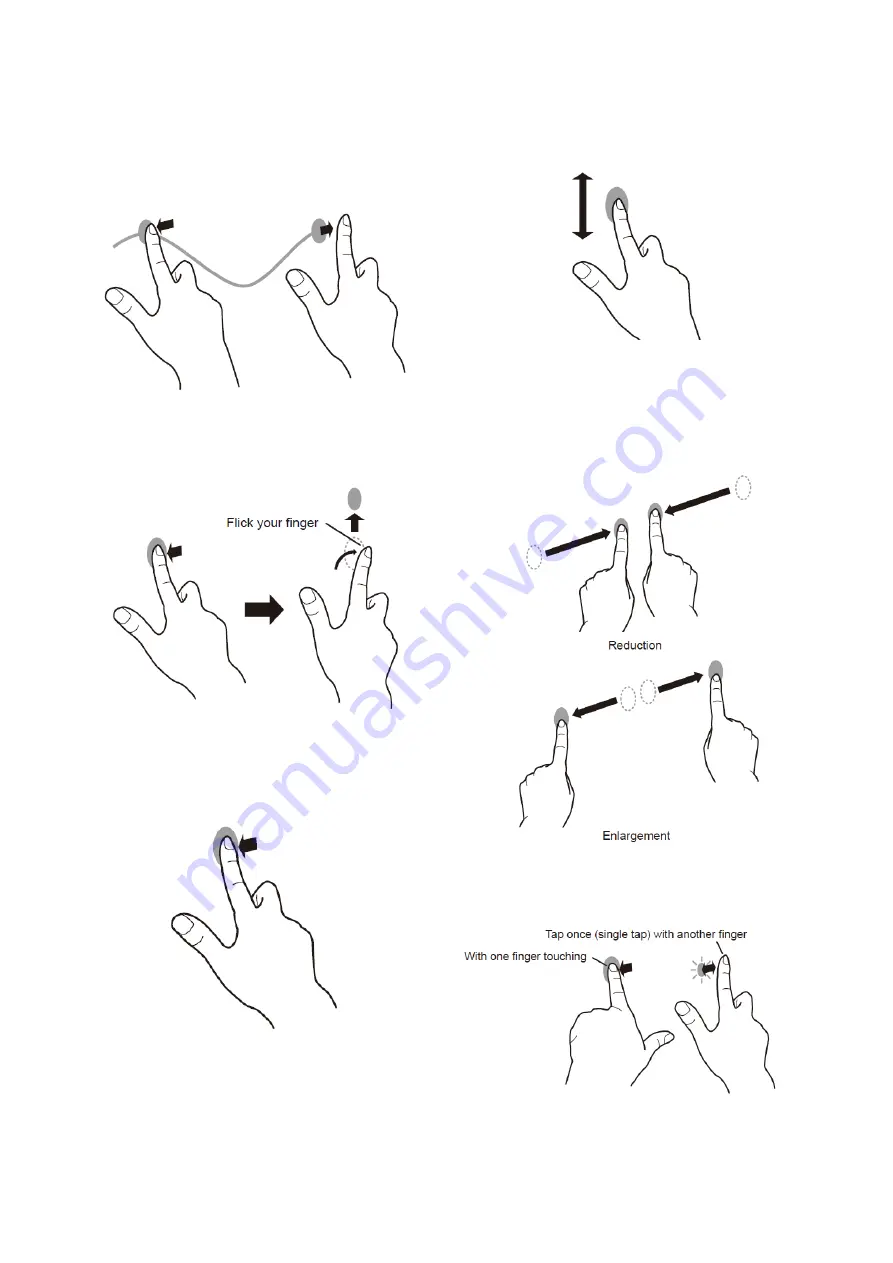
Drag-and-drop
Same action as drag-and-drop with a mouse.
Touch the screen with your finger/touch pen and move without
lifting. When you have finished the movement, lift your finger/
touch pen.
Flicks
Flick your finger/touch pen in the direction of the function you want
to use.
Press-and-hold
Same action as right-clicking a mouse.
Press briefly with your finger/touch pen, and then lift your
finger/touch pen from the screen.
Slide to pan
With your finger/touch pen touching the screen, move it up and
down to scroll the screen.
■
Finger actions
Zoom
Use in a screen that is capable of enlargement/reduction.
Touch the screen with two fingers and move your fingers closer
together to reduce the view, or apart to enlarge the view.
Press-and-tap
Same action as right-clicking a mouse.
With one finger touching the screen, tap once (single tap) with
another finger.
Содержание PN-80TC3
Страница 150: ...PN L803C 80TC3 DISASSEMBLY AND ASSEMBLY 6 6 3 Remove the four screws M3x6 SW W Then remove LED Power Supply PWB ...
Страница 183: ...PN L803C 80TC3 TROUBLESHOOTING 7 10 FUSE POSITION MAIN PWB F2200 F2300 F2102 F2302 F2101 ...
Страница 184: ...PN L803C 80TC3 TROUBLESHOOTING 7 11 5V POWER SUPPLY PWB F2100 F2100 ...
Страница 191: ...PN L803C 80TC3 HARDWARE DESCRIPTIONS 8 7 3 BLOCK DIAGRAM Block diagram ...
Страница 202: ...PN L803C 80TC3 HARDWARE DESCRIPTIONS 8 18 5 PARTS LAYOUT Main PWB TOP ...
Страница 203: ...PN L803C 80TC3 HARDWARE DESCRIPTIONS 8 19 BOTTOM ...
Страница 204: ...PN L803C 80TC3 HARDWARE DESCRIPTIONS 8 20 LED Power Supply PWB TOP ...
Страница 205: ...PN L803C 80TC3 HARDWARE DESCRIPTIONS 8 21 BOTTOM ...
Страница 206: ...PN L803C 80TC3 HARDWARE DESCRIPTIONS 8 22 Key PWB TOP BOTTOM ...
Страница 208: ...PN L803C 80TC3 HARDWARE DESCRIPTIONS 8 24 5V Power Supply PWB connector Upper pin 5V Output Lower pin GND ...


