5-126
►
INTERNET FAX RECEPTION FUNCTIONS
3
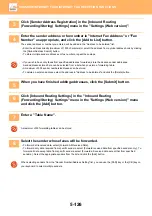
Click [Sender Address Registration] in the [Inbound Routing
(Forwarding/Storing) Settings] menu in the "Settings (Web version)".
4
Enter the sender address or fax number in "Internet Fax Address" or "Fax
Number" as appropriate, and click the [Add to List] button.
The sender address or number you entered will be added to the "Address to be Entered" list.
• Enter the address directly (maximum of 1500 characters) or select the address from a global address book by clicking
the [Global Address Search] button.
• To store multiple sender addresses or fax numbers, repeat these steps.
• If you wish to have only faxes from specified addresses forwarded, store the desired sender addresses.
Send addresses stored here can be selected from a list when you store a forwarding table.
• A maximum of 500 sender numbers/addresses can be stored.
• To delete an entered address, select the address in "Address to be Entered" and click the [Delete] button.
5
When you have finished adding addresses, click the [Submit] button.
6
Click [Inbound Routing Settings] in the "Inbound Routing
(Forwarding/Storing) Settings" menu in the "Settings (Web version)" menu
and click the [Add] button.
7
Enter a "Table Name".
A maximum of 50 forwarding tables can be stored.
8
Select the sender whose faxes will be forwarded.
• To forward all received data, select [Forward All Received Data].
• To forward only data received from specific senders, select [Forward received data from specified senders only.]. To
forward all data except data from specific senders, select [Forward all received data except that from specified
senders.]. Select the appropriate senders from the list and click the [Add] button.
When selecting senders from the "Sender Number/Address Setting" list, you can use the [Shift] key or the [Ctrl] key on
your keyboard to select multiple senders.

