64
⑤
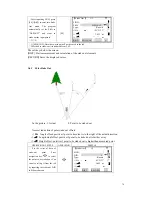
The screen returns to
Setting Meas menu. Settings
that are made will display “*”
in the front.
[*]F1 Setting Job (1)
[*]F2 Setting Station (2)
[ ] F3 Set Orientation (3)
F4 Start (4)
【
Setting Meas
】
3.5 SET ORIENTATION
With the orientaion, HZ-direction can be input manually or points with known coodinates can
be set.
5.3.1 .1 Manually Input
PROCEDURE: 1. Press [F1] to input a random HZ-orientation.
2. Input HZ-direction, reflector height and PtID.
3. Press [All] to start measurement and set orientation.
4. Press [RECORD] to records HZ-direction and set orientaion.
OPERATIONAL STEPS
PROCEDURE
DISPLAY
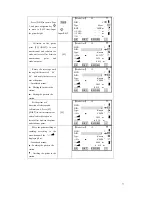
①
Press [F3] in Setting
Meas menu to set the
orientation.
[F3]
【
Setting Meas
】
[*]F1 Setting Job (1)
[*] F2 Setting Station (2)
[ ] F3 Set Orientation (3)
F4 Start (4)
②
Press [F1] to enter into
Set Manually function.
[F1]
【
Orientation
】
F1 Set manually
F2 Known Point
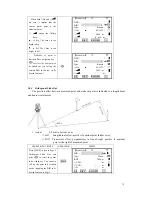
③
After Collimating on the
backsight point, input a
radom AZ value, reflector
height and PtID. After
inputting one item, press
[ENT].
Input horizontal
azimuth value
+
[ENT]
【
Set manually
】
BsPt: 2
R.HT: 1.500 m
AZ: 9°11
′
25
″
Sight BsPt Meas & Rec !
All SET EDM OSET
④
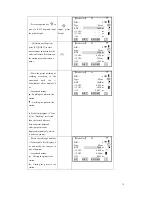
Press [F1] ([All]) to start
measurement and set
orientation.
[SET]
:
Set orientation
without acticating the
measurement function.
[0SET]
:
Set AZ to zero.
[F1]
【
Set Manually
】
BsPt: 2
R.HT: 1.500m
AZ: 9°11
′
25
″
Sight BsPt Meas & Rec !
All SET EDM OSET
Содержание STS-750
Страница 6: ...6...


