TOPEX Bytton (HSPA+ / LTE)
ByttonLTE(full)_genericUsermanual_sw306FAS_revN.1.docx
Page: 81 / 290
Note 3
:
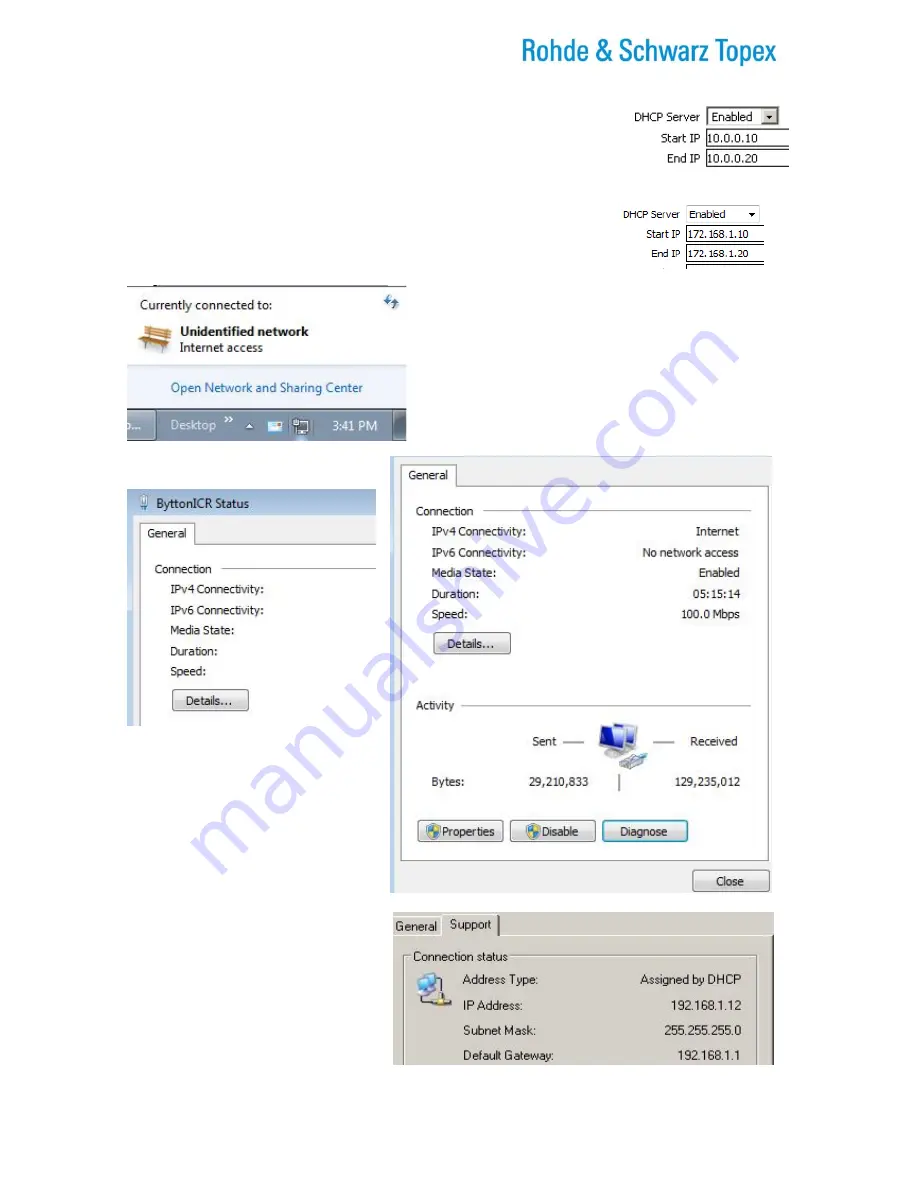
Of course, the DHCP setting must be correlated with the IP address of
Rohde & Schwarz Topex S.A. Bytton LTE. For instance, if the requirements of
your network compel you to use an IP such as 10.0.0.1, instead of the default
IP address “192.168.1.1.”, the DHCP server must be also set for the same
range of IP addresses, respectively from 10.0.0.xxx where xxx is from 10 up to
20:
Alternately, when the primary IP of the Bytton LTE box has been set to
172,168.1.1, instead of the default IP address “192.168.1.1.”, the DHCP
server must be also set for the same range of IP addresses,
172.168.1.yyy, where yyy may be from 10 up to 20 or a wider range:
To check the correct assignment of IP address, double
click the icon corresponding to the Bytton LTE network
connection on the desktop of your computer.
Click the link “Open Network and Sharing Center:
Figure 5-25: Open Network and Sharing Center to verify
the assignment of IP addresses.
The Status window for the network
connection will appear, as shown.
Fist, Click on the tab “
General
” to see
general information (status, Internet
access,
connection
duration,
connection speed) about the respective
network connection “Bytton_LTE ”:
Figure 5-26: The General tab of the
connection to Bytton LTE shows its
current state.
The “Support” or ”Details” window tells
you that the IP address has been
“Assigned by DHCP” and is in this
example
192.168.1.12
(inside
the
range 10-20 that you have specified).
You can also verify that the default
gateway is 192.168.1.1 (the Bytton LTE
device) and the Subnet Mask is
255.255.255.0.
Figure 5-27: The Details tab of the connection to Bytton LTE shows its IP address.
Forward to


