• When you fasten fabric to the table with tape, stick the tape to the sides of the table so that the tape
extends towards the back of the table. If you wrap the tape onto the bottom of the multi tray, you
may not be able to set the multi-tray correctly on the cassette stand.
1.
Press the [Power] key.
Remove the cassette after turning the power on. If the cassette is mistakenly removed before turning
the power on, turn the power off once, and then turn the power on again.
2.
Check that the cassette stand comes to the front.
If the cassette stand does not come to the front, press the [Tray] key and move the cassette to the
front.
3.
Lift the cassette slightly, pull it to the front to remove it.
4.
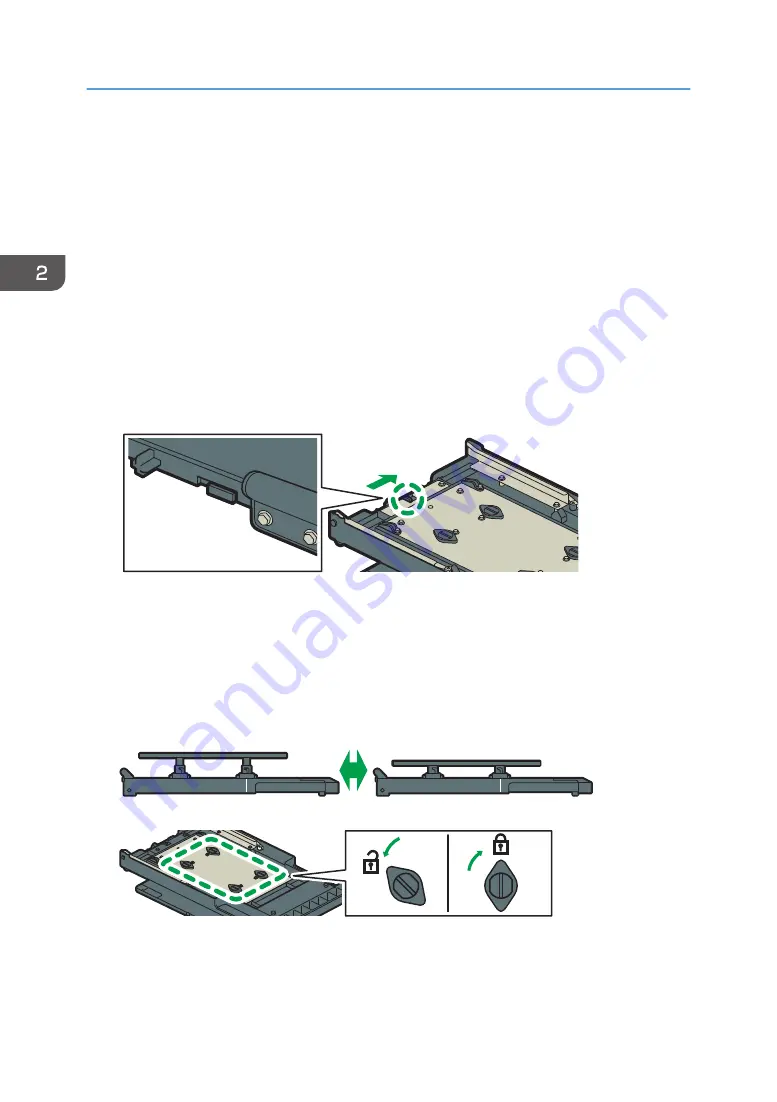
Move the detection lever located on the underside of the multi tray in the direction shown
in the figure.
DSA349
5.
Adjust the height of the multi tray table.
Turn the 4 knobs counterclockwise on the underside of the multi tray to release the lock, and then
adjust the height of the table. After adjusting it, turn the 4 knobs clockwise to lock it in position.
When loading a thin fabric (up to 16 mm (0.6 inches) in thickness), adjust to the top.
When loading a thick fabric (from 16 to 32 mm (from 0.6 to 1.3 inches) in thickness), adjust to the
bottom.
DSA350
DSA353
6.
Load the fabric on the table, tuck the protruding parts under the table, then fix the fabric
with tape, etc.
The image will be printed in the direction from the front side to the back side of the cassette.
2. Preparing for Printing
76
Содержание Ri 100
Страница 2: ......
Страница 16: ...14 ...
Страница 28: ...1 About This Product 26 ...
Страница 39: ...6 Close the right front cover DSA161 Installing the Ink Cartridges 37 ...
Страница 82: ...2 Preparing for Printing 80 ...
Страница 93: ...3 Click Print DSB022 Configuring the Layout Settings 91 ...
Страница 104: ...3 Printing on T shirts 102 ...
Страница 110: ...4 Printing via the Printer Driver 108 ...
Страница 145: ...6 Press the Enter key 7 Press the Escape key Using the System Menu 143 ...
Страница 170: ...6 Monitoring and Configuring the Machine 168 ...
Страница 182: ...7 Using the Machine with a Macintosh 180 ...
Страница 202: ...8 Maintenance 200 ...
Страница 240: ...9 Troubleshooting 238 ...
Страница 249: ...Where to Inquire For inquiries contact your sales or service representative Where to Inquire 247 ...
Страница 254: ...10 Appendix 252 ...
Страница 257: ...MEMO 255 ...
Страница 258: ...MEMO 256 EN GB EN US EN AU J088 6622B ...
Страница 259: ......
Страница 260: ...EN GB EN US EN AU J088 6622B 2017 Ricoh Co Ltd ...


