


5. E-axis assembly
Original Prusa i3 MK3S+ kit assembly
83
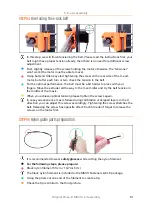
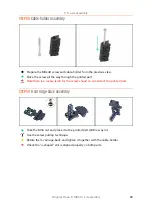
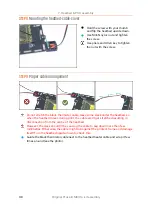
STEP 58
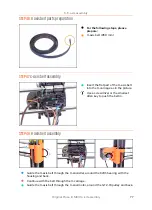
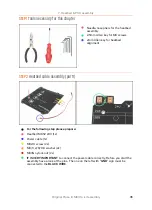
Cable-holder assembly
Prepare the M3x40 screw and cable-holder from the previous step.
Drive the screw all the way through the printed part.
Note there is a recess (slot) for the screw's head on one side of the printed part.
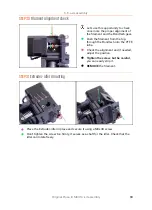
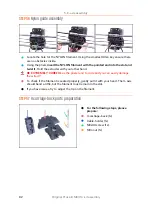
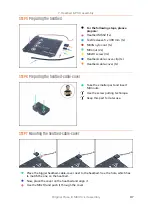
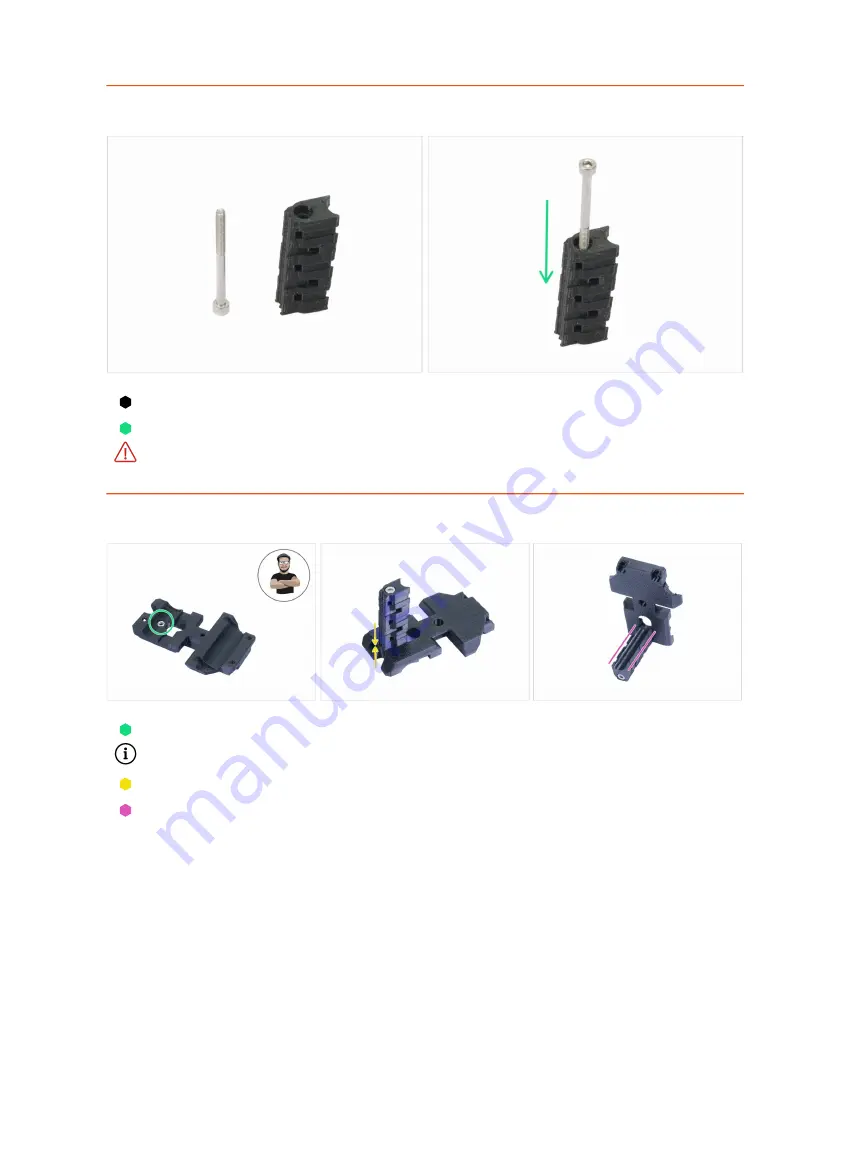
STEP 59
X-carriage-back assembly
Take the M3n nut and place it in the printed part (all the way in).
Use the screw pulling technique.
Rotate the X-carriage-back and tighten it together with the cable-holder.
Check the "u-shaped" slot is aligned properly on both parts.
Содержание i3 MK3S+
Страница 6: ...6 ...
Страница 7: ...Original Prusa i3 MK3S kit assembly 7 1 Introduction ...
Страница 15: ...Original Prusa i3 MK3S kit assembly 15 2 Y axis assembly ...
Страница 36: ...36 Original Prusa i3 MK3S kit assembly 3 X axis assembly ...
Страница 44: ...44 Original Prusa i3 MK3S kit assembly 4 Z axis assembly ...
Страница 51: ...Original Prusa i3 MK3S kit assembly 51 5 E axis assembly ...
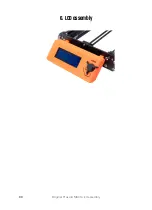
Страница 88: ...88 Original Prusa i3 MK3S kit assembly 6 LCD assembly ...
Страница 94: ...94 Original Prusa i3 MK3S kit assembly 7 Heatbed PSU assembly ...
Страница 108: ...108 Original Prusa i3 MK3S kit assembly 8 Electronics assembly ...
Страница 132: ...132 Original Prusa i3 MK3S kit assembly 9 Preflight check ...
Страница 137: ...137 Notes ...
Страница 138: ...138 ...
Страница 139: ...139 Notes ...
Страница 140: ...140 ...
Страница 141: ...141 Notes ...
Страница 142: ...142 ...
Страница 143: ...143 Notes ...
Страница 144: ...144 ...