

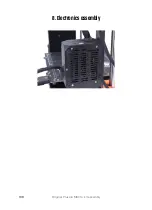


8. Electronics assembly
118
Original Prusa i3 MK3S+ kit assembly
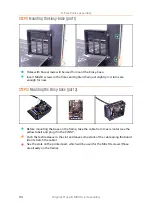
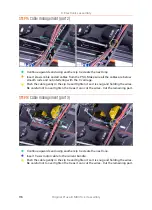
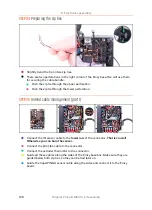
STEP 19
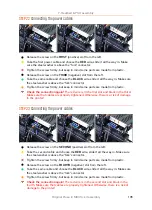
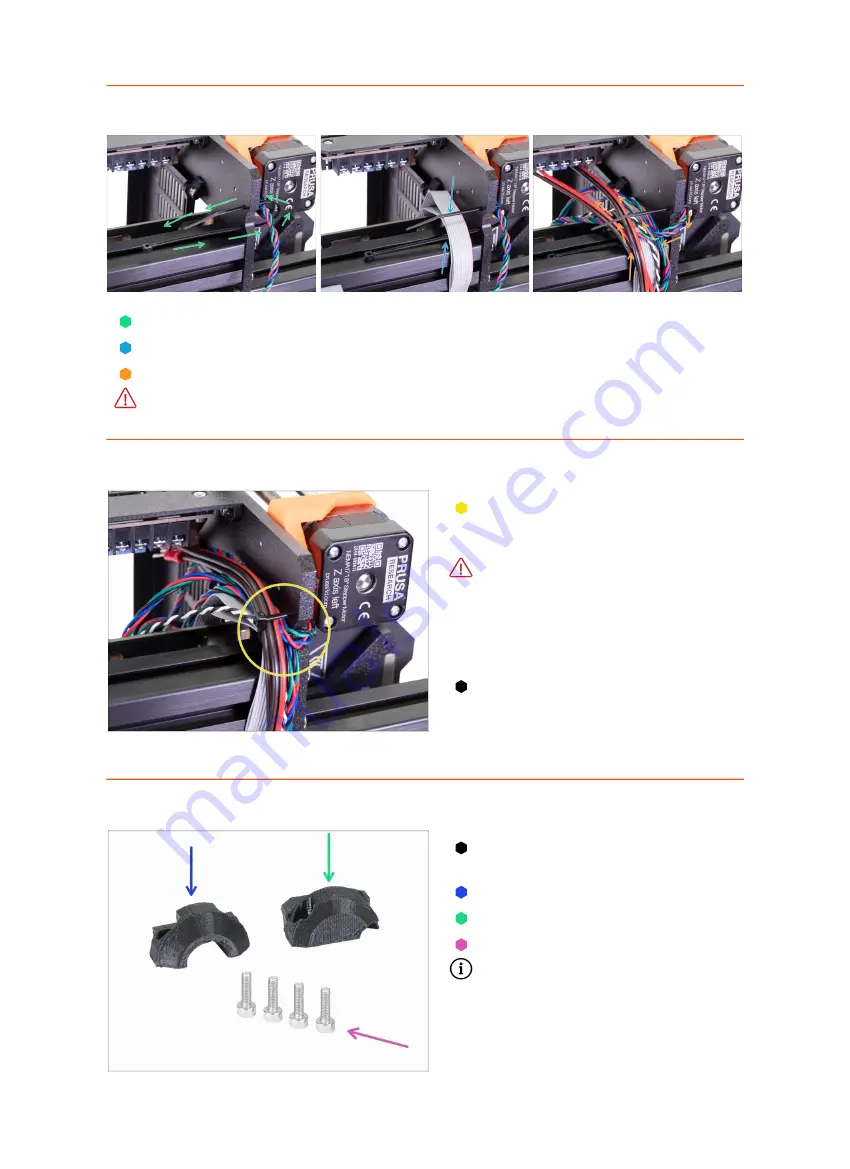
Cable management (part 6)
Slide the zip tie through the circular holes in the frame to create a loop.
This time place the LCD cables carefully in the zip tie.
Insert the Z-axis left motor cable and all cables from the bundle.
Don't tighten the zip tie! Wait for the next step.
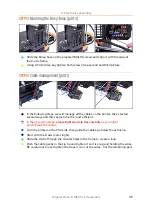
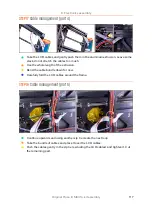
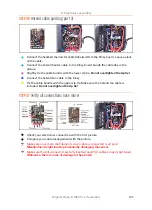
STEP 20
Cable management (part 7)
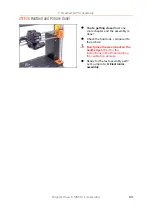
Push the cables gently in the zip tie,
before you tighten the zip tie, read
the next point.
This time be very careful!
Tighten
the zip tie slightly or you will
damage the LCD cables! The zip tie
should be snug to hold the wires in
place. Over tightening it can cut the
wires!
That's it! Cables are organised, let's
connect them to the EINSY board.
Now you can turn the printer back
on its feet.
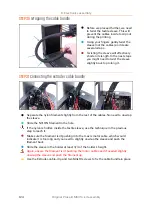
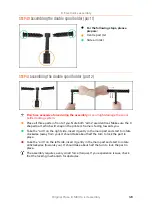
STEP 21
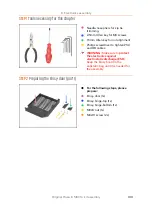
Connecting cable bundles
For the following steps, please
prepare:
Extruder-cable-clip (1x)
Heatbed-cable-clip (1x)
M3x10 screw (4x)
Note the difference between both
clips.
Содержание i3 MK3S+
Страница 6: ...6 ...
Страница 7: ...Original Prusa i3 MK3S kit assembly 7 1 Introduction ...
Страница 15: ...Original Prusa i3 MK3S kit assembly 15 2 Y axis assembly ...
Страница 36: ...36 Original Prusa i3 MK3S kit assembly 3 X axis assembly ...
Страница 44: ...44 Original Prusa i3 MK3S kit assembly 4 Z axis assembly ...
Страница 51: ...Original Prusa i3 MK3S kit assembly 51 5 E axis assembly ...
Страница 88: ...88 Original Prusa i3 MK3S kit assembly 6 LCD assembly ...
Страница 94: ...94 Original Prusa i3 MK3S kit assembly 7 Heatbed PSU assembly ...
Страница 108: ...108 Original Prusa i3 MK3S kit assembly 8 Electronics assembly ...
Страница 132: ...132 Original Prusa i3 MK3S kit assembly 9 Preflight check ...
Страница 137: ...137 Notes ...
Страница 138: ...138 ...
Страница 139: ...139 Notes ...
Страница 140: ...140 ...
Страница 141: ...141 Notes ...
Страница 142: ...142 ...
Страница 143: ...143 Notes ...
Страница 144: ...144 ...