


8. Electronics assembly
Original Prusa i3 MK3S+ kit assembly
129
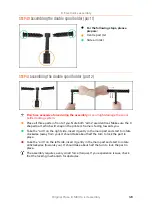
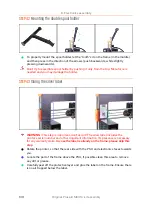
STEP 40
Assembling the double spool holder (part 1)
For the following steps, please
prepare:
Centre part (1x)
Side arm (2x)
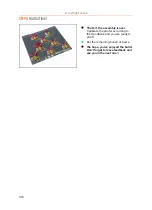
STEP 41
Assembling the double spool holder (part 2)
Don't use excessive force during the assembly
, or you might damage the spool
holder locking system.
Place all three parts in front of you. Note both "arms" are identical. Make sure the C
shaped part, which will snap on the printer's frame is facing towards you.
Take the "arm" on the right side, insert it gently in the main part and start to rotate
clockwise (away from you). It should take about half the turn to lock the part in
place.
Take the "arm" on the left side, insert it gently in the main part and start to rotate
anticlockwise (towards you). It should take about half the turn to lock the part in
place.
The assembly requires a very small force (torque). If you experience issues, check
first the locking mechanism for obstacles.
Содержание i3 MK3S+
Страница 6: ...6 ...
Страница 7: ...Original Prusa i3 MK3S kit assembly 7 1 Introduction ...
Страница 15: ...Original Prusa i3 MK3S kit assembly 15 2 Y axis assembly ...
Страница 36: ...36 Original Prusa i3 MK3S kit assembly 3 X axis assembly ...
Страница 44: ...44 Original Prusa i3 MK3S kit assembly 4 Z axis assembly ...
Страница 51: ...Original Prusa i3 MK3S kit assembly 51 5 E axis assembly ...
Страница 88: ...88 Original Prusa i3 MK3S kit assembly 6 LCD assembly ...
Страница 94: ...94 Original Prusa i3 MK3S kit assembly 7 Heatbed PSU assembly ...
Страница 108: ...108 Original Prusa i3 MK3S kit assembly 8 Electronics assembly ...
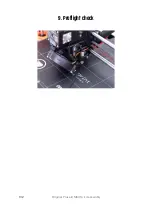
Страница 132: ...132 Original Prusa i3 MK3S kit assembly 9 Preflight check ...
Страница 137: ...137 Notes ...
Страница 138: ...138 ...
Страница 139: ...139 Notes ...
Страница 140: ...140 ...
Страница 141: ...141 Notes ...
Страница 142: ...142 ...
Страница 143: ...143 Notes ...
Страница 144: ...144 ...