


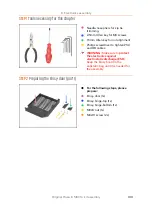


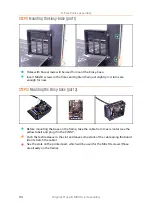


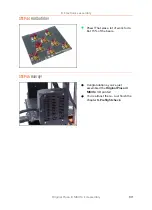

8. Electronics assembly
116
Original Prusa i3 MK3S+ kit assembly
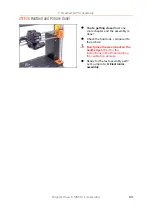
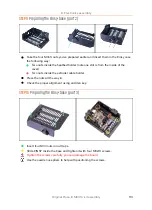
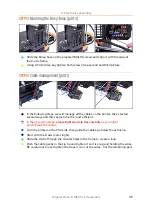
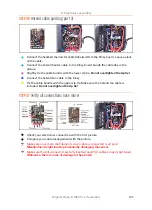
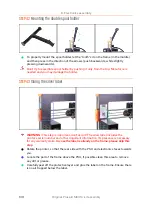
STEP 15
Cable management (part 2)
Continue upwards and using another zip tie create the next loop.
Insert Z-axis cable and all cables from the PSU. Make sure all the cables are below
smooth rods and not interfering with the Y-carriage.
Push the cable gently in the zip tie and tighten it so it is snug and holding the wires.
Be careful not to over tighten the tie as it can cut the wires . Cut the remaining part.
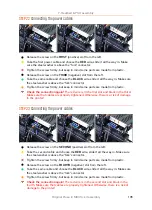
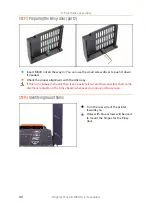
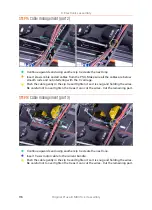
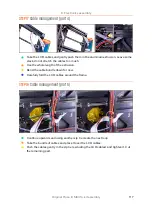
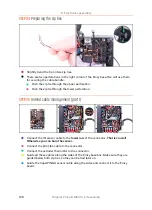
STEP 16
Cable management (part 3)
Continue upwards and using another zip tie create the next loop.
Insert Y-axis motor cable to the current bundle.
Push the cable gently in the zip tie and tighten it so it is snug and holding the wires.
Be careful not to over tighten the tie as it can cut the wires . Cut the remaining part.
Содержание i3 MK3S+
Страница 6: ...6 ...
Страница 7: ...Original Prusa i3 MK3S kit assembly 7 1 Introduction ...
Страница 15: ...Original Prusa i3 MK3S kit assembly 15 2 Y axis assembly ...
Страница 36: ...36 Original Prusa i3 MK3S kit assembly 3 X axis assembly ...
Страница 44: ...44 Original Prusa i3 MK3S kit assembly 4 Z axis assembly ...
Страница 51: ...Original Prusa i3 MK3S kit assembly 51 5 E axis assembly ...
Страница 88: ...88 Original Prusa i3 MK3S kit assembly 6 LCD assembly ...
Страница 94: ...94 Original Prusa i3 MK3S kit assembly 7 Heatbed PSU assembly ...
Страница 108: ...108 Original Prusa i3 MK3S kit assembly 8 Electronics assembly ...
Страница 132: ...132 Original Prusa i3 MK3S kit assembly 9 Preflight check ...
Страница 137: ...137 Notes ...
Страница 138: ...138 ...
Страница 139: ...139 Notes ...
Страница 140: ...140 ...
Страница 141: ...141 Notes ...
Страница 142: ...142 ...
Страница 143: ...143 Notes ...
Страница 144: ...144 ...