

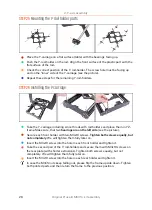


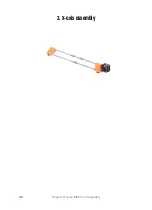


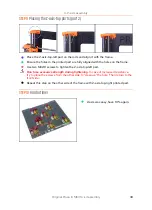

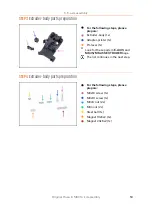


3. X-axis assembly
40
Original Prusa i3 MK3S+ kit assembly
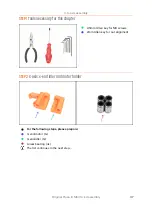
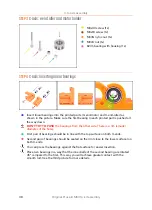
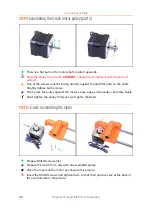
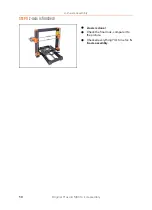
STEP 7
X-axis: smooth rods preassembly
Take remaining smooth rods and compare their length. For X-axis you need longest
rods (370 mm).
Linear bearing (3x)
Permanent marker (1x) not included in the kit
Several paper towels to wipe oil and grease from the bearing surface.
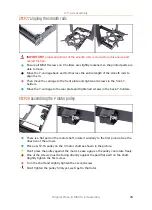
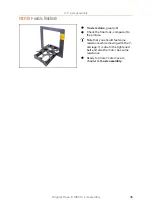
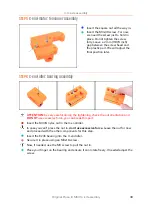
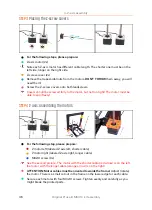
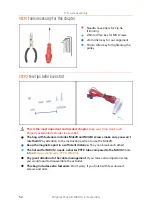
STEP 8
Marking the bearings
Wipe grease from the outer surface
of the bearing with a paper towel.
Position the bearing so that you can
see two rows of balls. Like in the
picture.
Make a mark with a permanent
marker on the outer surface of the
bearing, in the middle above two
rows of balls.
Use the same procedure for the
remaining two bearings.
We will use these markings in the
upcoming chapters to achieve the
desired bearing orientation.
Содержание i3 MK3S+
Страница 6: ...6 ...
Страница 7: ...Original Prusa i3 MK3S kit assembly 7 1 Introduction ...
Страница 15: ...Original Prusa i3 MK3S kit assembly 15 2 Y axis assembly ...
Страница 36: ...36 Original Prusa i3 MK3S kit assembly 3 X axis assembly ...
Страница 44: ...44 Original Prusa i3 MK3S kit assembly 4 Z axis assembly ...
Страница 51: ...Original Prusa i3 MK3S kit assembly 51 5 E axis assembly ...
Страница 88: ...88 Original Prusa i3 MK3S kit assembly 6 LCD assembly ...
Страница 94: ...94 Original Prusa i3 MK3S kit assembly 7 Heatbed PSU assembly ...
Страница 108: ...108 Original Prusa i3 MK3S kit assembly 8 Electronics assembly ...
Страница 132: ...132 Original Prusa i3 MK3S kit assembly 9 Preflight check ...
Страница 137: ...137 Notes ...
Страница 138: ...138 ...
Страница 139: ...139 Notes ...
Страница 140: ...140 ...
Страница 141: ...141 Notes ...
Страница 142: ...142 ...
Страница 143: ...143 Notes ...
Страница 144: ...144 ...