2
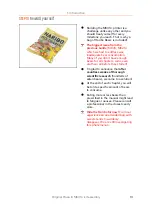
Step 38 - Haribo time!
34
.................................................................................................
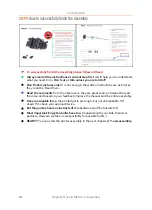
Step 39 - Y-axis is finished!
34
........................................................................................
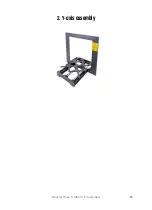
3. X-axis assembly
36
...........................................................................................................
Step 1 - Tools necessary for this chapter
37
.................................................................
Step 2 - X-axis: x-end idler and motor holder
37
.........................................................
Step 3 - X-axis: x-end idler and motor holder
37
.........................................................
Step 4 - X-axis: inserting linear bearings
38
................................................................
Step 5 - X-end-motor: tensioner assembly
38
.............................................................
Step 6 - X-end-idler: bearing assembly
39
...................................................................
Step 7 - X-axis: smooth rods preassembly
39
..............................................................
Step 8 - Marking the bearings
40
...................................................................................
Step 9 - X-axis: assembly
40
...........................................................................................
Step 10 - Assembling the X-axis motor pulley (part 1)
41
...........................................
Step 11 - Assembling the X-axis motor pulley (part 2)
41
...........................................
Step 12 - X-axis: assembling the motor
42
...................................................................
Step 13 - Haribo time!
42
..................................................................................................
Step 14 - X-axis is finished!
43
........................................................................................
4. Z-axis assembly
44
............................................................................................................
Step 1 - Tools necessary for this chapter
45
.................................................................
Step 2 - Z-axis: assembling motor holders
45
..............................................................
Step 3 - Placing the Z-screw covers
45
.........................................................................
Step 4 - Z-axis: assembling the motors
46
...................................................................
Step 5 - X-axis: trapezoidal nuts (part 1)
46
..................................................................
Step 6 - X-axis: trapezoidal nuts (part 2)
47
.................................................................
Step 7 - Assembling the X-axis and smooth rods
47
..................................................
Step 8 - Placing the Z-axis-top parts (part 1)
48
..........................................................
Step 9 - Placing the Z-axis-top parts (part 2)
48
.........................................................
Step 10 - Haribo time!
49
..................................................................................................
Step 11 - Z-axis is finished!
49
.........................................................................................
5. E-axis assembly
51
............................................................................................................
Step 1 - Tools necessary for this chapter
52
.................................................................
Step 2 - Few tips before we start
52
..............................................................................
Step 3 - Extruder-body parts preparation
52
................................................................
Step 4 - Extruder-body parts preparation
53
................................................................
Step 5 - Extruder-body assembly
53
..............................................................................
Step 6 - FS-lever assembly
54
........................................................................................
Step 7 - Steel ball assembly
55
.......................................................................................
Step 8 - Extruder motor parts preparation
56
..............................................................
Step 9 - Bondtech gear assembly
57
.............................................................................
Step 10 - Bondtech gear alignment
58
..........................................................................
Step 11 - Extruder-cover part preparation
58
................................................................
Step 12 - Hotend parts preparation
59
...........................................................................
Step 13 - Hotend assembly
59
.........................................................................................
Step 14 - Extruder assembly
60
......................................................................................
Step 15 - X-carriage parts preparation
60
.....................................................................
Step 16 - X-carriage assembly
61
....................................................................................
Step 17 - Assembling the IR-sensor cable
61
................................................................
Step 18 - Assembling the X-carriage
62
........................................................................
Step 19 - Assembling the X-carriage
62
........................................................................
Step 20 - IR-sensor parts preparation
63
......................................................................
Step 21 - IR-sensor assembly
64
.....................................................................................
Step 22 - IR-sensor assembly
64
....................................................................................
Step 23 - Hotend fan parts preparation
65
...................................................................
Step 24 - Hotend fan cable adjustment
65
...................................................................
Содержание i3 MK3S+
Страница 6: ...6 ...
Страница 7: ...Original Prusa i3 MK3S kit assembly 7 1 Introduction ...
Страница 15: ...Original Prusa i3 MK3S kit assembly 15 2 Y axis assembly ...
Страница 36: ...36 Original Prusa i3 MK3S kit assembly 3 X axis assembly ...
Страница 44: ...44 Original Prusa i3 MK3S kit assembly 4 Z axis assembly ...
Страница 51: ...Original Prusa i3 MK3S kit assembly 51 5 E axis assembly ...
Страница 88: ...88 Original Prusa i3 MK3S kit assembly 6 LCD assembly ...
Страница 94: ...94 Original Prusa i3 MK3S kit assembly 7 Heatbed PSU assembly ...
Страница 108: ...108 Original Prusa i3 MK3S kit assembly 8 Electronics assembly ...
Страница 132: ...132 Original Prusa i3 MK3S kit assembly 9 Preflight check ...
Страница 137: ...137 Notes ...
Страница 138: ...138 ...
Страница 139: ...139 Notes ...
Страница 140: ...140 ...
Страница 141: ...141 Notes ...
Страница 142: ...142 ...
Страница 143: ...143 Notes ...
Страница 144: ...144 ...


