5. E-axis assembly
Original Prusa i3 MK3S+ kit assembly
61
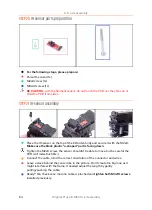
STEP 15
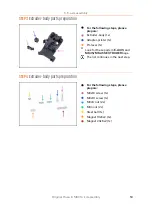
X-carriage parts preparation
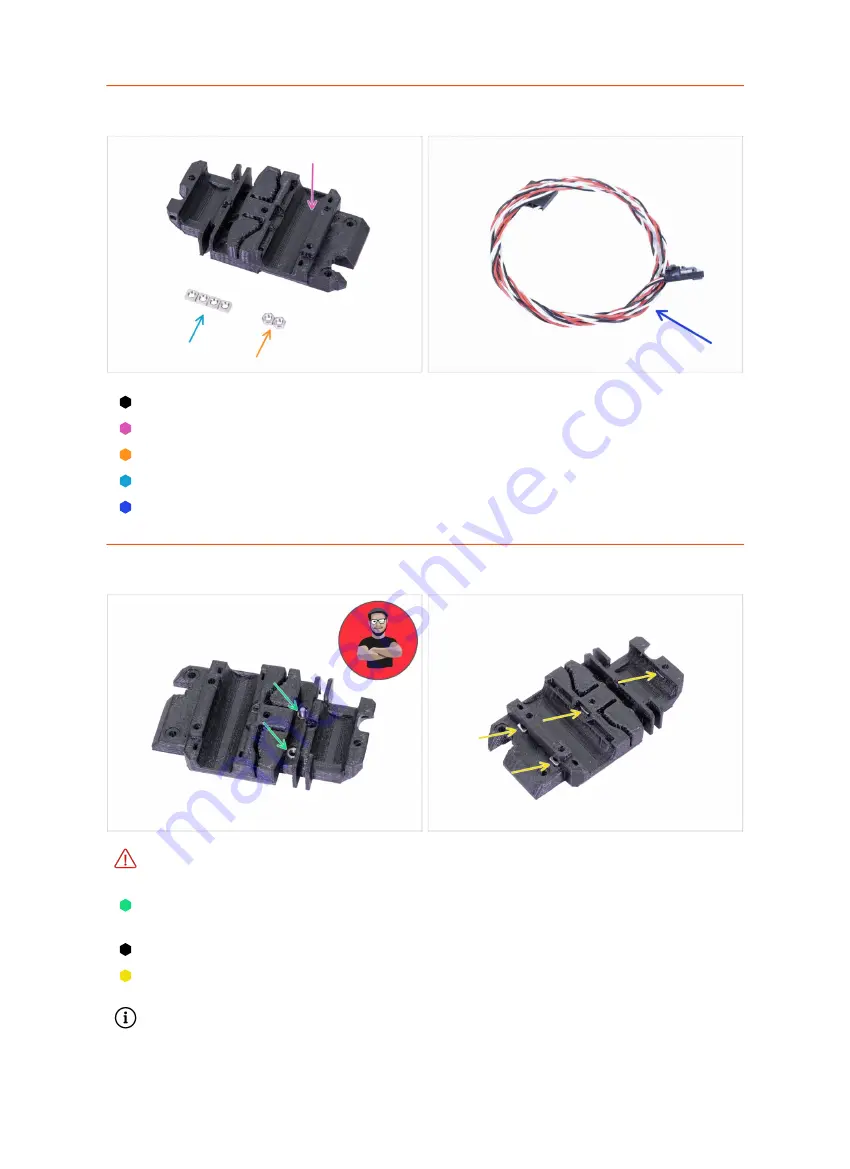
For the following steps, please prepare:
X-carriage (1x)
M3n nut (2x)
M3nS nut (4x)
IR-sensor cable (1x)
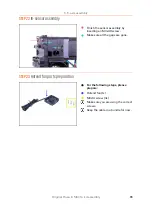
STEP 16
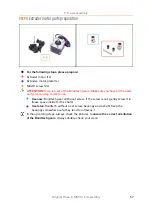
X-carriage assembly
For the following nut insertion
USE A SCREW. THAT'S AN ORDER!!!
Seriously,
use a screw to pull the nuts in, both have to be properly seated in the X-carriage.
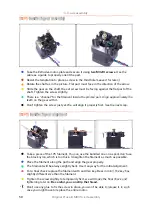
Take both M3n nuts and using pliers (or screw) push them in the X-carriage, then
using a screw from the other side, pull them all the way in.
Don't forget to remove the screw.
Take all four M3nS nuts and insert them in. Ensure correct alignment using the
Allen key.
From now on, keep in mind the nuts are inside, avoid rotating the X-carriage
"downwards", or the nuts might fall out.
Содержание i3 MK3S+
Страница 6: ...6 ...
Страница 7: ...Original Prusa i3 MK3S kit assembly 7 1 Introduction ...
Страница 15: ...Original Prusa i3 MK3S kit assembly 15 2 Y axis assembly ...
Страница 36: ...36 Original Prusa i3 MK3S kit assembly 3 X axis assembly ...
Страница 44: ...44 Original Prusa i3 MK3S kit assembly 4 Z axis assembly ...
Страница 51: ...Original Prusa i3 MK3S kit assembly 51 5 E axis assembly ...
Страница 88: ...88 Original Prusa i3 MK3S kit assembly 6 LCD assembly ...
Страница 94: ...94 Original Prusa i3 MK3S kit assembly 7 Heatbed PSU assembly ...
Страница 108: ...108 Original Prusa i3 MK3S kit assembly 8 Electronics assembly ...
Страница 132: ...132 Original Prusa i3 MK3S kit assembly 9 Preflight check ...
Страница 137: ...137 Notes ...
Страница 138: ...138 ...
Страница 139: ...139 Notes ...
Страница 140: ...140 ...
Страница 141: ...141 Notes ...
Страница 142: ...142 ...
Страница 143: ...143 Notes ...
Страница 144: ...144 ...


